Genius Bathroom Cleaning Hacks

Shannon Quinn - September 3, 2019
Share

The bathroom is one of the most important rooms of the house. It’s where we get clean in the shower, relieve ourselves, do our hair, and put on our makeup. It is a vital part of our every-day-life, and yet so many of us dread cleaning it. Sure, it’s stinky and gross, but it is probably the most important space that needs to be kept sanitized and clean. The good news is that there are tips and tricks to make the process a lot easier. Here are some great hacks to keeping your bathroom sparkling clean.

Creating a cleaning list can help you stay organized. Photo Credit: lovemelovemypic/Shutterstock

50. Make a Cleaning Checklist Before You Start

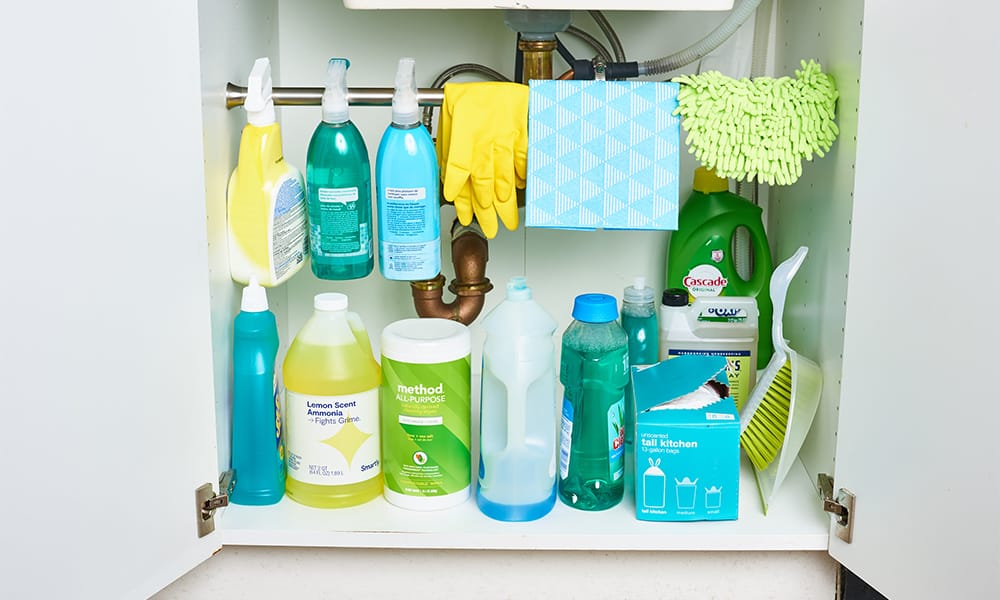
The bathroom is one of the smallest rooms in the house, so in theory, it should be easy to do. But if this is your first time doing a deep clean top-to-bottom, you still might be at a loss as to where to start. It may be a good idea to start with a checklist. Once you have the list in front of you, it becomes easier to imagine a game plan. Some people keep all of their cleaning supplies in the bathroom, so it’s easy to grab. But you may not be so lucky, and need to store everything elsewhere. Once you have the list ready, you can carry in all of the necessary cleaning supplies in one trip without having to walk back and forth throughout the house.

If you have a cleaning plan, you can do it the most efficient way possible. Credit: Shutterstock

While you are creating your checklist, make a plan to clean the room that makes sense. For example, leave the floors until last, because they will be slippery. In the beginning, you may need that checklist to remind yourself about the order of operations. And maybe it’s wrong, and you figured out something better. That’s okay. This is all a learning process, and you’re going to figure it out. Once you have a good rhythm going, you’ll have it memorized. For example, in my house, we remove everything from the floors, clean the sink, tub, and toilet. Then we mop the floor. While the floor is drying, we take the hamper to the laundry and get the towels clean. Meanwhile, the floor is air drying. By the time we’re done cleaning other parts of the house, the floor is dry, and it’s time to put everything back into the bathroom.

Poo-Pourri may be expensive, but you can make your own DIY version. Photo Credit: Daily Advent

49. Make Your Own Number 2 Toilet Spray

There’s nothing more embarrassing than going “number 2” knowing that friends and family might use the bathroom right after you. Aerosol spray doesn’t always work to hide the stink. In fact, it often makes things worse. This is why a company called Poo-pourri created a spray that goes in the toilet before you go. The product completely stops any bad smells from escaping. Unfortunately, Poo-pourri can cost as much as $10 per bottle! It’s a brilliant hack, but it’s just expensive. Wouldn’t it be great if you could make your own? Well…You can!

You can make your own toilet spray at home. Credit: Shutterstock

A blogger called One Essential Community came up with a recipe for a DIY number 2 spray. All you need is three ingredients; witch hazel, vegetable glycerin, and essential oils. Mix it together in a spray bottle, and voila! You have homemade toilet spray. Alternately, you can visit your local Dollar Tree and find bottles from a knock-off-brand that essentially do the same thing for just $1 per bottle. I have personally used this cheaper brand, and it works just as well as the original. The great thing about buying the $1 bottles is that it is affordable to put a bottle in every bathroom of the house, plus keep a bottle in your purse for traveling.

If you have guests over your house, you may want to create a set of bathroom rules. Credit: Shutterstock

48. Create a Sign For Your Bathroom Rules

Nowadays, it’s more important than ever to be sure your home is kept clean from bacteria and viruses. The only trouble is that if you live with a lot of roommates or host guests, you can’t reasonably clean up after every single person. This is why you should consider creating a set of bathroom rules about cleaning door knobs, handles, and washing hands. Type up your sanitation rules, laminate, and tack the paper to your wall so that everyone can see. Not only will his help keep viruses at bay, but it also means less cleaning for you.

This sign shows you all of the do’s and dont’s of protecting yourself from the virus. Credit: Shutterstock
A bag full of vinegar over the shower head is all you need to clean it. Credit: CNET

47. White Vinegar Shower-Head Trick

Shower heads can have hard water build-up, and it may also get mold growing in it over time. It is very difficult to get inside of the shower head, and giving it a quick wipe will not clean the build-up that may be blocking the water from coming out. A simple solution to this is to get a plastic bag and fill it with white distilled vinegar. Use a rubber band or hair tie to close the bag tightly, and allow it to sit on the shower head for at least 20 minutes.

Vinegar is acidic, so it will break down any of the gunk on your shower head. Credit: Shutterstock

The high acidic content of the vinegar will help to break down any stubborn residue. Remove the bag, and pour the vinegar down the drain. Don’t worry, this won’t hurt your drain at all. If anything, this will actually help a little bit to unclog it. Use the shower head immediately after to check of it’s working. If not, attempt cleaning it again. The next time you turn on the shower, any blockage should be cleared.

Give your guests plenty of sanitation options in your bathroom. Photo Credit: North Carolina Health News

46. Leave Out Wipes and Hand Sanitizer

Most of the time, people want to help keep the bathroom clean, but they don’t have the tools at their disposal. This is why it’s probably a good idea to create a wipe and hand sanitizer station somewhere in your bathroom. These products were in high demand a few months ago, but many stores have finally begun to restock. If you leave these products out for your family and friends to use, they’re also more likely to clean off objects like their cell phone, which can be a huge carrier of bacteria.

Some people like to use hand sanitizer after washing their hands in the bathroom. Credit: Shutterstock

In my house, we have a large hand sanitizer pump in both bathrooms, disinfectant aerosol spray, multiple soap options. We also have an air purifier, which we turn on when we have guests over. As the smallest room in the house, your breath doesn’t have a lot of room to escape. So we want our air to be pure and clean at all times. And we want everyone to have access to a place to refill their sanitizer bottles for free. The more you have available in the bathroom, the less you have to worry that you’re truly clean when you come indoors.

Some UV sanitizers are large enough for several objects, while others are small and portable. Photo Credit: Pixel-Shot/Shutterstock

45. Create a UV Phone Sanitation Station

A surprising number of people take their phone into the bathroom with them so they can check their texts while they sit on the toilet. Unfortunately, this is highly unsanitary. Not only were you carrying the cellphone out into the world with you, but now it’s covered in microscopic fecal particles that were inside of the bathroom. Thankfully, you can buy UV sanitizer boxes online, and set one up on your bathroom shelf. These only take 8 minutes to sanitize your objects with a UV light. For some people, it’s the perfect amount of time to get everything done in the bathroom, wash their hands, and remove a newly clean cellphone.

A more affordable option would be to purchase a UV light wand to sanitize your objects. Credit: Shutterstock

Recently, even Dollar Tree started carrying UV wands. While I have purchased some for my home, it’s difficult to trust if these are actually doing anything to help protect your home from viruses. Personally, I don’t think that a UV light should totally replace good old-fashioned cleaning. However, there are many people who swear by this as a chemical-free alternative to sanitizing things, especially if they have objects they are giving their children.

Alka-Seltzer is available in most grocery stores and pharmacies. Credit: Shutterstock

44. Use Alka-Seltzer to Unclog the Drain

After a while, hair and other gunk gets caught up in your drain. No one wants to deal with that! It’s probably one of the most disgusting jobs you can possibly do. One amazing hack to avoiding dealing with it is to remove the drain cover, and plop four tablets of alka-seltzer in the drain. Next, pour one cup of vinegar down the drain. This will fizz and break up and debris. Then, pour boiling hot water down the pipes, and wait. The tablet and water will loosen up anything that was clogging the drain, and it should work normally again.

If you experience heartburn, you may already have a box of alka-seltzer at home. Credit: Shutterstock

Just keep in mind that if there is a major blockage, you still may need to call in a plumber to fix the issue. A hack like this may fix a mild problem, but you never know what kind of mysteries are hiding inside of your pipes.

Sometimes, all you need is a little cooking spray to get rid of that pesky soap scum. Photo Credit: SutidaS/Shutterstock

43. Remove Soap Scum With Cooking Spray

It turns out that your bottle of PAM may be good for more than just frying eggs in the morning. As strange as it sounds, using non-stick cooking spray will help to remove soap scum! If you happen to have a spray bottle in your kitchen, grab it and begin to spray around the problem area. Wait 5 to 10 minutes in order for the spray oil to do its magic. Just don’t leave it on for any longer than 10 minutes, because it will get goopy, and that makes it difficult to remove. Then, rinse it with cold water.

Non-stick cooking spray, like PAM, helps to remove soap scum that just won’t quit. Credit: Shutterstock
Make sure you use the lemonade mix. Photo Credit: Q985 Online

42. In a Pinch, Use Kool-Aid For Toilet Cleaner

For most parents, Kool-Aid is a sugary drink that their kids love to drink in the summer time. But did you know that it can be used for so much more than drinking? If you have a packet of lemonade Kool-Aid (Or any other lemonade mix), pour that into the toilet and allow it to sit for 5 minutes. The citric acid that is in the lemon mix will help to break down and tough stains and residue that may be difficult to get out of your toilet. Then, take your toilet brush and give it a good scrub.

The citric acid in the lemon flavored kool-aid helps to clean the toilet. Credit: Shutterstock

Technically, you don’t need the kool-aid to get this done. If you have plain out lemons, this will work perfectly fine, as well. The whole point is to get the citric acid in there. Just cut them up and squeeze the juice into the toilet. If you have a different brand of lemonade mix around the house, this should work too. Just put a tablespoon of the mixture into the toilet.

A Swiffer can be used for so much more than floors. Photo Credit: lev radin/Shutterstock

41. Use a Swiffer to Clean the Walls

Have trouble figuring out how to clean your walls? You may be afraid of using a cleaning spray, for fear of ruining the paint. And if you have high ceilings, you might not be able to reach the tops of your walls, anyway. The perfect solution to the issue is to use Swiffer dusters. You can buy the mop stick and attach both dry and wet attachments. If you are just dusting your wall, we recommend using the dry attachment.

At Target, they practically have an entire aisle of Swiffer products. Credit: Shutterstock

Buying Swiffer products can be expensive. The best option for saving money is to use coupons from the Sunday morning newspaper, and purchase a starter kit. Once you have the broom kit, it’s very affordable to buy off-brand refills. The cheapest places I have found them in stock is over at Dollar Tree. They fit the standard Swiffer mops. However, they’re usually in smaller packs, so you don’t have the option to buy in bulk like you would with the original brand.

Instead of putting your toilet brush into a wet container, let it drip-dry. Credit: ThriftyFun.com

40. Hack to Dry Your Toilet Brush

After cleaning your toilet, you may have noticed that you put it away, the gross dirty water just sits in the holder. After a while, this can begin to smell, and you will suddenly find yourself dreading the toilet brush completely. In case no one has ever told you, this should not be happening! A hack to drying your toilet brush is to stick it under the lid of the toilet so that it drip-dries. Once it stops dripping, this is when it’s time to put it back in the holder.

Clean and replace your toilet brushes often. Credit: Shutterstock

You should also be regularly buying new toilet brushes. Some people have the same brush for years without ever thinking to replace it. You should be getting a new toilet brush every six months if you are buying them from the dollar store. If you have a more high-end toilet brush, you could try to make it last longer by regularly bleaching it and making sure it stays in good condition.

These Ikea spice shelves make a great organizational unit for a bathroom. Credit: Loving Here

39. Use a Spice Rack for Hair Products

This next tip is a great Ikea Hack. If you are having trouble storing your hair products in the bathroom, you’re not alone. This can also be a huge problem for people, especially if they are renting, and the landlord never bothered to install a vanity with shelving. So, what should you do? Clever people out there on the Internet figured out that you can get Ikea Bekvam Birch spice shelves, and screw them into your wall, and…Voila! Instant product organization. Since these shelves are only $5 each, they are cheap, and it should be affordable to buy several. It’s also easy to paint any color you want.

These shelves are typically used for spices, but they can be used in any room of the house. Credit: Shutterstock

When you go through the process of re-organizing your hair products, check the expiration dates. Not sure how long each one lasts? Do a quick Google search. Like, did you know that hair gel goes bad after 18 months? Try to discard any products that have gone bad, or that you no longer use.

Rubbing alcohol does wonders for cleaning. Photo Credit: tong patong/Shutterstock

38. Clean Your Hair Iron and Curler with Rubbing Alcohol

Hair tools can be really expensive, especially if you buy a high-end product. But for those of us who get the cheaper tools from somewhere like Walmart, you might throw our your curling and straightening irons once they get to look really gross. Over time, hair spray and other products bake onto the heated wands, and it can cause a really gross build-up. Eventually, the tool looks like something out of a horror movie, and you never want to use it again. Instead of throwing it away, just get some rubbing alcohol, and clean off the surface. This should be enough to completely clean and disinfect the hair tool.

After a while, gunk piles up on hair products. Credit: Shutterstock

However, even if you keep your curling and straightening irons clean, there is always a point where you need to say “goodbye”. If the product is rusting, or there is something seriously wrong, don’t be afraid to dispose of it and find a new one. However, don’t try to donate it to the thrift store. This is one of those donations that the thrift store will throw away.

Toothbrushes are great for scrubbing grout. Photo Credit: Andrey_Popov/Shutterstock

37. Clean the Grout With a Toothbrush

In tiled bathrooms and kitchens, you may have some trouble cleaning the grout. The space in-between the tiles are so small, you can’t use a large scrubbing brush to get the job done properly. The secret is to use an old toothbrush. According to the American Dental Association, you should be switching out your toothbrush every three months. Obviously, don’t use the tooth brush you use to brush your teeth!

Put on some gloves, grab a toothbrush, and get to work. Credit: Shutterstock

Cleaning the grout might be a good project to tackle once it is time to switch out your toothbrush for a new one. If you have one of those fancy electric toothbrushes that swaps out the heads, you might want to just go to your nearest Dollar Tree to get a cheap brush, instead. They have recently started selling bamboo toothbrushes, which are biodegradable and better for the environment compared to plastic toothbrushes.

Make sure your towels always have a place to hang dry. Photo Credit: Africa Studio/Shutterstock

36. Keep Your Towels Fresh and Mildew-Free

One of the biggest sources of germs in the bathroom is the towels. Some people reuse their towels over, and over again. While this is good for saving energy from doing too many loads of laundry, it can actually be an issue. Bacteria will grow on those towels after a while. And if something damp is left in the dark, that’s a recipe for mildew.

This heated towel rack helps to keep them dry after going into the shower. Credit: Shutterstock

In order to prevent mildew from growing, make sure you wash your towels at least once every three days. You should own enough of them to have backups, so that there is always a fresh, clean towel on-hand, even when you are doing the laundry.

Lemons help to clean hard water stains. Photo Credit: Pat_Hastings/Shutterstock

35. Use a Lemon for Hard Water Stains

Lemons contain citric acid, which helps to break down tough crime. If you have hard water, it’s likely that it leaves behind stains on your metal surfaces. All you need to do is to cut a lemon in half, and rub it all over the surface that you are trying to clean. Rise, and you’re done!

This faucet has a lot of water stains covering it. Credit: Shutterstock

If you do not have real lemons on-hand, you can use a bottle of lemon juice, or powdered lemonade as an alternative. So long as it contains citric acid, that’s all you really need for this hack to work.

Remember to let the curtain dry, without getting bunched up. Photo Credit: Ana Anderson/Shutterstock

34. Clean or Replace Your Shower Curtain

You should be cleaning or replacing your shower curtain every few months. If you have a fabric curtain with a plastic liner, you should be able to put the fabric in the washing machine, and replace the liner cheaply from the dollar store.

You will need to remove your shower rack from the rings in order to clean it. Credit: Shutterstock

In case you didn’t know, leaving the shower curtain pushed back is often what causes mold to grow in the first place. The dampness is trapped in-between the folds of fabric or plastic. Once the lights are turned off, the mold grows in the darkness. If you want to prevent this from happening, keep the shower curtain closed.

Tea can be used to clean wood in your bathroom. Photo Credit: Africa Studio/Shutterstock

33. Black Tea to Clean Floors and Cabinet Mirrors

Are you stumped as to how to clean your bathroom’s hardwood floors without using some kind of chemical? Plenty of people out there swear by using black tea to get the job done. Just boil some water, brew a few tea bags, and use that tea as a cleaning solution. What’s even better is that the tea smells great. Looking for a chemical-free alternative to windex? Turns out tea can be used for that, too. Just make sure you brew two different batches for your floor and mirrors, so that you don’t get anything dirty unnecessarily.

The great thing about cleaning with tea is that you get to drink tea, too. Credit: Shutterstock

Another obviously plus to cleaning with tea is that you can make yourself a cup, while you’re at it! Remember that the cleaning process doesn’t have to be stressful. In fact, the more relaxing you can make the experience, the less painful it will be.

A lot of people already own baby oil. Photo Credit: 279photo Studio/Shutterstock

32. Use Baby Oil to Clean Metal Faucets

If you have children, you probably have a bottle of baby oil lying around somewhere. This can be used for so much more than giving a back massage. Believe it or not, baby oil can shine and clean metal faucets! You can also use this oil to shine stainless steel around the house.

Use q-tips to get into the nooks and crannies with the baby oil. Credit: Shutterstock

Just make sure to have paper towels on-hand to wipe away any excess when you are done. No one wants a slippery handle when they are trying to take a shower or wash their hands.

Have dryer sheets? Time to use them. Photo Credit: Moms

31. Use a Dryer Sheet to Remove Soap Grime

Believe it or not, you can use your dryer sheets for so much more than making your clothes smell amazing. The chemicals that exist in a dryer sheet can be used for all kinds of amazing cleaning hacks. Since we are talking about the bathroom, one of the things you can do is use a dryer sheet to wipe away soap grime in the shower.

Dryer sheets can help you clean soap scum that accumulates in the bathroom. Credit: Shutterstock

You may want to do this when the shower is still wet, so that the dryer sheet will have some water work with. Just a few minutes later, your shower should be grime-free, and you can throw it away when you’re done.

A plastic over-the-door shoe organizer doubles as a product organizer. Photo Credit: Business Insider

30. Over-The-Door Shoe Organizer to Hold More of Your Products

You may have seen those clear plastic over-the-door shoe organizers before in the past. It’s cheap to buy it online, and they are available in most stores. This is a perfect hack for creating more storage in your bathroom. It is especially helpful for kids who are constantly losing their stuff, too! If your bathroom has a lot of products and almost zero space, one of these organizers might be the solution to your problem. After all, if the back of your door is blank anyway, you might be missing out on some precious space. These organizers are also great for the inside of your pantry doors, the bathroom closet, hallway closet, and so many other places where you can put them out of sight.

Do you have too many products in your bathroom? Credit: Shutterstock

Sometimes, we have so many products, we’re not sure what to do with them. There is always the chance that you could put everything away in your over-the-door rack, and still have products left with nowhere to go. Remember that as human beings, we actually need very few things to keep our skin and body looking great. Go through your items and throw away anything that is expired. Also try to see if you can consolidate two identical products into one bottle. Remember which products worked the best for you, and stick to replacing the best things, rather than experimenting with 10 different new ones.

You can put a magazine rack on the inside of your cabinet. Credit: Pinterest

29. Metal Magazine Holder for Hair Tools and Other Supplies

One of the biggest storage challenges that women face is where to put our hair tools. Some people have a dedicated drawer, while others don’t have the space at all, so they just lay out on the counter. If you are the latter, a great life hack you might want to try is installing metal magazine holders into your bathroom as tool holders. Some people have screwed the magazine holder on the inside of a cabinet door, so that it can be hidden away when the door is closed. Others have drilled them directly into the bathroom door so that they are on-hand at all times.

Some people use these magazine racks to hold wash cloths. Credit: Organization Obsessed

Personally, I have a magazine rack that is meant to be mounted on a wall, and I keep it in my bedroom. Since I share a bathroom with so many people, it wouldn’t be fair for me to mount just my hair accessories in the bathroom. My magazine rack is made of brass, so it looks golden and feminine hanging on my wall. I leave my hair tools hanging next to my jewelry collection and floor-length mirror, because my hair, makeup, and accessories are all the last thing I work on when I get ready in the morning. This works perfectly for me, but you should find a method that works for you.

You can reach into the crack of the toilet using a wipe and a screwdriver. Credit: secureservercdn.net

28. Use a Screwdriver to Reach the Cracks

Are there spots where you can’t reach in your bathroom? One big example of this is the crack in-between the water tank and the seat of the toilet. If you are really desperate to clean under there, you can manage to do it by getting a screwdriver and a wet wipe. What you may find under there my shock and disgust you, so be sure to wear gloves! This same technique can be used all over the house, if you need to wipe hard-to-reach places.

Having a clean toilet is difficult, unless you get into all the nooks and crannies. Credit: Shutterstock

Some people will go as far as to unscrew every piece of their toilet so that they can clean the parts that you normally cannot access. Others make it a habit of replacing the toilet seat once a year, since it only costs around $20 to do so. It’s up to you how far you go in keeping your tush clean.

Clorox bleach is one of the most popular brands, but you can get any one you want. Photo Credit: RD

27. Use Bleach to Clean Your Toilet Brush

Before you put your toilet brush away, remember that it needs to be sanitized. While the brush is over the toilet, slowly pour some bleach over the bristles, and then flush the toilet. Bleach causes a lot of fumes, so you don’t want it to linger for long. Open a window in order to help ventilate your bathroom. As we mentioned in another entry, you can allow your toilet brush to drip-dry under the seat.

Toilet cleaner often contains bleach. Credit: Shutterstock

Most toilet cleaning products contain bleach, so you should be able to pour some of the cleaner onto the brush, as well. However, you can dunk the brush into a solution of water and bleach on its own so that it has a chance to sanitize even longer after its initial use.

Even at a young age, kids can learn to clean up after themselves. Photo Credit: Halfpoint/Shutterstock

26. Teach Your Kids to Clean Up After Themselves

There are a lot of parents out there who never taught their kids how to clean a bathroom. For some people, that idea sounds shocking. This new generation of Millennials say that they have so many problems “adulting”. What’s the issue? Well, they got rid of home economics class, and most parents wanted their kids to focus on their education, rather than household chores. Children should be taught how to clean the bathroom from an early age. They should know how to clean up after themselves whenever they make a mess.

Kids will probably enjoy learning how to clean, because it makes them feel like a grownup. Credit: Shutterstock

This might seem harsh to parents who want to cater to their children, but just remember that it will truly help them grow into responsible adults. It also makes a lot less work for you in the long-run, because they will grow up knowing how difficult it actually is to clean up.

Hanging your clothes on the shower rod helps them to de-wrinkle with steam. Credit: The Krazy Coupon Lady

25. Steam-Iron Your Clothes After a Shower

If you are traveling out of town to an important event, you may suddenly realize that you don’t have an iron, and your shirts are all wrinkled. Oh, no! In a pinch, you can use your shower to steam your clothing. After taking a hot shower, hang your shirt on the shower rod, and close the door. The heat and steam from the room should help the fabric to loosen, and it will look like it has been steam pressed.

Before and after hanging a wrinkled shirt in the shower. Credit: Reddit

Obviously, you can do this while you are taking a shower, so that it doesn’t waste any water. Just remember that the shirt may be moist for a moment after it’s been steamed. You will need to allow it to hang dry on the balcony, or on the heated towel rack.

Water jets in a jacuzzi tub can get clogged sometimes. Photo Credit: Rainer Plendl/Shutterstock

24. Don’t Forget to Clean Your Tub Jets

While it’s rare in most homes, some people have luxurious Jacuzzi tubs in their bathrooms. If you are one of the lucky ones, don’t forget to clean your tub jets. These can get clogged if the water is too hard. If you want to clean your jets, fill your tub with water, and pour in some dishwasher detergent. Then, add a splash of bleach for a deep clean. Let it sit for a bout 15 minutes, and then drain the tub. Rinse it by filling the tub with clean water, and drain again. If you are looking for a natural alternative to bleach, try just using vinegar, instead.

Even if your hot tub is outdoors with a lid, you still need to clean the jets. Credit: Shutterstock

Obviously, if you have an outdoor jacuzzi, the same technique needs to be done. One of the most common places for people to catch an infection is at a community hot tub at a hotel or gym. Just because you put chlorine in the water and a lid on top doesn’t mean that it’s perfectly clean all the time! It may even be necessary to hire a professional to come over to clean it every once in a while.

Combining vinegar and baking soda will cause a chemical reaction. Photo Credit: JPC-PROD/Shutterstock

23. Use White Vinegar and Baking Soda to Clean Grime

If you are trying to use all-natural ingredients to clean your bathroom, there is perhaps no better combination than white vinegar and baking soda. Remember in elementary school science class where you would put the two ingredients together to make a volcano? Well, this will do the same thing. Vinegar is acidic, and when it combines together with baking soda, it will fizz and break apart any grime that may be caked onto a surface. If you plan to clean your entire bathroom, use gloves.

Vinegar and baking soda are a magic combination. Credit: Shutterstock

While this works well in the bathroom, this is a method I use in my kitchen all the time. It’s especially useful if a frying pan has food burned to the bottom. The baking soda and vinegar helps to break up the food that’s stuck to the bottom, and it becomes much easier to scrub. Compared to soap and water alone, the results are like night and day.

Adding an additional shelf above your bathroom door gives you storage in an unexpected place. Credit: Apartment Therapy

22. Install a Shelf Above the Door

If you bathroom is small and lacks a lot of storage space, one genius solution is to install a shelf above the door. You can buy all the materials you need for the project at somewhere like Home Depot or Lowes, and get the project done in an hour. It’s up to you whether you want to be fancy, or just have a plain shelf. Just make sure that it is securely in place, and do not put too much weight on the shelf if you want to ensure that it never falls. You wouldn’t want it dropping on your head!

Shelves above the door can also be a good place to display collections, like these bottles. Credit: This Old House

Remember that this shelf doesn’t have to be found in the bathroom aisle of your department store. Most bathroom shelves are specifically meant to hold toiletries underneath the mirror. Or, it will be some sort of towel rack hybrid. For example, much better to find something in the kitchen shelves at Ikea if you want to do this project.

If you have an old pumice stone lying around, you may want to reuse it. Photo Credit: catalina.m/Shutterstock

21. Use a Pumice Stone to Clean Your Toilet

Do you have a ring around your toilet that just won’t go away? Using a pumice stone is yet another option. Using a pumice stone is a great way to clean toilets if you are trying to avoid using harsh chemicals. Just remember to wear rubber gloves if you are reaching into the toilet with the stone. Once you are done, make sure you let it dry completely, and keep it separate from your beauty products.

Make sure your separate your foot pumice from your cleaning one. Credit: Shutterstock

If you plan to do this on a regular basis, you might want to order a specially designed pumice stone with a handle so that you don’t have to reach deep into the toilet with your hands. This technique may seem strange, but for the people who use it, they seem to be big fans of the method.

Coat racks can help you hang multiple towels for everyone in the family. Photo Credit: Diy Network

20. Install Coat Racks Instead of Towel Rods

If you are struggling to find the room to hang all of the towels for your family in the bathroom, consider hanging an accordion style coat rack on the wall. This should give everyone the chance to hang their towels and robes up to dry after using the shower, so they know that it can dry until the next day. If you are on a strict budget, you can find individual hooks to install on the walls, as well.

This coat rack holds towels and accessories in the bathroom. Credit: Shutterstock

If you are renting an apartment, and you are afraid to screw holes in the wall, you can try to get Command hooks for your towels, instead. Once you are ready to move out, these should be able to come off without damaging the walls.

Magic erasers can be used to clean so many things. Photo Credit: OlenaPalaguta/Shutterstock

19. Use a Magic Eraser for Soap Grime

In this list, we go over a lot of different methods on how to get rid of soap grime in the bathroom. One tried and true method to cleaning almost everything in your house is a magic eraser. You would be shocked to see just how much these bad boys can accomplish! From sharpie marks to yellowing doors, these can clean almost everything in your house. You should be rinsing your magic eraser after it gets dirty, and you could reuse it over and over again throughout your entire bathroom.

You can continue to use magic erasers down to the last morsel. Credit: Shutterstock

Keep in mind that the name-brand magic eraser is by Mr. Clean, but you can actually find a cheaper version at places like Dollar Tree. The box still comes with two erasers, making them just 50 cents each! You truly can’t go wrong when you spend only $1 to get so many things clean in the bathroom.

By folding your towels, it helps store them in small spaces. Photo Credit: Didecs/Shutterstock

18. Roll Up Your Towels Instead of Folding

Are you desperate to get some new space in your bathroom closet? Try rolling your towels instead of leaving them in a stack. This can dramatically cut down on the space on your closet shelf, and it allows more space to fit other stuff like extra toilet paper. On top of being a space saver, having a rolled towel simply looks a lot more fancy!

These towels looks cute even next to the bath. Credit: Shutterstock

Rolled up towels of reminds us of being in a hotel where the maids turn towels into origami swans. Okay, maybe not that fancy, but it creates much more organization than what you used before. Whenever you start allowing yourself small luxuries in life, it helps to boost your self-worth. Over time, the better you treat yourself, the more confident and successful you can become.

Adding your soap and cleaning supplies to a cake plate looks super cute. Credit: modern-glam.com

17. Use a Cake Plate for Soaps

One of the cutest trends I’ve seen out there on Pinterest is to use a cake stand as a pedestal for soap and hand sanitizer. If you can find a multi-tiered cake stand online or in the store, you may want to consider buying that for added vertical storage on your bathroom vanity. With multiple tiers, this makes it perfect for stacking wash clothes, soaps, and so much more. You could even add some flowers if you want to make it look pretty.

Cake plates come in all shapes and sizes. Credit: Shutterstock

Even if you don’t have a cake plate with multiple tiers, even just one like the photo above can help to keep your sink area clean, and display all of your cleaning products at the same time. If you are on a tight budget, check out your local thrift store to see if there are any cute vintage cake plates available. Many people also do a Dollar Tree DIY using a candle stick as a pedestal, and glue it onto one of their ceramic plates. Paint the entire thing one solid color, and bam- you’ve got a $2 cake plate.

As strange as it sounds, grapefruit and salt together make a great cleaner. Photo Credit: Stephanie Connell/Shutterstock

16. Grapefruit and Salt is a Great Tub Cleaner

Sometimes, you need a bit of grit to get some really gross grime around your tub. Do you have a grapefruit at home? Just cut it in half, sprinkle some kosher salt, and use the half of the grapefruit to start scrubbing. The citric acid from the grapefruit will help to break down the grime, and it smells good, too!

Grapefruit contains citric acid, which can help with cleaning. Credit: ShutterstockWhen you’re done, be sure to rinse everything off with water. This is a perfect hack for anyone who wants to avoid harsh chemicals, and go for something natural, instead. Added bonus if you have a compost pile in your back yard, because the fruit won’t go to waste afterwards.

Some expensive bathroom makeovers like this have huge metal towel racks. Photo Credit: bezikus/Shutterstock

15. Multiple Rungs on Your Towel Racks

For a lot of people, towel rack space is a huge issues. This can be especially bad if you have a lot of roommates in the house, and you all need space to hang our towels. A great solution to this problem is to get a towel rack with multiple bars. You can choose to either install a very fancy and expensive metal towel rack, or buy a cheaper version online, or from somewhere like Ikea. Just remember to clean your towels every 2-3 washes. Yes, your body is clean when you get out of the shower, but you need to wash them regularly to avoid bacteria buildup.

The more rungs you have on a towel rack, the more you can fit. Credit: Shutterstock

In Europe, it’s common for every bathroom to have a heated towel rack. These usually have multiple bars, so you can hang several towels at once. Heat radiates through the pipes, and it helps to dry up the moisture while heating the room at the same time. Here in the United States, you can buy an electric version online.

It is very common for shaving cream containers to become rusty. Photo Credit: NET_Photog /Shutterstock

14. Turn Your Shaving Cream Upside Down to Avoid Rust

If you let a bottle of shaving cream sit in the shower, you may have noticed that the moisture will cause the can to rust. Eventually, that rust leave a disgusting orange ring on your white shower shelf. If you want to prevent this from happening, simply store your shaving cream upside-down.

If you have a beard, you probably have a can of shaving cream around the house. Credit: Shutterstock

Obviously, this is not an option for everyone. You may not have a shower caddy, or anything that could suspend your shaving cream. There are brands of shaving cream that are rust-free, or you could find a cream with plastic packaging, instead of metal.

You can buy brush attachments for your drill online. Photo Credit: Amazon

13. Use Your Drill For Deep Scrubs

Do you have scum on your bathroom tile that refuses to go away? You may want to invest in brushes for your power drill. This will be way more powerful than anything you could possible manage to do by hand. Of course, this only works if you have a drill in the first place!

Drill brushes are available to purchase online. Credit: Shutterstock

If you do not want to spend a fortune on a power drill, go somewhere like Walmart or Harbor Freight, where they sell discounted tools. Since this is a product that you won’t be using on a daily basis, it’s okay if you buy a discounted version.

Exhaust fans should be cleaned at least once a year. Photo Credit: RD

12. Clean the Exhaust Fan

Over time, the exhaust fans of a bathroom get caked with dust and mold, and it could stop working properly. If you live in an apartment, you may want to ask for advice on how to clean the exhaust fan. Whoever works in the office might send a maintenance worker over to your apartment to remove the vent and clean it for you, instead of dealing with it on your own. Most complexes don’t want you to accidentally break the fan, so they would rather send in a professional to help you.

Don’t forget to wear gloves if you are cleaning a fan. Credit: Shutterstock

If you are home owner, that’s a different story. Your only options are to hire a handyman yourself, or figure out to do it on your own. If you’re brave and decide to clean the exhaust fan yourself, at least look up a tutorial on YouTube so that you can watch someone else do it, first. Also make sure you wear protective gloves when you are removing the parts.

Baseboards need to be cleaned, too. Photo Credit: FotoDuets/Shutterstock

11. Don’t Forget to Clean the Baseboard

All the way at the bottom of the wall near the floor of your bathroom is the baseboard. This strip of molding is often forgotten or neglected, but it needs to be cleaned, too. A baseboard can get caked with dust, and it just may not look as good as it once did when you first installed or painted it. If you want to dust, simply take a micro fiber cloth or an old rag and wipe down the baseboard. If a white baseboard is discolored, try using a magic eraser. More often than not, you can make it look beautiful and white again.

Use a microfiber cloth to clean your baseboards. Credit: Shutterstock

When all else fails, you may want to consider repainting the baseboard so that it looks fresh. Remember that it’s common to have to repaint your baseboards every few years. This is usually done at the same time that you are repainting the entire bathroom.

Keep your cleaning supplies underneath the sink. Photo Credit: The Kitchn

10. Organize The Space Under the Sink

If you want to make cleaning in your house as easy and convenient as possible, you should try to keep cleaning products in each room. For example, don’t put all of your bathroom cleaning products in the kitchen, so that you have to carry it back and forth. If it all possible, keep everything in one place. If the area under your bathroom sink does not have a storage unit, you can build your own. Just go to Home Depot, buy a shelf with brackets, and build your own so that there are two levels of storage.

Both the bathroom and kitchen are good areas to keep cleaning supply under the sink. Credit: Shutterstock

If you have a vintage style pedestal sink without storage, there are racks that are made to fit around the sink itself. This could be a good place for you to put all of your cleaning products. Some people will go one step further to encase their pedestal sink in wood, or use a curtain to surround it. Alternately, just make sure that you have the bathroom products somewhere near the bathroom. In my house, we keep them in a basket sitting above the toilet, and we also have them on the floor behind the toilet. Is it pretty? Not really. It’s much better to hide them somewhere.

Plungers need to be cleaned. Photo Credit: Thomas von Stetten/Shutterstock

9. Clean the Plunger

After using a plunger, make sure you clean it before you put it away. Once the gross deed is done, flush the toilet a few times so that clean water pours down over top of it. Next, pour some bleach into the water to disinfect it. Don’t have bleach? You can also use any disinfecting spray, too. (You may want to put out rubber gloves for all of this. by the way.) In an absolute act of desperation, you can always use boiling water. Boil some water in a kettle, and carefully pour it over the rubber end of the plunger so that it is sanitized.

Have a plunger? You need to clean it. Credit: Shutterstock

If you are using the plunger to clean your kitchen sink, you should go through the same process. Remember to sanitize the sink itself, since this is where you will be doing your dishes later! Always used bleach, or something like Lyson disinfectant to make sure it eliminates any germs. Also consider buying a brand new plunger from the Dollar Tree if you need one for the sink, so that you are never cross-contaminating.

Always clean your bath mats. Photo Credit: katielittle/Shutterstock

8. Clean Your Bath Mats

Bath mats are similar to rugs, so some people forget that they need almost as much TLC as a towel. Mats are stepped on when you are dirty, and they get wet every time you step out of the shower. Remember to wash them at least once every two weeks, and tumble-dry. Many people keep a backup bath mat to use while their dirty mat is being washed. Once a bathroom mat has been cleaned in the washing machine, it takes a very long time to dry.

Remember to allow your bath mats to dry out completely. Credit: Shutterstock

You will most likely have to dry it all on its own, or hang dry it outside on a warm and sunny day if you have a balcony or somewhere else. If you live in Europe, you may have a heated towel rack that works very well to dry out the rug. Remember to make sure it is totally dry before you put it back in the bathroom if you want to avoid a musty smell.

Mold in a bathroom is a total disaster. Photo Credit: Burdun Iliya/Shutterstock

7. Use Paint That Prevents Mold

All you need for mold to grow is moisture and darkness. Since bathrooms get wet every single day, it only makes sense that they can get moldy sometimes. Many people do not realize that you can purchase mold-resistant paint at the hardware store. If you cannot find it on your own, ask a store employee to help you find it. This will dramatically cut down on the amount of mold you find on your walls and ceilings. If you already have mold growing on your walls and ceilings, use bleach to scrub it off.

Check your local hardware store for anti-mold paint. Credit: Shutterstock

Make sure you remove all of the blackness. Remember to wear clothes that you no longer care about, because bleach causes stains. Also try to identify what is causing the mold, and consider tiling the area around your shower.

There are several different types of razor hooks out there. Credit: Teletrogy

6. Use Wall Mounts as a Razor Rack

Most showers don’t come with a designated space to keep your razor. When they sit on the shelf, it’s all too easy to accidentally knock it over. They also rust faster if they’re sitting at an angle that doesn’t allow the moisture to drain. A great solution to the problem is to purchase stick-on hooks to hang your razors on the wall of the shower. Some companies even sell magnetic versions of the razor hook, which is great to help keep it in place.

This razor hook is magnetic, so it helps keep the razor in place. Credit: Pinterest

In most households, you’re going to need multiple hooks in the shower. (Unless you live alone.) This is perfect if you have multiple people in the household sharing the same shower, as well. Now, everyone can clearly see which razor is theirs, and never have a crowded shower shelf.

Sprinkling baking soda in your toilet helps between cleanings. Credit: Shutterstock

5. A Sprinkle of Baking Soda Goes a Long Way

Cleaning the bathroom is a big job, especially if you let things build up for too long. One great hack is to keep a sprinkle bottle filled with baking soda in the bathroom. Sprinkle some of the powder in the toilet after you’ve used it, and flush as normal. This helps to eliminate a lot of bad smells, but it also does a mini-clean of the toilet every time you use baking soda. The next time you go to clean the bathroom, it won’t be nearly as difficult to scrub.

Boxes of baking soda are usually $1 or less. Credit: Shutterstock

If you keep your cat’s litter box in the bathroom, remember to sprinkle that on top of the sand, too. This helps to eliminate the odors coming from the sand, even after you’ve cleaned out the box. Don’t worry, though. This isn’t going to harm your cat’s paws in any way.

Clean while you’re already showering. Photo Credit: Grigvovan/Shutterstock

4. Clean While You’re in the Shower

Some of the worst shower stains come from hair color, toner shampoo, and other products that contain dyes. If you allow those products to stick to a white shower surround and dry, you’ll have no choice but to break out the bleach in order to remove those stains. Instead of letting those products create stains, prevent it from happening in the first place. If you have a detachable shower head, pick it up and clean the walls with the warm water as you go. Check after getting out of the shower to see you missed a spot, and use the shower head again to remove the stain before it completely dries.

There’s a lot you can do in the shower, but it’s more productive to clean. Credit: Shutterstock

There are plenty of other things you can do in the shower too. I usually rearrange the bottles to look neat and tidy. If I have to wait 5 minutes for my conditioner to work, why not do something productive with my time? However, I don’t recommend cleaning with harsh chemical products while you’re in the shower. Bleach can be corrosive in your skin, so never break out the bottles of cleaning product while you’re in the buff!

Food coloring can be used for toilet leaks. Photo Credit: Michelle Lee Photography/Shutterstock

3. Check for Toilet Leaks With Food Coloring

A household toilet uses several gallons of water per day. This is already a lot on the environment, and it only gets worse if you have a toilet leak. According to the American Water Works Association, a leaky toilet can waste as much as 300 gallons of water per day. Not only is this bad for the environment, but it could also be racking up your water bill. Believe it or not, the solution to your issue is food coloring.

Colored water can help you find leaks. Credit: Shutterstock

Thankfully, the solution is simple. All you need to do is drop some food coloring into your toilet’s water tank. In the next 10 to 15 minutes, if you see the color in the toilet bowl, it means that there’s a leak, and you should get it repaired.

Wax can be difficult to remove. Photo Credit: Gabi D/Shutterstock

2. Use Your Hair Dryer to Remove Wax

Sometimes, we have to deal with cleaning problems that seem out-of-the-ordinary. For example, maybe you like to light candles while you take a bath, or you wax your legs. You may have encountered the issue of finding hardened wax on your surfaces, and it’s impossible to clean with most cleaning products. A hack for getting rid of hardened wax is to grab your hair dryer, and use the hot air to make the wax soft again. Once it has softened, grab a muslin wax strip or a cotton rag. Allow the wax to stick to the rag, and pull it off of the surface. Follow up by cleaning the residue with some rubbing alcohol.

If you wax your legs, you might accidentally spill some in the bathroom. Credit: Shutterstock

I have personally used this hack at home. Please keep in mind that you want to do this as soon as possible, so that there is no residue left over. Even with this hack, it was difficult for me to remove wax from my table, which has a mirror top. This is most likely because I left this overnight until the next morning.

Spilled nail polish is the worst. Photo Credit: jonny89/Shutterstock

1. Use a Dryer Sheet to Remove Nail Polish

Nowadays, a lot of people are too nervous to go to the nail salon. So if you like to give yourself manicures and pedicures in the bathroom, you’ve probably spilled a bottle of nail polish at some point. This can be incredibly hard to remove from almost any surface. A great hack is to take some nail polish remover and pour it onto a dryer sheet. The combination should be abrasive enough to help scrub out any polish stains.

Accidents happen. There might be a day when you spill your nail polish. Credit: Shutterstock

If it’s not working, check to see if your nail polish remover is acetone-free. Only acetone can remove stains like this. You can buy a bottle of pure acetone from stores like Walmart or Sally’s Beauty. Just keep in mind that if it removes nail polish, it will also remove paint from surfaces, too. Try not to go overboard! This has happened to me in the past, where I used acetone to remove Sharpie from a vintage camera, but I rubbed too hard, and it removed the paint.

Advertisement