Home Improvement Hacks Guaranteed to Improve Any Home

Trista - August 19, 2019
Share

Making improvements around your home takes guts, especially when you do it on your own. After you get over the fear of trying some DIY projects, keep in mind that you don’t have to dip into your nest egg to get some home improvements done. You don’t have to spend a fortune to get the job done. These simple hacks are not only easy and affordable to implement in your house. It will also save you much time, effort, and money instead of hiring a contractor to do the job for you. Check out these easy home improvement hacks that will wow your loved ones. There are over 70 different hacks that you can try in your house. They are for the kitchen, bathroom, garage, and other essential parts of your property. (PS- you’re welcome!)

Photo Credit: Lowes

Building a Ball Tower

If your kids are avid in sports, then you’re going to have many balls lying around. They accumulate like dust bunnies under your couch. An accident can quickly happen if they’re left lying around in your living room. Instead, you can take charge of the situation by building a ball tower with just a few simple tools. A few pieces of wood and some luggage bungee cords will help to keep your balls organized in one place. Tuck it away in a corner so that they’re not underfoot. This idea makes it easy for your kids to deposit and pull out any ball that they need when they need it.

Photo Credit: Creating Marys Home

Some chores are better for kids of different ages. Having a ball tower makes clean up easy, and cleaning up the balls and putting them away is an age-appropriate chore for many kids. You can make a game of it and see how many balls can go into the ball tower before falling out. Just be careful that no cars are moving in or out if you put this in the garage. Try this out today and have a place for all the bouncy balls, so they aren’t rolling all over your yard or garage.

Photo Credit: Ecotelligent Homes

Garage Foam Dam

Whether ice is melting from your tires in winter, you’re washing your car, or you’ve just driven in from the rain, you don’t want that water creeping towards your tools and turning them into piles of rust. You can keep all that water at bay with the simple use of spray insulation. A spray form is pretty versatile and easy to use. Just aim the nozzle and spray where you want the dam to be on the ground. It stays in place, and you can drive right over it without damaging it. In the summer months, when you don’t need it anymore, just scrape it off. It won’t damage your garage floor at all.

Photo Credit: Safco Foam

This hack is a low-cost option that can save you significant time when it comes to protecting your tools. Any tools on the ground are generally too big to hang up or keep on a table – which is usually the more expensive tools. Alternatively, if you are just getting started organizing using these hacks, you may have some things on the ground while sorting. You can use this with hack number #48 to make cleaning your garage floors even easier! Try using both of them to keep your garage floors cleaner and have less water spreading out on the whole floor.

Photo Credit: Instructables

DIY Rake Squeegee

Garage floors can get dirty after a while, especially with a lot of foot traffic and the filthy tires of your car on it all the time. Alternatively, after a long winter, a lot of road salt can fall off and start to damage the foundation of your garage floor. Washing is the best option, but who wants to wait for all those puddles of water to dry? Instead, you could build your own floor squeegee out of a simple rake and a pool noodle. Attach them with some zip ties, and you can start pushing all that filthy water out of your garage with no problems.

Photo Credit: Pinterest

It is a perfect hack as you’ll most likely only need this in the winter and spring months for water and salt, while you only use a rack in the fall months usually. A tool you purchased for only a couple of months has now turned into closer to half of the year! That is a much better bang for your buck, and it’s better to put it to use rather than sitting in the shed with your other summer and fall tools collecting dust. Try out this hack this winter/spring and see how easy it makes cleaning your garage floor become!

Photo Credit: Pixabay

Tool Covers from Old Work Gloves

Some tools are just too sharp to leave lying around on your work shelf. Alternatively, you don’t want them gouging up your work area. You can solve that problem quickly with just a pair of old work gloves. You can cut off the fingers and slip them over the ends of your tools, such as chisels or pruning shears, so that the sharp edges are kept away from delicate fingers. Another excellent use for old work gloves is to cut off the fingers and hem the tips and slide them over the handles of pliers or other tools.

Photo Credit: Needpix

This hack will make a much softer grip in your hands so that your palms don’t suffer. It’s no good if you get injured before your able even to start your project! That not only protects you, but it also covers your tools. If you drop them, they will have a soft barrier, and it’s less likely they will chip, scratch, or break. Reusing old gloves that you don’t use anymore is better for the environment, making this a no-cost hack! Use this with any of your longer tools today, and it will help with your tools’ longevity.

Photo Credit: Mac Rumors

Stripped Screws: Not a Problem Anymore

When you’re putting in or taking out screws, having metal against metal makes it easy for the screw heads to get stripped. That makes them more challenging to put in or take out, and trying harder will strip them further. Instead of going out and buying more screws, you can solve the problem with a simple rubber band. Place one side of the rubber band across the head of the screw and insert the screwdriver. The rubber will keep the screw head protected from further stripping while still providing enough friction to unscrew it from the material.

Photo Credit: This Old House

When you do this, you will want to apply a fair amount of pressure down onto the screw, and you will want to unscrew it slowly. The added pressure down will allow the screwdriver or bit to grip the stripped screw, and going slowly will help prevent it from stripped further. If you go too fast, you can also break or tear your rubber band, which you don’t want to do. Sometimes just some added friction is all it takes to get the screw to cooperate. Try this hack out on any screws you’ve been having trouble with.

Photo Credit: Mel Magazine

Put Those Old Sneakers to Good Use

You may go through many sneakers every year or so, and it can feel like a waste throwing them out. Instead, you could give them a second purpose by using them on your ladders. Do you know those rubber feet that keep the ladder from scraping the sides of your house? They do wear out over time, and you have to spend money to replace them. However, you can solve that problem by merely duct-taping your old shoes to the ends of your ladders to protect your walls and exterior. It may be a good idea to wash the shoes’ bottoms first before leaving tread marks on your walls.

Photo Credit: Pinterest

Some people like the method better as it provides a bigger surface at the top for the ladder to sit on the wall. Having more rubber touching the house can give more grip and providing a sturdier ladder for people. Make sure you duct tape them securely on your ladder – you don’t want to be several feet in the air and one of the shoes falls off, causing the ladder to become unbalanced. So keep those old shoes that have decent rubber soles on them and duct tape them to your ladder for a no-cost hack today.

Photo Credit: Family Handyman

A Dock For Drills

Your worktable can be hard to keep organized when you have many tools lying around. That makes it easy to lose the different pieces and assembled parts, making it harder for you to complete your projects. But with just some PVC pipe, you can more space with your drills and other tools out of the way. Cut 3-inch PVC piping into sections that fit under your work area. Then cut a strip out of one side; this is where the battery pack-handle of your power tool is going to slide into so that it can hang from the bottom of your shelf.

Photo Credit: Youtube

To keep everything together, you could put the charging stations above each drilling unit so that you never forget to plug the battery pack in – it’ll be right above where it hangs! You could hand hammers with this method as well – just position the hammer with the head so that it won’t fall through the slit. By keeping all of your tools neat and off of your workspace, you’ll be able to get so much more accomplished, and it will be less overwhelming. Try out this organization hack for your garage or tool shed today.

Photo Credit: Handy Crowd

Getting Out Stubborn Nails

Nails can be troublesome to remove, especially if you want to get them out straight. A pry bar can only do so much, but it doesn’t have to be a problem anymore with a little ingenuity. You will need a pry bar, but you’ll also need to get your hands onto some locking pliers for this hack. Pry the nail up slightly so that the shank is exposed and then lock the pliers onto it. Then use your pry bar to get it out. You’ll have a much easier time getting it out without bending the nail.

Photo Credit: Pinterest

Another key thing to remember while doing this hack is to go slow if you don’t want to bend the nail. If you’re going more gradually, there is less chance of damaging the nail or the material coming out of it. If you need to bend the pin back, try using a hammer and gently hit it back into the shape you want it. Remember, hack #38 and keep all of your extra nails in one place if you do end up damaging a nail trying to remove it. Try this hack out next time you need to remove any nails.

Photo Credit: Gear Junkie

Getting the Light Without Needing Hands

You can invest in one of those fancy forehead lamps that you wear while you’re working on your projects, but there are easier solutions involved. The best thing about this is that you likely already have these things lying around your home. Place a flashlight in the jaws of a pair of pliers and wrap a rubber band around the arms several times to keep it all locked together. Then you can swivel the light as you need to for better illumination. You can move the flashlight up or down in the jaw to easily get the angle you need.

Photo Credit: Family Handyman

Make sure you have checked the batteries before starting your project – nothing worse than being ready to start and you discover you have no light! It’s best always to be prepared by testing out the flashlight first and see if it will light up the area well enough for you to work in. You may need to set up more than one flashlight to see well enough to complete your project. Try out this hack next time you need some extra light, and keep it in mind if your power ever goes out. You’ll have everything you need, and it could be safer than candles.

Photo Credit: Family Handyman

Rubber Band Clampers

There are special wood clamp tools that you could buy at the hardware store, but they can end up being very expensive. Furthermore, depending on how often you work on wood projects, you may not even use them very often. If you have spring clamps lying around, you can use those instead. Just clamp them onto the edge of your wood projects and add some rubber bands to provide more tension and ensure that everything stays in place. Wrap the rubber bands around the clamps several times to get a tighter tension for your project, and use thicker rubber bands if you have them.

Photo Credit: Instructables

This hack will come in handy when you need to repair tables or chairs that have been damaged. It’s not uncommon to see this in kitchen table sets as they are used often. Make sure you use quality wood glue and allow it to set with the clamps. Read the glue bottle for instructions as times vary from 6 hours to 48 hours of curing time. Don’t touch the project or clamps once you have everything set in place. Just let it sit and dry. Try this hack on any wood projects you’ve meant to do.

Photo Credit: Family Handyman

Moving Heavy Things Without a Dolly

Getting heavy tools or items around your yard, especially if you live by yourself, can be a difficult task to accomplish. Hiring someone to move these things for you can also be expensive. So what can you do to remedy the situation? Simple: PVC pipes. Get a few pieces of 4-inch PVC pipe and lay them out in a row. Lift the edge of your heavy object and slide 2 of the pipes underneath it, one at the front and one half-way down. Place your other pipes in front of the first pipe and push until the pipe underneath is free. Then move that pipe to the front of the line and start again.

Photo Credit: Move On Moving

Congratulations, you’ve made your own crude treadmill to move your bulky items around! Throughout history, this hack has been used, usually using trees underneath to roll large objects where they needed to go. This hack can be done by yourself, but it’s best to have another person with you if you injure yourself. Ask a friend or neighbor to help you, as you don’t want this large item to land on foot, or even worse, right on top of you! Use this hack with a friend or neighbor and get the job done sooner than later!

Photo Credit: Family Handyman

Curved Sanding Paper

No, you’re not going to find this at the hardware store. You may not even see this at all unless the sandpaper is attached to another surface. You can make your own with this simple hack, which also involves PVC pipe. Get different sizes of PVC for your various projects and apply some spray-on adhesive. Spray some more on the backs of your sandpaper and let them dry before attaching them. For an even better tool, you can connect two different kinds of grit to both curves of the pipe so that you’re not constantly switching back and forth.

Photo Credit: Pinterest

Now you can sand down any convex surface you’re working on for a smooth finish. If you have space at one end of the pipe, leave that empty so that you have a handle for yourself. That will save your hands from getting dry or hurting them with the sandpaper, and it will just make using this tool easier in general. It doesn’t have to be a PVC pipe either – an old dowel or any curved scrap material will work. Try this hack out for your next project when you have to sand down any challenging areas.

Photo Credit: Family Handyman

Screw and Bit Organizer

Keeping all of them in place without losing all of the pieces can feel like a struggle in futility. You could invest in one of those large organizer boxes to keep your different parts. Nevertheless, if you’re good with a saw and glue, you could make your very own organizers with just some PVC pipe and some end caps. Cut a few small pieces of pipe and glue one end cap on. Write the size screws or drill bits you’re putting inside; you can write them with a marker on the side of the pipe. You’ll know where everything is at all times.

Photo Credit: Home Depot

You’ll want to only glue one end cap on so that you can get to the material inside, but with that being said, you will also want to store this upright so that the cap doesn’t fall off. You could use an old 6-pack container like from our previous hack to store these upright, or you could make your own stand as well. If needed, you could use some hot glue around the edge of the cap – let it dry – then you’ll have a rubber seal to make the cap stay on tighter. Try this hack with all of your loose nuts, screws, and bolts!

Photo Credit: Family Handyman

Cutting Pipe with String

You can pretty much use any string, too, as long as it doesn’t break easily. Moreover, you won’t have to waste your time struggling with a saw either. Brace the PVC pipe down and get your piece of string underneath. It would be a good idea to wear some gloves so that you’re not giving yourself a rug-like burn or blisters. Then just pull while moving the strings back and forth, and you’ll start to notice that it’s cutting through the pipe like butter. It may take a bit to get started, but once you see it start to cut the tube, you’ll want to keep going!

Photo Credit: Aconcord Carpenter

This hack uses the friction of pulling the string back and forth over the pipe to cut through the tube. It can take quite a bit of workforce, and it is a good workout. If you don’t have the right tools, this is a no-cost or low-cost hack you can use in a pinch. It can take some time to do – so if you have more than a couple of pipes to cut, be prepared to be at this for a while. You’ll be saving money in the process, so it’s a win-win!

Photo Credit: Instructables

Gutter Cleaner For Free

Taking care of gutters is an annoying task that many people put off until there’s a problem. It can be a hassle to get up there and wash them out: you have to set up the ladder, hook up a hose, and then carry the whole thing up there so that you can wash out all the debris. Alternatively, you can rig up your own gutter cleaner with just a PVC pipe. You’ll need a ¾-inch pipe, two elbows, garden hose coupling, and a cap. Drill holes that are 1/16 of an inch in the lid and attach everything so that the handle is long enough to rinse out your gutters.

Photo Credit: Spring Klein Magazine

You may need to get up there and clean out your gutters if they haven’t been maintained in a long time, but once you do that, you can use this hack to keep up with it! You’ll save yourself many headaches if you ever do need to get up there and inspect the gutters, as you’ll be keeping up with this chore with this easy hack! You can have a good idea if the gutters are cleared if no debris is coming out at the bottom, and the water runs relatively clear as well.

Photo Credit: Pinterest

PVC Bike Rack

Putting the bikes away isn’t always a full-proof plan. They can sometimes shift and move on their own, or a breeze can blow the front tire in the wrong direction. A simple nudge can send your bike and the bikes beside it toppling over. You can keep them in place with an easy-to-build wall-mounted rack made entirely out of PVC. What’s great about this project is that you can add or subtract from it as much as you want if you have a growing family and need a bike for everyone. That makes it completely customizable for your family.

Photo Credit: Pinterest

It is a low-cost hack for your garage to keep it organized and neat. You’ll need to get brackets or another way to mount it onto a wall – or if you don’t have a wall to secure it and are just keeping it on the ground – use sandbags or rocks to weigh the bike rack down. That way, when you wheel your bike into the frame, it won’t move or shift as much(expect it to move a little bit, but not enough that it’s not worth the hack!). The weather is getting warmed, and bike season is coming up soon, so try this hack this weekend!

Setting aside a garage vacuum will help you take care of more home improvement projects with ease. https://www.instructables.com

Building a Garage Vacuum

You’re ready for summer vacation, and it’s time to take your car out on the road. Bad news: it’s filled with salt, receipts, and crumbs from the last time your kids were in the car. You could get the vacuum cleaner and struggle to get the inside of your car clean. Alternatively, you could rig up a central vacuum cleaner for your entire garage that makes cleaning a snap. Just install a 2-inch sanitary tee on the ceiling of your garage and drop a pipe down. Attach a 90-degree bend and a stub out to connect the hose, and you have the perfect cleaning solution for your car.

Photo Credit: Popular Mechanics

Once you have this installed, you can clean your car right in your garage with no worries about extension cords and lugging out a heavy vacuum cleaner. Remember to take the mats out of your vehicle as well so you can get underneath them(lots of sand and dirt collects there), and don’t forget the cup holders and the door panels with the extra storage space – things always get shoved in there. That isn’t a no-cost hack for mos, but the convenience of having a central vacuum cleaner in the garage will be worth every penny and is priceless!

Photo Credit: Pinterest

PVC Bag Dispenser

It’s great to save those bags from groceries so that you can use them in your garbage bins. However, you don’t want to leave them in a pile in the corner, as that just looks messy. Instead, install a two-foot-long length of PVC fence post to the wall and shove your extra bags into it. It’s a great way to keep them out of the way while still providing you access to them when you need to get one out. You’ll want to make this when you have a couple of bags already – if you just put one in, it may just fall out the bottom.

Photo Credit: Pinterest

The idea is it gets a bit packed, and because of that, the bags don’t fall out. Pro tip- don’t put the bags inside of each other. If you do, when you go to grab one, you could be taking several by accident. Putting them on separately will better pack them in the tube, and it will be easier to grab just one from the bottom when you need it. Use this hack in your kitchen or pantry today and see how much space this saves you! You can easily decorate this to match your kitchen decor as well.

Photo Credit: Family Handyman

Dowel Storage

Dowel rods are handy, but how do you keep them out of the way. You could rubber band them together, but that just looks unprofessional, and there’s no guarantee they’re going to remain standing in the future. They are also a pain to untie and retie every time you need a dowel. Instead, use a 3- or 4-inch piece of PVC pipe, cut it to about 30 inches in length, and attach it to an end cap or empty wall space. Screw the whole thing to the wall, and you have a great place to keep your dowels.

Photo Credit: Family Handyman

Another great option would be the heavy-duty cardboard tubes that lightbulbs sometimes come in. Any kind of long, heavy-duty, cylinder-shaped packaging or pipping would work for this hack. If you don’t have a spot to mount it to a wall, you could always use large zip ties to attach it to another pipe as well (just make sure it’s not too heavy to bend the piping you’re connecting it to) or to a beam. It will make your garage, shed, or workspace much neater, and you’ll be able to find your materials much easier with everything in one place.

Photo Credit: Pinterest

Sprinkler Socket System

Ready to water your lawn for summer? You have the perfect sprinkler system set up with your hose so that there’ll be no patches of dry grass this year. Nevertheless, getting them into the ground and remaining upright is trickier than it looks, but we have a solution. Save those extra pieces of PVC pipe and create some perfect, permanent sockets for your sprinklers. Save pieces that are big and small. Even mismatched lengths will work. They’ll keep those sprinklers upright so that watering your lawn goes smoothly, and you’ll have the greenest lawn in your neighborhood.

Photo Credit: The Spruce

If you have mismatched lengths and sizes of PVC pipe – don’t worry. That’s fine! These are just being used as an anchor for your sprinkler system. If you find that the stakes are loose and falling over – you can pack the pipe with some loose dirt. Once you put the stake in, it will keep it more secure because the pipping is acting as a retainer wall. Keep playing with the amounts of dirt needed to keep the sprinkler stake standing upright and secure. Try out this sprinkler hack this summer on your lawn and garden.

Photo Credit: Pinterest

Easier-To-Use Sandpaper

You could get an electric sander, but those are expensive. You could sand by hand too, but that’s the fastest way to get blisters. The solution to this problem may have been right under your nose the whole time. Got some paint stirrers? Just wrap the body of the stirrer with some sandpaper, adhere to the ends, and you have a great way to smooth out wood or remove paint without getting blisters on your fingers. The great thing about these is you can mark the handle, so you know what grit sandpaper it is as well.

Photo Credit: Family Handyman

What you are doing with this hack is essentially making a handle. You can purchase sandpaper handles and holders at any local hardware store. However, if you are getting paint, you can ask for extra stir sticks for free. If you don’t use sandpaper often, this is an excellent alternative to purchasing something you may not use very often. Remember this hack when you are doing any simple renovations at home, especially when your painting gets those stir sticks! They may even give you some if you’re not purchasing paint that day, so it doesn’t hurt to ask.

Photo Credit: Guides Brit

Magnetizing a Screwdriver

Are you sick of trying to balance your two hands holding a screw in place while trying to screw it? The simple solution is to magnetize your screwdriver. This hack will keep the screw on the head while driving it into whatever surface you’re working on at the time. It’s effortless to magnetize a screwdriver too. Wash the metal end of your screwdriver and get a powerful magnet. Run one end of the magnet along with the screwdriver, from base to tip; do not go back in the other direction. Turn the screwdriver as you do so over and over again so that the whole thing is magnetized. Voila!

Photo Credit: Pinterest

It looks like you can get these magnet strips for anywhere between $9.99-$19.99, so it’s not our cheapest or low-cost hack. However, if you keep an eye out for sales or have it as a gift item you would like, you may get it cheaper or free! Sometimes you have to pay for convenience, and some hacks are worth that little splurge. If you are a carpenter or work with tools for your job, or know someone, this is an incredible hack to keep in mind for your next project on the job site or at home.

Photo Credit: Family Handyman

Cleaning Sandpaper with a Sneaker

One of the most common tools used in any home project is a sander. An electric sander can dirty easily, and you can save on buying new sandpaper by cleaning the one you already have. Just by using an old sneaker, press the rubber sole of it against the blade of the power sander, and you’ll start to see it get cleaner before your very eyes. You don’t want to press too hard. Just apply enough pressure where you can see the debris coming off the sandpaper. You’ll wonder why you never thought of it sooner.

Photo Credit: Izzy Swan – Youtube

If you don’t have an old pair of shoes lying around, check out your local thrift stores and pick up an older pair of shoes. It’s great because you don’t have to worry about the size or what they look like as they are just going to be used in your shop. Make sure to pick up a pair with a decent rubber sole still – you don’t want them to be completely worn out and not last very long. Have you ever tried this hack or used something other than shoes to clean your sander?

Photo Credit: Family Handyman

Cushiony Hammers: No More Damage to your Walls

Everyone’s made that mistake of putting a hole in the wall because they missed the nail they were aiming for. It’s a common mistake, but it’s easily preventable with this hack. Just slip on the rubber cap from a chair leg around the head of the hammer. Now you have a rubber mallet that still lets you drive those nails in without damaging your walls. The best thing about this hack: a rubber cap only costs about a dollar. You can usually find these are hardware stores or find them easily online on sites like Amazon.

Photo Credit: Ebay

If you go back and read hack number 22 – hopefully, you won’t be missing the nail so much and can get it started without missing it. While a rubber cap for a chair leg will usually fit well, sometimes the chair has a wider or narrower leg. If you tape around your hammer, then put the cap on, it will ensure a more snug fit. You will still not want to swing too aggressively as you can even put a hole in the wall with this cap on. Try out this hack for yourself on your hammers!

Photo Credit: Family Handyman

Keeping Your Tools Rust-Free

If you leave your tools for too long in a toolbox, they won’t be able to breathe, and some of them can start to get rusty. It’s made even worse if you don’t keep your toolbox stored in a cool and dry place. You can solve that problem by just adding a breathable pouch of silica kitty litter to your toolbox. It’s designed to absorb moisture, so there’s no water vapor to promote rust on your tools. If you already have a cat, this hack is perfect as you don’t need to go out and buy kitty litter for this.

Photo Credit: Family Handyman

Silica packets are a great thing to keep when you get them in packages and parcels. You can use them in many different places where you don’t want any excess moisture. Just be sure to keep them away from children. Kitty litter is also a good purchase as well if you don’t own a cat but live in a cold area that gets snow. You can use kitty litter as a source of friction for your car if you get stuck anywhere icy. So hang on to those silica packets and get yourself some kitty litter for these home hacks!

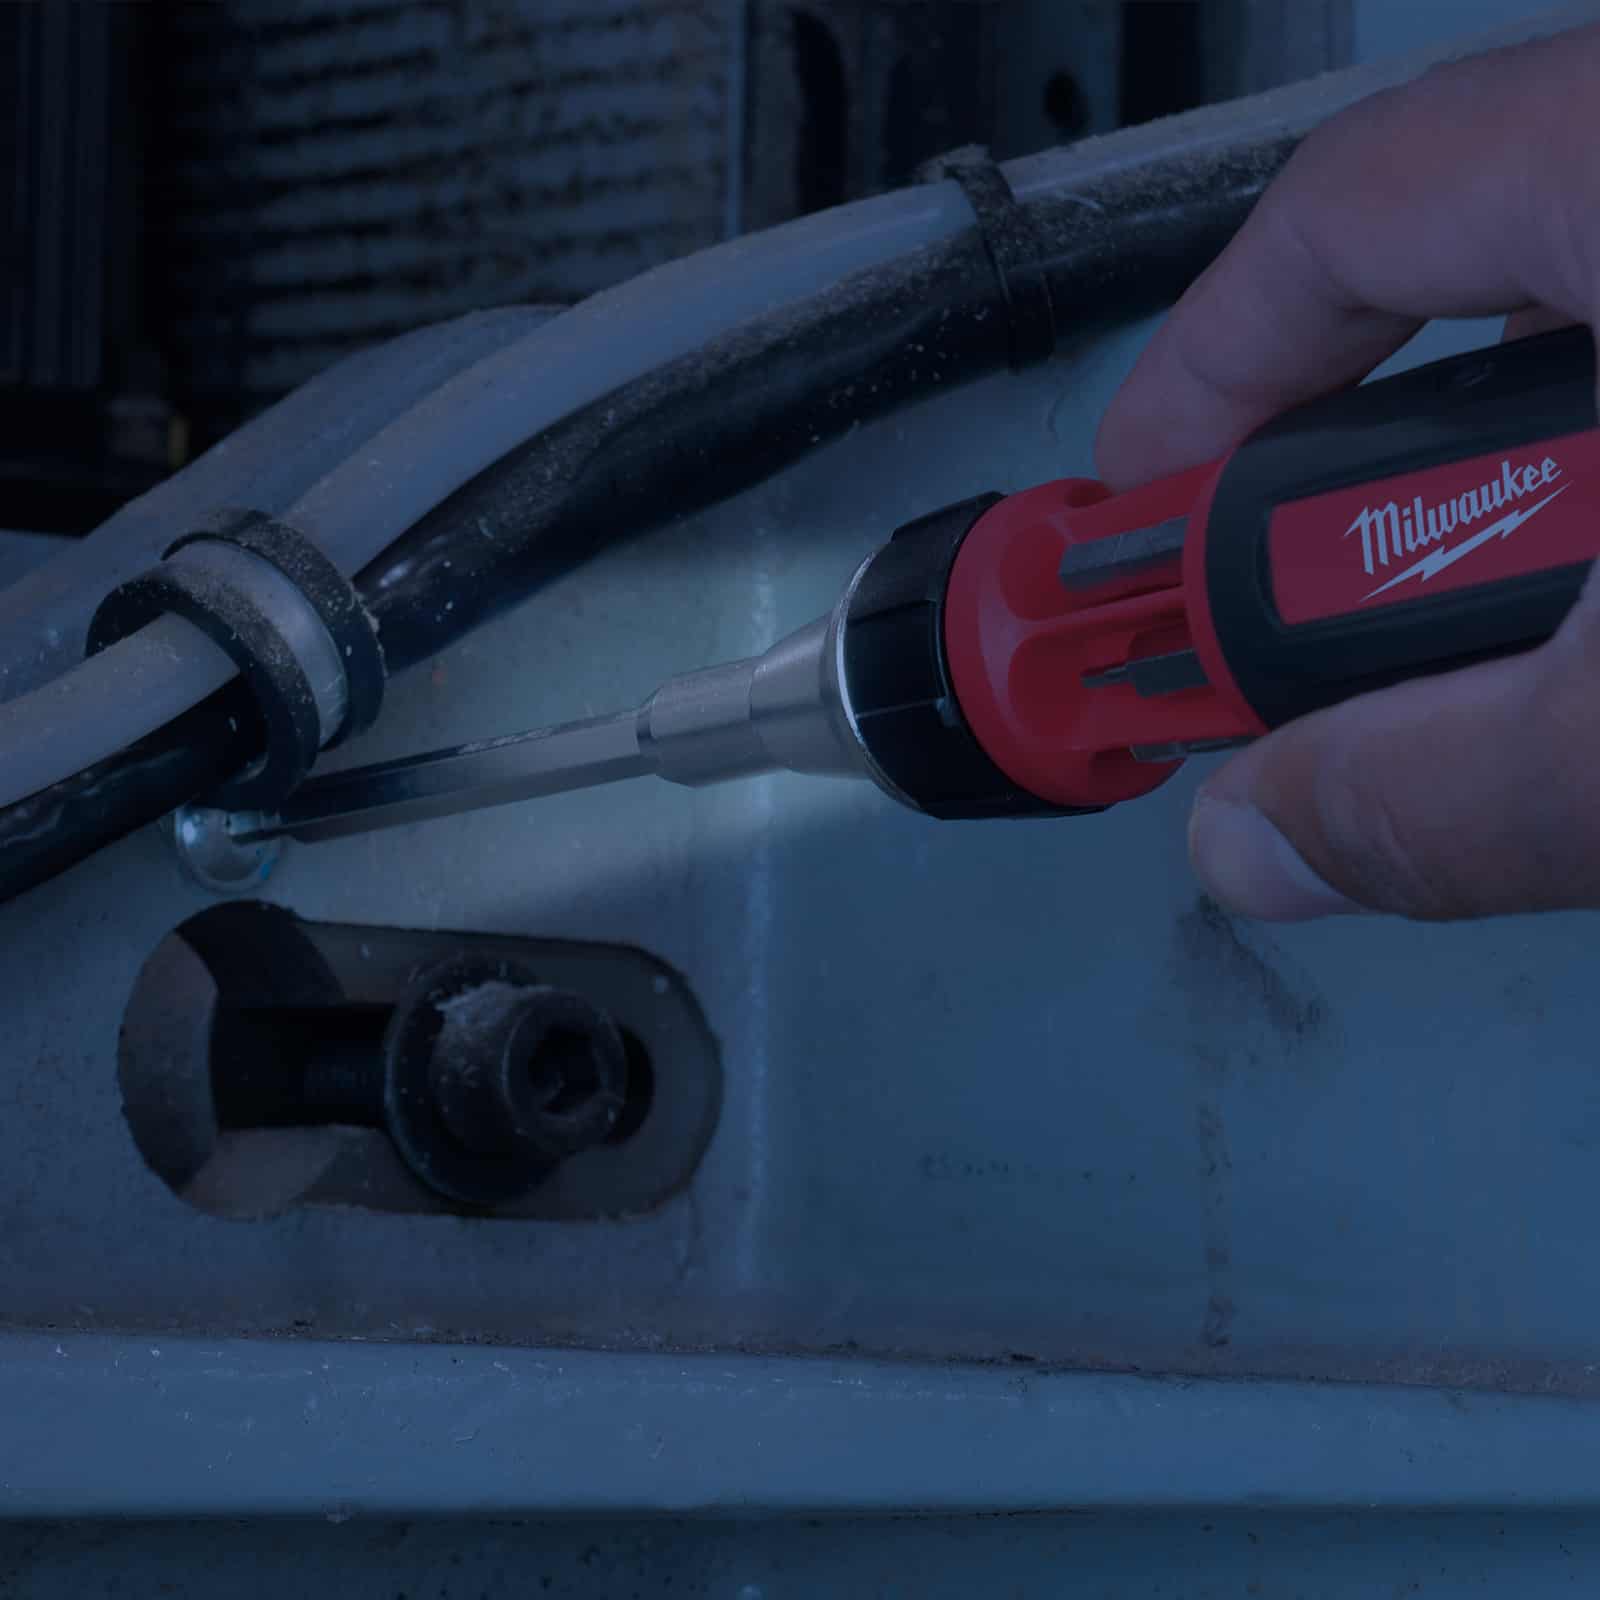
A quick light at the end of the screwdriver could help with those projects that are not in well-lit areas. https://www.familyhandyman.com

Adding a Light To Your Screwdriver

It can be hard to see what you’re screwing in if it’s behind something else or you’re in a dark room. Trying to add holding a flashlight in the other hand to the mix can just make it harder for you to get the job done. Instead, you can use a rubber band to secure a small flashlight to the screwdriver. Alternatively, you can tape a keychain flashlight to the handle of your screwdriver so that the light shines right where you need it. You also get to use both your hands, so you’re not accidentally dropping the screw all the time.

Photo Credit: Tooled-Up

You should never make it a habit to work in poorly lit conditions, so having a flashlight in your tool kit is always a good idea. If you have several sizes, this is even better. With this example, the smaller flashlight came in handy for the hard to reach spots. You can usually find small keychain flashlights at dollar stores – making this hack and completing your tool kit very affordable. That would also make an excellent gift for the handyman in your life. Remember this hack next time you are working in those smaller spaces.

Recycle those old wine corks and help your caulking gun in between uses. https://www.pinterest.com

Wine Corks Get a New Lease on Life

Caulking guns are great multi-purpose tools for taking care of leaks, making a house airtight, and finishing areas around tubs and sinks. However, after use, they can leak, or air can get into the nozzle and start to dry up the caulk. This neglect can create a hardened plug that has to be removed, or you need to purchase a new one. You can prevent that from happening by shoving a wine cork onto the end of the nozzle. You were going to throw it out after you finished that bottle of wine, so why not give it another use?

Photo Credit: Diy Chat Room

Putting the wine cork on the end of the nozzle creates an airtight seal at the end – it’s like putting a cap on a bottle or screwing on a lid. It not only saves your product, but it also saves you money by not having to replace dried-out caulk. With that money you save, it gives you another excuse to buy more wine as well. You never know when you may need the cork, so it’s best to have some on hand. This home hack is a win-win for everyone, so try it out next time you have any caulking to do.

Leftover carpet can assist your sawhorse from getting too rough. https://www.familyhandyman.com

New Saddles for Old Horses

Using a sawhorse is excellent when you have to take care of large projects you need to manipulate easily. Working on a table can make things awkward, and you can’t get to every part of what you’re working on, especially if you need to get underneath it. However, sawhorses can be rough and tend to scratch up your projects’ finish, which can ruin them. That’s why you should add a padded surface to your sawhorse. A simple strip of leftover carpet stapled onto it will get the job done, and you won’t have to worry about scratches.

Photo Credit: Spruce Austin

If you don’t have an old piece of carpet, any larger piece of fabric will make the top of the sawhorse smoother to work on. It should be a larger piece of fabric and a sturdy material. Blackout curtains or old jeans would work in this case. If you can’t cover the whole length, just center the fabric and staple it – most is better than none. Alternatively, reach out to friends and family to see if they have any scrap carpet as well. Try out this hack and see how much easier it makes doing projects at home.

Photo Credit: Family Handyman

Bobby Pins Aren’t Just For Hair

very time you’re hammering in a nail, you’re putting your fingers at risk of getting hit. No one wants a broken, purple finger at the end of the day. So pull out that box of bobby pins and put them to work. Slipping one around the shaft of a nail gives you a great way to hold them in place while you’re hammering, and your fingers are kept safe and out of the way. Once the nail has been hammered in securely enough, then you can remove the bobby pin. You should be able to tap it in gently enough to stay put.

Photo Credit: Family Handyman

You can use this hack for screws as well, and with the bobby pin being able to open easily, you can use this hack on many different size nails and screws. Bobby pins usually come in a package with 100 or more in them, and you can generally find them at your local dollar store for a dollar or two. Make sure you buy bobby pins for home projects and beauty projects, so no one is ever left without one! Try this hack out next time you need to nail or screw anything into the wall.

This plastic saucer may seem like an everyday item, but it can also help keep your home from wasting too much heating energy in the winter months. https://www.familyhandyman.com

Plastic Plant Dishes Keep Your House Warm

If you have circulated air conditioning, they may have those ceiling registers throughout your home. These help to remove warm air that floats to the top of the room. However, in winter, they’re also open access for cold air to come in and chill your home. You can nip that in the bud by buying a few clear plastic saucers that you use under flower pots to collect excess water. Add a little removable weather stripping to adhere to the ceiling over the registers temporarily, and your home will be toasty this winter.

Photo Credit: Youtube

You can do this type of hack in numerous ways around your home. You can seal windows, seal under doors, and even block off rooms entirely that you don’t use and that is poorly insulated. Heating can be costly, so anywhere that you can save will be a big help on your next bill. Keep an eye on any of these hacks that you use if something comes undone or you need to fix it – you don’t want to do all this work to find the tape came undone, and it was all for nothing. Use this hack in your home and see how much you save!

Photo Credit: Hicks House

A Bright, Colorful Door the Easy Way

Painting a door isn’t easy, and it can be hard to get at all the angles. You also tend to get an uneven job because paint can drip down the door, creating wet parts that take longer to dry. To hasten the job, you’ll want to get a sawhorse and some screws. Drive one screw into the middle of the door’s top edge and then two at each corner of the bottom edge. Then just set it on the sawhorse, paint one side, and then flip it over to paint the other. The excess will drip off, and you can get the entire door painted without waiting for the other side to dry.

Photo Credit: Hicks House

If you don’t have two sawhorses, you can use two sturdy chairs or tables that will also work. As long as you can move around the table in your workspace to paint both sides, then this is fine. To further ensure you don’t have any paint dripping down the door, make sure you are not overloading your brush with paint. It is okay if you need to use two coats of paint. Just make sure the first one is completely dry. Get all of your painting done quicker with this easy hack!

PVC pipes over the handles of pruning shears is a safe alternative for your trimming work. https://www.familyhandyman.com

Trim Those High Branches

It can be dangerous to get up on a tall ladder with a pair of sharp pruning shears in your hands. One slip and you could end up with a bloody accident or a broken bone. You can lengthen your grip, however, by adding some handles to your shears. Slip some PVC pipes over the handles and tape them into place, and you have an easier way to prune those smaller branches that don’t put you at as much risk. Make sure you use strong tape – like duct tape, to secure the pipes in place.

Photo Credit: Themocracy

This type of hack can be used for many applications. Any tool that needs the handle to be longer to increase the leverage is where you would use this hack. Getting more leverage also makes the task easier because you’re not using as much force. Think of a tight nut you need to loosen – if you have a more extended handle, you don’t need to use as much force to loosen it because the longer handle is doing the work. Not only does this hack make reaching places easier – it’s also making the chore itself easier. It’s a win-win!

Photo Credit: Bob Vila

Easy Carry With a Tarp

Your yard’s spring cleaning can be quite liberating to see all the new growth coming up and getting rid of the old stuff. Nevertheless, it can be tiring to walk back and forth with all those branches and dead leaves you’ve cleared out to put onto the burn pile or filling up leaf bags one by one. However, you can create one giant load. Instead, that’s not difficult to carry. Just get all of your debris situated on a large tarp and drag the thing behind you. It takes care of all the cleanup with only one journey.

Photo Credit: Chicago Canvas

The tarp method can be used to move all kinds of things around your yard as well. Think stones, lights, lawn furniture, wood, sand, mud, dirt, etc. As long as there aren’t any sharp edges sticking towards the ground, making the tarp hard to drag, and it’s not too heavy, then you should be good. Don’t overload it because then there could be a risk of injury, and you also don’t want your tarp to tear. Use this hack to clean up your yard this weekend and see how quick and easy yard work becomes!

You don’t need a brush for little touch-up jobs around the house. https://www.familyhandyman.com

Paint Touch-up Without Brush Cleanup

Maybe you’ve missed a spot on your wall, or someone accidentally scraped some of it off moving a box. You don’t want to break out the brush or roller to get the spot looking good as new again. Instead, get some old washcloths or rags you don’t want to keep anymore and dip them into the paint. Dab it on the wall and then toss it away or rinse it if you’re going to use it again in the future for another painting project. You may want to repeat the process a couple of times to match the wall.

Photo Credit: Youtube

When dabbing the marked spot on the wall, try to dab around it as well to blend the color into the wall. If you only wipe it in the marked area, it could become more noticeable. You want to “feather” out the edges to make a smooth blend with the wall. An old kitchen sponge may work for this as well if you don’t have any rags, or you could use an old pair of socks. It is always handy to keep extra rags around for hacks like this – you never know when you will need them!

Photo Credit: Family Handyman

No More Lost Socks

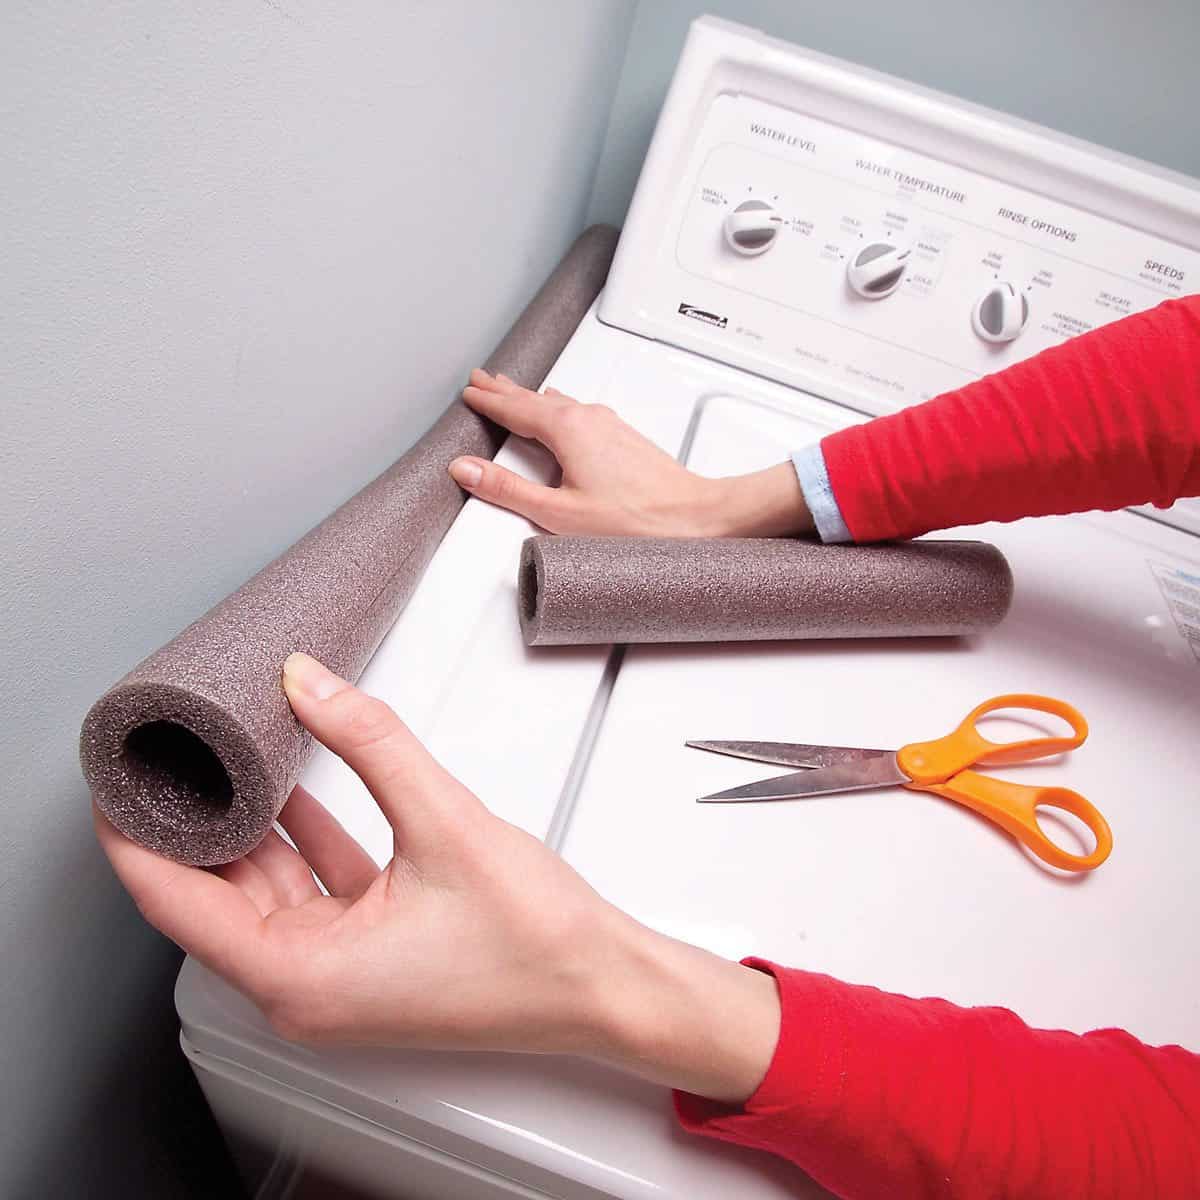
There’s no secret as to where those lost socks go: they’re behind or between your washer and dryer, and because they’re pushed back so close to the wall, it’s almost impossible to get them out. Stop the socks from falling beside your machines by adding some pipe insulation or pool noodles between your appliances and the walls. No more stockings slipping at that point, and your laundry is saved. It’s also a great way to stop your machines from hitting your walls when your laundry is off-balance, and having some clearance is recommended.

Photo Credit: Sharon R Hoover

Most appliances are white or black, so you can also paint them to match your machines. Anything long and soft will work for this hack, preferably if it’s in one solid piece – like a pool noodle. Unfortunately, pool noodles are often only available in the summer, so if you have space, try to remember to pick up a few extra when shopping. You can also use this hack if you are using stackable machines to protect your walls. Make sure to check around your appliances before using this hack. You don’t want to miss any pieces of clothing!

Photo Credit: Youtube

Sandpaper Storage

Never know what kind of sandpaper you have lying around? Want to prepare beforehand so that you don’t waste time making a trip to the store? Getting a filing box and sorting your sandpaper by grit size will keep everything in one place and bring your garage organization to the next level. Just write the grit number on the tabs, or use a label maker to mark the shelves and place them in the correct slot. That way, you will know how much you have, what you have, and when you need to buy more with a glance.

Photo Credit: Pinterest

You can often find old desktop filing organizers at thrift stores, or if you have scrap material laying around, you can make this a no-cost hack and use those up. You just need to make a box shape with multiple shelves inside. Also, use plastic baggies or paper clips to keep numerous sheets together and your smaller and round pieces together as well. That way, when you pull out a larger sheet, your smaller pieces don’t fall out as well. It keeps everything neat and tidy. Use, or make, this simple garage organization hack this weekend for all your sandpaper.

This PVC pipe contraption will help you clean up after your dog does its business. https://www.familyhandyman.com

PVC Poop Pipe

If you have dogs, then you’re likely picking up after them so that their poop isn’t ruining your lawn. However, if you don’t want to throw the bags into your trash can and stink up your garage, you can create a poop pipe outside. Stick a 4-inch PVC drain pipe into the ground and insert a plastic bag you want to use for collection. Use a rubber band to keep the bag in place and add an end cap to keep the smell at bay. Then when it’s garbage day, just remove the entire bag and its contents in one go and toss it into your garbage can.

Photo Credit: Camping Earth

If you have trouble visualizing this and have kids, think of it as a diaper genie for your dogs. Except, this is way more affordable or sometimes free if you have any extra items lying around in your garage. The only thing you need to worry about with this hack is forgetting about it – so make sure you have a reminder set on your phone or write a reminder on a sticky note and leave it on your garbage can(Don’t Forget Doggie Bag!). You will be surprised at how easy this hack makes this unpleasant chore.

Organizing paint with sticks can help remind you of what the finished project might look like. https://www.familyhandyman.com

Paint Organizing with Stir Sticks

Did you forget what that paint looks like when it’s dry? Maybe you don’t remember what color is in which can? Stir sticks can help you out, so you’ll never have to guess. When you’ve finished using a can of paint, keep the stir stick you used and let the paint dry. Then drill a hole into the handle and label it with the color that’s on the can for easy organization. Just hang the stick above the right can or tape it to the top of the can. That way, you won’t have to pull down every can of paint to find the right one or open multiple cans.

Photo Credit: Pinterest

Make sure you ask for extra stir sticks when you order any paint from hardware or general stores. They usually give them out for free and have no problem giving you a few extra with your paint purchase. Another good thing to write on the stir stick is the store you got the paint from, and the color on the label or the color name. That way, if you need to order more and don’t have the can, you have all the information you need. Did you ever think of a home hack like this one for your paint?

Oil that sits in your vehicles can cause a host of problems. https://www.familyhandyman.com

Catching That Excess Oil

Letting oil sit in your car, lawnmower, or snow blower is only going to lead to problems. When you’re not using these tools during certain times of the year, it’s best to drain the oil from them to keep the interior clean. However, getting rid of oil can create a mess. If you have any cereal boxes lying around, just cut off one side and fold it in half to create a trough. Then use it to guide the oil from the machine into a waste pan so that it doesn’t stain and ruin your garage floor.

Photo Credit: Gobdp

We suggest cereal boxes just because they are a good size, but you can use any product box that is the right size for the project you need. It’s best to use a “coated” box on the outside – most cereal boxes have many colors and are a bit sturdier. You can feel the boxes’ thickness and compare them to know which one is best to use. Use the thicker one to make sure it doesn’t fall apart right away. Try this hack out on your seasonal appliances this weekend!

Photo Credit: Home Tips

Getting Rid of the Sticky Stuff

Removing tape or anything that’s stuck can be hard on your fingernails, and they could end up leaving any residues behind. That gunk can lead to dirt and other grim getting stuck to the surface, too, and then your left with have a filthy mess. Instead, use a hairdryer and heat the tape or sticker so that the adhesive starts to melt. That makes it easier to pull it off without leaving a mess behind. You can use this method on glass, wood, metal, and just about any other surface. The key is to take your time and go slowly.

Photo Credit: The Spruce

After heating up, it’s best to try and get most of the residue off in one go, but you can repeat it multiple times. If you pull on the sticker or tape too quickly, it can rip and make the process more annoying. Try to remember to use this method before getting the item wet – like cups, for example. The sticker tag is harder to get off after you’ve washed it, and we often forget about it until it’s too late. Try this hack on the next items your purchase or on things around your home that you find.

Do not throw away your old drink packs because they could be useful. Shutterstock

Repurpose Old Six-Packs

Paint projects and other home improvement tasks tend to come up frequently, and you may find that you have a lot of stray bottles of spray paint, lubricants, and caulk that is waiting around for the next job to do. There can be a better way than to have the items strewn throughout your workspace. Consider repurposing a six-pack container and using it as a handy shop organizer. The pockets are the perfect size for the hand-held bottles, and your recycling project provides a built-in carrying holder to travel well to the next job you plan to tackle.

Photo Credit: Alibaba

These six-pack containers can also be used to organize other household items like cleaners. It will make underneath the sink tidier, and your things will be easier to find. Also, if you live in a house with multiple floors, having this handy cleaner caddy will make any chore a breeze. You can reinforce the bottom and the handle with duct tape, making this handy hack last longer as well. If you can, try to get a six-pack container that was once wet or moist, as the cardboard can break down quickly and can get moldy.

Plastic spray bottles have many uses when it comes to DIY projects. Shutterstock

Extra Uses For Spray Bottles

You probably have several spray bottles for cleaning and other purposes from around the house. One tip is to use a spray bottle when getting the water out of a copper pipe. Getting the water out is essential so that the solder will not melt. When you are soldering a fitting, stick the plastic tube down the pipe and pull the spray trigger – this will suck any water out. Other helpful ways to reuse plastic bottles are extending a sink spout onto your bathroom sink so young children can reach the water. You may need to cut the bottle to fit your faucet.

Photo Credit: Really Are You Serious

You can also create plastic bottle baskets, cell phones, napkin holders or pencil holders, or other desk organizers. The possibilities are endless! Any edges can be sharp, so make sure you either line the edges with tape or use sandpaper to dull the edges. Remember to use spray bottles for things other than cleaners as well – ditch the watering can and mist your plants, and use spray bottles to style your hair! Use a spray bottle in the summer filled with cold water to give yourself, others, and even your pets a refreshing cool mist.

Protect your floors from damage by using milk jugs for the heavy lifting. Shutterstock

Milk Jugs To Move Furniture

If you plan to move into a new house or are considering a change of pace in your living room, you will need to figure out how to move your heavy furniture without breaking your back. Dragging can be hard on the carpet, and you could damage the furniture’s legs. You can make homemade moving pads using discarded milk jugs. Cut the bottoms off four separate plastic water or milk jugs and put each one under each of the four furniture legs. The rounded bottoms are slippery enough to make the moving faster, easier, and safer for you.

Photo Credit: Family Handyman

If you are using an old milk jug, please rinse and wash it before use. With both a water or milk jug, make sure it is dry before putting it under your furniture legs, or else you could ruin your furniture. Once this heavier plastic is cut, it can be sharp, and you don’t want it cutting you or marking your furniture. You could line the edges with tape or give it a quick rub with some sandpaper. Give this fast and easy moving hack a try! It could save you some headaches on your next move.

Keep your garage looking neat after spray paint jobs by utilizing leftover cardboard boxes. Shutterstock

Cardboard Boxes Make Perfect Spray Booths

You can prevent the dreaded “overspray” from spray paint if you use a makeshift spray booth from a cardboard box. To make the spray booth, first cut a hole in the top of the box and cover the opening with a plastic wrap or a light fabric. Position a shop light to cause an illuminating spotlight for your project. Use coat hangers that are poked through the cardboard to hold and rotate the objects you are painting. This brilliant idea will help you keep your shop neater, and your paint projects will be thumbprint free.

Photo Credit: Youtube

The best part is that you don’t even need to purchase an oversized item to get the size box you need. Next time you are out shopping, ask an associate if they have any boxes you can have. Most stores recycle or throw away their packages so that you can get multiple sizes for free. Some stores will even save boxes for you or save a particular size box if you need it, so make sure to ask! If, for some reason, they can’t save boxes for you, some stores also sell moving boxes in various sizes for a reasonable price.

Jars can be handy tools to keep your hardware safe and secure. Shutterstock

Repurpose Peanut Butter Jars

Because they are plastic, peanut butter jars can be better storage options than glass baby food jars. The space provides more hardware to be placed inside, and the jars will not break as easily. After they are washed and cleaned up for their second use, attach the lids of the 28-ounce jars under a shelf with two screws so that the top cannot spin once it is loosened—next screw on the loaded jar. You can also cut away half of the jar with a utility knife for quicker access. What you need to put inside is totally up to you.

Photo Credit: Hack A Day

Anything that needs a tight, screw-on lid can be used with these jars. Think outside the kitchen. These could be used for smaller parts in the garage or holding small craft supplies. Also, you could cut a hole in the top and use it as a piggy bank. You can paint the plastic or leave it so you can see what’s inside. There are so many possibilities for this hack that the options are endless. Anyone in any household can use this. Have you ever thought of using an old peanut butter jar before?

If your kitchen lacks storage options, create more space savers using office desk storage baskets.

Add Desk Storage Baskets To Your Kitchen

You can use many desk filing storage baskets as a way to create more counter space in your kitchen. Many options on the market allow you to place and organize how you see fit. You can also attach magnets to your cabinets’ bottoms and the tops of your storage baskets for more available out-of-the-way space. Many baskets are already stackable, so if your not that craft, you can look for this type instead. Another option is to place things like your Keurig K-cups all in one ready-to-go basket. If you use baskets with drawers with a solid color, it can be a neater and cleaner look.

Photo Credit: Jolly Chic

Many dollar stores have stackable baskets for sale, or you can check out local thrift stores and yard sales. If your baskets are a solid color and you can’t see what’s in them, you can use labels to keep everything neat and organized. If you chose black and white baskets, they would go with any color scheme even if you decide to change it up. It is a good idea to get multiple sizes as well. Try out this affordable hack in your house!

Store your food in shoe organizers for easy accessibility. Shutterstock

Create Unique Pantry Options

If your pantry is a bit on the small side, hang a plastic pocket shoe organizer, and get ready to have your snacks easily seen and ready to eat. This unique option cuts down on the number of boxes taking up space in your pantry and helps you utilize real estate for more meal prep items. You can also place a rolling rack as another way to store your food items. Consider taking your items out of the boxes if you can – this can save you a ton of space! You can either label the bag or write on it with a sharpie.

Photo Credit: The Kitchn

Another tip if you are doing this, place bigger items further back and smaller items forward. That way you can see everything. You want to see everything so that you don’t forget about things in your pantry. It is also important to check dates on food or write dates on items you are taking out of the packaging. That way, you can use the older items first, and you are not wasting any food. This practice can be easily remembered using the acronym FIFO – First In First Out. Every couple of months, do an audit of your pantry. This affordable hack will look great in your kitchen!

Create a night look on your porch with glow-in-the-dark paint. Shutterstock

Use Glow-In-The-Dark Paint

It can be pricey to put outdoor lighting on your home, but you can achieve similar effects with a different kind of paint. Quality glow-in-the-dark paint can be applied to stepping stones, plant boxes, or other outdoor structures. You will save on labor and materials, and you will also create a certain kind of mood for your next gathering. If you have children, this can be a great activity for them to help out with. You could paint glow in the dark flowers to line a garden or paint a tic tac toe set for a fun outdoor game.

Photo Credit: Art N Glow

For rocks, you can find them anywhere outside, and it won’t cost you anything! You can even make that a game as well (you can collect the best rocks?). Flat stones will work best and give you more surface area to work with. Alternatively, if you are looking for other lighting alternatives – mason jars and planters would be a great option. You can find both at local thrift stores to save on money, and they fit into a rustic backyard theme nicely. If you drink any wine or beer, keep those bottles too and repurpose them for this project. Just wash them out first.

The answer to making your furniture long-lasting may be in your children’s coloring box. Shutterstock

Use Crayons To Hide Imperfections

If you want to keep your furniture, but it has seen better days, you may only need to go as far as your kid’s room to find the solution. Crayons can bring new life to sofa legs that have been scratched by cats or coffee tables that have been scuffed by scissors. All you would need to do is find the shade that best matches the wood finish and then soften the wax with a hairdryer. This hack also works by removing coloring marks on wallpaper. After covering the offending artwork with rubber cement and waiting for it to dry, roll off the rubbery glue from the wallpaper.

Photo Credit: This Old House

If you wait until August or September to do this hack, often larger stores will have jumbo packs of crayons on sale for the school year. You could also check out thrift stores. If you didn’t want to use your hairdryer, or the furniture is in a tricky spot not near an outlet, you can also heat up with wax with a lighter. If the box you have doesn’t quite match, try adding a tiny bit of yellow, black, white, or red to create your own custom wood color. Once you have filled in the area, don’t forget to wipe away any excess wax to finish the surface.

A pencil can be the ticket to solving the noisy step. Shutterstock

Silence Squeaky Steps

If your home has a persistent squeaky step, you can solve the problem with just a regular pencil. All you have to do is scrape some lead into the seam where the flat part( the step) and the back, or riser, meet. For this step, make sure you have sharp scissors or a newer razor, and be careful using these tools. You will then notice that the squeak will disappear. Be forewarned that this hack is temporary, as the pencil lead will eventually seep out of the joint. Just reapply later when it starts to screech again.

Photo Credit: Deviant Art

Also, make sure that when you are cleaning your stairs, you are not scrubbing away the lead you just put there. You could test this hack with different types of pencils as well. You will notice that standard pencils have HB2 or a similar variation of that written on them. That is the hardness of the lead, and the further you go up, H3, H4, etc., will be the more formidable lead. You may have to look in the arts and crafts sections of stores to find pencil kits for drawing and sketching with these different pencil types.

Photo Credit: Apartment Therapy

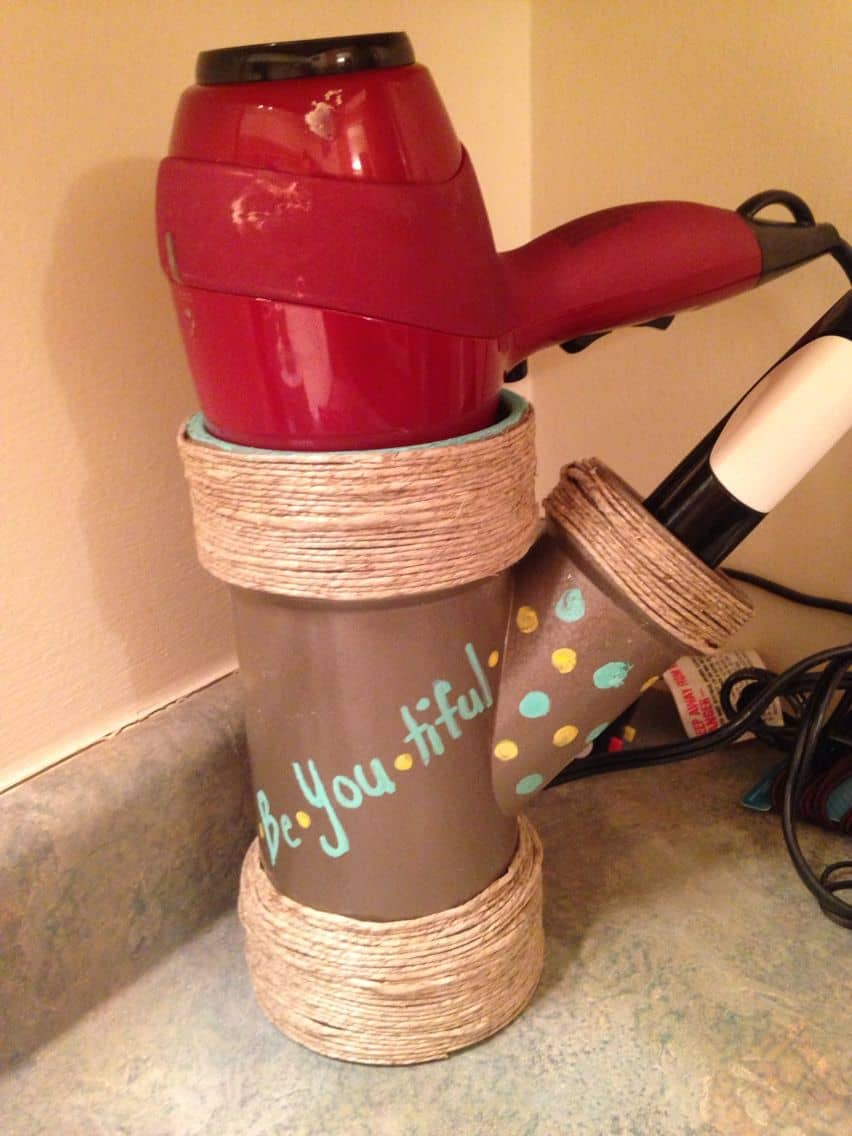
Use PVC pipes for Iron Curlers

Sometimes it’s hard to find a nice place to put curling irons. You don’t a mess of cables mixed with everything else in the bathroom. Also, it can be annoying to spend a lot of time untangling. Even when you spend some time organizing it, in no time, it can go back into having a big mess. When you’re in a rush and with very little time, it’s necessary to have everything accessible and ready to work. So here is a cheap and good DIY that doesn’t take a lot of time to get done. More importantly, it will make your life easier and mess-free.

Photo Credit: Pinterest

All you need is a hook-and-loop tape to attach a 5-inch length of 2″ PVC pipe to a vanity door or the place most accessible for you. You can do the same thing with 3-inch pieces of 1-½ inch in diameter pipe to hold all the cords. Just remember to measure your curling irons to figure out how long the holsters need to be, and you’re ready to go. You can make as many as you need and even use them for flat irons too. Moreover, if you want to make it even cooler, you can paint it and decorate it as you please!

Photo Credit: Delightfully Noted Blog

Keep Wrapping Paper in Place

It’s such a hassle opening the gift closet and finding all your gift wrapping paper rolls all over the place, especially when there are small pieces of paper that you want to save to use later. The typical answer to this problem would be to use tape to keep the roll in place, but then you damage the edge of the paper. Well, there is a straightforward and quick way to keep those rolls and the paper in place, so it’s always nice and not wrinkled or bent. Furthermore, we are here to teach you this neat trick that will not cost you a thing.

Photo Credit: Pinterest

All you need for this project is not to throw away the empty toilet paper tube. That is all. Then cut that empty toilet paper tube lengthwise and wrap it around the roll of gift wrapping paper. You can cinch it up and secure it with a piece of paper, but it is not necessary. So next time you need to wrap some gifts, all you need to do is remove the toilet paper roll sleeve, and that is it. So start saving all those empty tubes and keep everything in its place.

Photo Credit: Real Estate

Clean Your Oven with Two Ingredients

After a big family dinner, your oven might be messy with all that turkey fat and juices that sometimes can fall at the bottom and leave significant stains, and after all the food is done, that mess will give you a headache to clean up. There are chemicals and detergents that you can buy in the store that will do the job. However, what if there’s an easier and better way to clean it with two ingredients that you might already have in the pantry? And better yet, with minimal scrubbing too!

Photo Credit: Home Quicks

After the oven has cooled down, make a paste of baking soda with just a teaspoon of water, make as much as you think you’ll need, and then rub it all over the mess and leave it overnight. After that sat down for hours, take a spray bottle of equal parts water and vinegar, and spray it all over the surface of the oven. You’ll quickly see a chemical reaction between the baking soda and the vinegar will begin to bubble and break all that baked char. Spray as much as you need, especially in the problematic areas, and let it soak for about 15 minutes, and you’re done.

Photo Credit: People

Use Tape to Get Rid of Pet Hair

If you’re an animal lover, you know cats and dogs tend to leave a trail of hair wherever they sit. Furthermore, it’s a bit embarrassing letting your visit sit down on a hairy sofa. It can be a pain sometimes cleaning it depending on the fabric of your furniture. However, there’s always an easy solution for this problem without taking out the bulky vacuum from the closet, which will deal with Fluffy’s hair very quickly. If you read the title, you already know what you’ll need, but we’ll still explain it in-depth, just in case.

Photo Credit: Pinterest

Duct tape is the swiss army knife of the household. Moreover, in this case, all you need is to get a piece of it, wrap it in your hand, and clean away. You can also go the extra mile and make it even easier by getting a paint roller with a cover, wrapping the duct tape around it and roll it on your sofa. That also works perfectly for car seats in vehicles. It will also work to clean food crumbs or any dry mess that you might have on the sofa. Once the tape is full, replace it and keep it going.

Photo Credit: Southern Living

Say Goodbye to Garbage Disposal Odor with Citrus Peels

A disposer is an essential tool in the kitchen, but sometimes it can develop an odor from rotten food that might be stuck somewhere inside. Nevertheless, there’s an easy solution to clean it out with this easy 3 step hack. First, you need to keep the water running at medium force without turning on the disposer. Then drop in any citrus peel you have at hand, like orange, lemon, or grapefruit, and run the disposer for five seconds. The citric acid from the peels can soften the waste stuck in and attack smelly bacteria.

Photo Credit: The Spruce

After leaving the citrus acid to work for 15 minutes, turn on the water and the disposer once again. Next, drop in a couple of ice cubes. The flying shards of ice will work like a sandblaster and take care of the nasty crust left in the disposer. Moreover, finally, you need to run the water until the bowl is half full, pull the stopper, and turn the disposer on to flush it out, and now you can say goodbye to the bad smells and have a disposer squeaky clean and smelling wonderful.

Photo Credit: The Kitchn

Use Foil as a Hand Scrub Brush

Sometimes we need a little help to scrub out that cheesy crust that is glued to the pan of lasagna. However, we can’t find a good brush, and an ordinary sponge won’t do the job. Well, here is when the versatile foil comes in handy. We bet you have a roll saved in a dark drawer just waiting to be used for something unusual like making it into a scrubber. However, believe us when we tell you, you won’t regret it. Since you can mold it in any form you want, it can get in small crevices and difficult areas that a sponge might not get.

Photo Credit: Cnet

Foil can also go beyond food storage or scrubbing dirty dishes. It can also help you polish silver to look like new! You can use your favorite silver polish or a mixture of baking soda with a bit of water to make a paste, which will also work as a scrub with your new friend, the foil. Try it out next time you need something rougher to clean around the house. It’s such a versatile tool that is inexpensive,. Have you ever thought of using it this way? Trust us. You will not regret it.

Photo Credit: Business Insider

Blow Out the Garage

It’s time to clean and take out the dust bunnies from the garage or the storage room in style. Who needs a broom when you have a leaf blower staring at you and begging to be used! It will only take you a few minutes comparing it to sweeping, which might take you an hour, and you don’t need to move heavy stuff like furniture. You can use it on any surface that needs cleaning, like work surfaces and shelves along with the floor. Now, if you have things that might fly away, like that homework that you’ve been working on, it is vital to move before trying out this cleaning method.

Photo Credit: Amazon

Before starting your spring cleaning with that leaf blower, remember that safety is a priority. Wear a dust mask and safety glasses in case small debris gets in your face. Don’t forget to use earplugs, because the downside of this fast cleaning is that it will get loud. If you don’t own a leaf blower or can’t borrow one, you can also use a shop vacuum by connecting the hose to the exhaust port. This technique can also work for cleaning screen porches or a dusty storage room.

Photo Credit: maxuser/Shutterstock

Keep an Homeowner’s Journal

We are sure that everyone has had this moment where a kitchenware or washing machine dies, and you know it has an extended warranty but can’t find the receipt. Alternatively, how about the homeowner’s insurance you got? Furthermore, you need the papers handy and can’t find them between all the mail envelopes. Well, we got an excellent solution to keep your receipts and important documents organized and convenient for when you need them. It’s cheap and will save you so many headaches and time now that you know where to find it.

Photo Credit: Andrey_Popov/Shutterstock

Get yourself a ring binder and start labeling the tabs with whatever you think is essential to divide. That goes for grocery receipts, car repair papers, utility warranties, insurance, and anything other paper that you might go crazy looking for. If you are a coupon addict, this is also an excellent way to keep all those newspaper coupons organized. You can do it by type or alphabetic order. That way, it’s ready when you go shopping. Who does want things to be convenient to find? Having everything accessible in one place makes life easier for any homeowner. Furthermore, it can help you out if you are selling the house later.

Photo Credit: Amj Campbell

Stop the Squeaky Door Hinge

Nothing screams “haunted mansion vibes,” like having doors that squeak when you open or close. It is also a problem when you’re trying to be quiet after you arrive late at night home and don’t want to wake anyone up. That is especially so when it’s so loud that it can scare the ghost away. Thankfully for the ghosts, there’s a solution for this home problem that will make things less noisy and annoying. Over time hinges tend to get rusty, and sometimes, it just needs a little bit of maintenance and lubricant to make it work just like new.

Photo Credit: Wd40

You can get a lubricant, all-purpose lube, silicone spray, or dry Teflon spray in any hardware store, but if you need something quick, a little bit of cooking oil can work well, but it’s won’t last long. Just place it a little bit between the hinges, and that’s it, but if the squeaks persist, you can fix it the hard way by removing the hinge pins and rub any rust or corrosion in it with a wool pad and then give it a generous coat to the pins with the lubricant or lube before replacing them.

Photo Credit: Youtube

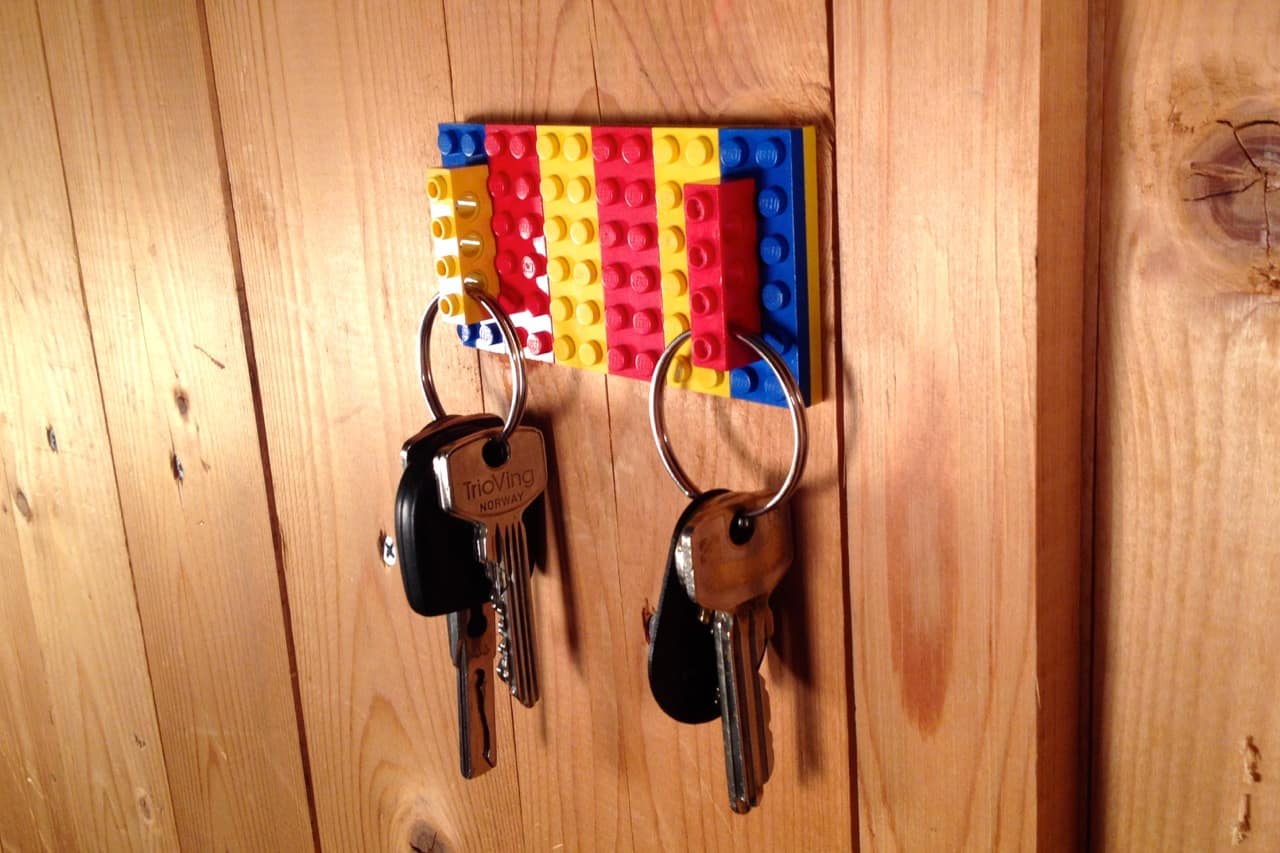
Paint your Keys

There’s nothing worse than being in a hurry to go to the bathroom, and you can’t find the right key to open the front door. It has happened to all of us in a moment of our lives. Over the years, your keyring will start to get bigger with many keys that you won’t remember what they open or if they have any use anymore. However, with this hack, you can leave that problem in the past. Just grab your favorite nail polishes, waterproof markers, and your creativity for this hack.

Photo Credit: Mon Makes Things

All you have to do is paint the top of every key with brightly colored nail polish, making sure that one side is dry before painting the other. Suppose you have too many to remember which color opens, which, you can use waterproof markers to identify each one. After you’re finished and the paint is dry, you can protect your masterpiece with some clear topcoat. If you might lose some of the paint over time, but you can always do touch-ups. Try using colors that might give you clues where the key might belong.

Photo Credit: Make Use Of

Make a Tablet Tray for your Kitchen

The internet is filled with amazing recipes that you can’t wait to make. However, finding a good place to rest your tablet to follow the instructions sometimes ends with your tablet dropping on the kitchen sink. You don’t want it getting splattered by that homemade spaghetti sauce you’re trying to make. More importantly, keep it away from your countertop. Here we will teach you a cool project to keep your tablet safe. At the same time, you will look cool to show off in your next family gathering. Even if it might look very complex to make, it is not, and here we are going to show you how.

Photo Credit: Make Use Of

This tray can swing down and forward, so the tablet isn’t hidden under the cabinet. It’s a simple mechanism that will position the arms exactly as it should be. Get yourself some pieces of plywood and measure it using your tablet. Cut some aluminum parts and round the corners with a grinder. Use small magnets glued to the bottom corners and the hiding place to hold up the tray when it’s closed. You can glue it using epoxy, which will hold it in its place. Then, you can use a foam placemat as a liner for the tray, which will keep your tablet from sliding off. Furthermore, now, you have a hidden tablet tray in your kitchen!

Photo Credit: Connect Coffee

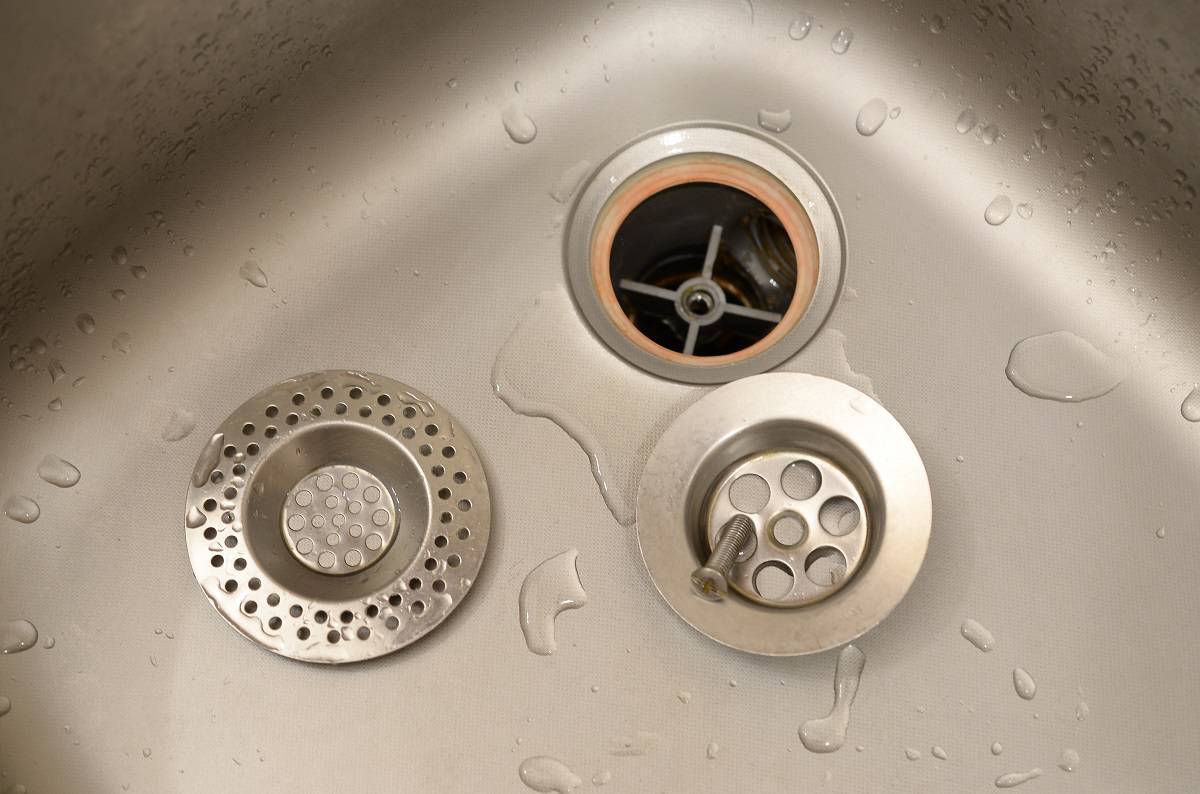
Use Coffee to Unclog the Sink

Your kitchen sink and tub are the easiest to get a clog, and sometimes it gets so bad that not even those store-bought unclog chemicals won’t do the job, and the last resort would be to call the plumber. However, what if we tell you there’s another thing you can use to get rid of that nasty clog? It’s one of those tricks that you never thought about, and we are sure you have in your pantry, not knowing you can use it for something greater. So here we teach you this neat trick that might save you that call to the plumber.

Photo Credit: Green Living Zone

All you need for this hack is coffee grounds. You can use the ones used for that cup of Joe in the morning, a dab of dish soap, and boiling water. Mix the coffee grounds with the soap. Then adding it into your drain, then quickly pour a lengthy pour of boiling water into it. The combination of all three ingredients will break up whatever is clogging the pipes. Plumbers and experts have recommended this technique. So next time you see the water taking a long time to go down the drain, do this neat trick to get it over with and forget taking that trip to the store.

Photo Credit: Instructables

Remove Candle Wax from Furniture

Has it ever happen to you that you’re having a nice candle dinner on the sofa and accidentally hit the candle, and the wax gets all over your clothes and couch? And then, you quickly try to clean it up and make a bigger mess by spreading the melted wax all over the place. Talk about a horrible clutter. Well, that’s not a problem anymore with this neat trick to clean it and leave the fabric as good as new. Follow these fail-proof steps that will also erase all stress away from ruining your favorite shirt.

Photo Credit: Homemade Simple

Instead of trying to scrape off the melted wax, have a little bit of patience and go to the kitchen, get a plastic bag, and fill it with ice cubes. Then place it over the wax and let it sit for a few minutes. Once the wax is completely solid and cooled down, you can easily pick it up, and that is it. Your fabric and furniture are saved from a nasty stain that not even taking it to a laundromat or stain specialist will take away. No more mess means a happier you and no more ruined sofa.

Photo Credit: The Kitchn

Utilize Vinegar as a Cleaning Tool

There’s not a single ingredient as versatile as vinegar. Not only is it great for making your favorite snacks like pickled cucumbers (I mean, you can pickle anything you want at this point) but also for cleaning around your home. So try out these new hacks to keep your home shining. Is your microwave smelling a bit funky? Well, vinegar is here to save the day. Just place a bowl of vinegar in the microwave for five minutes, and afterward, with a damp cloth, wipe everything off. If not a fan of the vinegar smell, you can also put a few doors of lemon juice, which will also help with the cleanup.

Photo Credit: The Spruce

The next trick is even more versatile, especially if you have a hard time trying to eliminate water stains on your mirrors and glasses. To make your mirrors and windows looking just like new, mix white vinegar with your favorite ammonia-based window cleaning fluid. Alternatively, if you want to keep it more natural and ammonia-free, you can use equal parts of cold water and vinegar in a spray bottle. Wipe everything with a clean microfiber cloth. For harder stains like inside the shower, you can spray and leave it on for a few minutes before removing it.

Photo Credit: Diy Projects

Create a Cutting Board Storage

This project is an excellent and easy space saver for your kitchen, especially if you have too many cutting boards running around and have no place to keep them handy. All you need for this is a ¼ inch thick acrylic plastic, or you can also use a piece of plywood or any other type of wood that you prefer. You will also need No. 14-8 crimp sleeves for spaces, which you can find in the electrical aisle at home improvement centers. If you can’t find any, you can also use any tube or wood blocks. Plus, a few screws depending on the thickness of the counter door that you’ll use for storage.

Photo Credit: Serious Eats

You’ll need to measure the space you have available and, using a table saw or circular saw, cut the acrylic or wood that you’ll need, always remembering to cut it slowly so that it doesn’t damage the plastic or wood. Use sandpaper to knock off the sharp edges after being cut. Round the lower corners with a belt sander or with softer sandpaper. Then assemble on the door using finish washers. You can make the sleeve as thick as you need it, depending on the board’s thickness or if you want to save more than one in one sleeve.

Photo Credit: Cs Hardware

Hide a Power Strip Inside a Drawer

In this day and age were tech help keep us connected and organized. Having a phone, tablet, e-reader, smartwatch, and laptop means that you need a few chargers to have around. Moreover, that also means that you might end up with a mess of cables all tangled together on your bedside. Having a power strip is the best solution to have everything in the same place instead of having them all around the house. However, you will want to hide it away so that everything looks presentable and mess-free.

Photo Credit: Hydrange A Tree House

All you need for this hack is a power strip and Velcro tape. There’s no many setups so that you can achieve this in just a few minutes. Your nightstand probably has a small gap above the back of the drawer. All you need to do is drill a hole in the back of the nightstand big enough to fit the power strip cord. Then, sneak out to the wall outlet, remembering to leave slack so the drawer can pull out completely. You can fasten the power strip safely to the bottom of the drawer. Use Velcro tape for stability and to make it easier to remove if you need to move it around the drawer.

Photo Credit: Pinterest

Build Pallett Storage in the Garage

Keeping all your home and garden equipment and tools organized in one place can be a hassle. You might have to spend a couple of bucks to buy outdoor organizers to keep everything in place, but we got you a very cheap option that will save you money and is very easy to do too, all it will take you is one hour to make this project a reality. All you need is to have a pallet around, or you can easily get one for free in a hardware center or any store. Just ask a store employee for help.

Photo Credit: Hgtv

All you need to do is attach a pallet to a fence, shed, or the walls of your garage. You’ll need screws long enough to go through both the pallet and the wall you are attaching it to. You don’t need too many screws. You can use two, one into each exposed wall stud. If you think it needs to be more sturdy, you can use more, but as soon as you put all your gardening and power tools on it, it’ll be very secured. You can even paint it to make it look nicer, or leave it as it is to make it rustic looking.

Photo Credit: Hydrange A Tree House

Disguise the Router

Routers can be an eyesore, especially if your house has a specific type of decoration with a router that looks out of place. Thankfully, we got two solutions for you that are very easy to do. The first one is to hide it in a box or an empty drawer in the living room. Get all the cables behind the drawer by drilling a hole behind the cabinet. Then put the router in, and you’re done! It’s a straightforward solution for it. However, if you want a nicer solution that might take a bit of time to do, then keep on reading.

Photo Credit: Amazon

For this project, you will need an old hardcover book or one you like, how it looks, and that the router can fit nicely inside, so it also needs to be big enough. Carefully take all the pages out using a knife if it’s too glued to the hardcover, or pull out the pages. Then cover the router with the hardcover, and voila! You got a hidden router that no one will notice, and it’ll go well in your living room or home office. You can even put something on top of the book to make it nicer.

Photo Credit: Insider

The Magical Invisible Bookshelf

Cast Winggarium Leviosa to your books with this cool looking bookshelf that will leave your friends in awe! For this project, you will need a book that you’re ok to destroy but one big enough to hold books of the same size or smaller, a good “L” shaped bracket, a carpet knife, pen, small wood screws with flat heads, a few large wood screws, wood glue, and a stack of books for weight. That might take a while, but in the end, you will be proud of what you’ll achieve.

Photo Credit: Pinterest

Measure the halfway point of the last page of your book and make a mark. Using the bracket, draw the outline and then cut a hole deep enough that the bracket will fit perfectly. Cut a notch for the” L” bracket so the book can sit against the wall. Then use the screws to secure the pages of the book together and attached, so they don’t rise and keep them in line. Glue the inside to hold the book’s bottom cover in place. Use the stack of books for pressure and leave it overnight. When it’s dried up, attach it to the wall using a Woodscrew. You can put books on top of it, and you’ll have a magical shelf that will make your friends questioned how you did it!

Photo Credit: Twitter

A Lego Keyholder

This cute project not only will keep your keys safely in one place so they won’t get lost but also your kids will love how cool it looks! This easy project will become a conversation starter with your friends and family. Just take a few Lego bricks in your favorite colors from your kid’s toybox to make the keychains. You will also need eyelet screws, split rings, small screws to attach to the wall or a heavy-duty double-sided mounting tape, and a Lego board in the color of your choosing. So here are the instructions for this hack.

Photo Credit: Larstube

For starters, let’s begin by drilling a hole into the base of a Lego brick that is slightly smaller than the screw portion of the eyelet screw. Then, wind the eyelet screw into the Lego and attach a split ring through the hole to make your keychain. Make as many as you need for everyone in your household. Next, we need to connect the Lego board to the wall or the surface that you preferred. For this, you need first to mark the board’s desired location and make sure that it is leveled. Drill pilot holes in all four corners of the Lego board and attach it to the wall.

Photo Credit: Family Handyman

Repurpose a Gutter as an Organizer

This cool trick will fix that frustration of not finding the tools that you need in that big toolbox that you have in your truck. This simple, quick hack will add as many compartments as you need to keep all your small screws and trinkets in their place in any tool bag. All you need is a PVC gutter downspout long enough to make as many compartments as you’ll need for your tool bag. You will also need a miter saw or power saw that you have around. Remember always to be cautious while working on this project, safety first.

Photo Credit: Angry Kitten Crafts

First, divide your PVC gutter downspout with a marker to make 5-inch sections. Then use the saw to cut them and sandpaper to use for every opening carefully, so it’s nice and smooth. Now that the hard part is over, all you need to do is arrange them vertically in a grid pattern inside the tool bag and glue them together with epoxy or a hot glue gun. This hack will also work to organize things small enough around the house, like paintbrushes and pencils for your arts and craft room or screwdrivers and small tools in the shed.

Photo Credit: College Info Geek

Get File Folders to De-clutter the Space

We are sure you have a few file folder organizers around your house that are collecting more dust than papers, and if you don’t have any, you can buy a few for cheap in office supply shops. That space under the sink is the perfect space to put all your kitchen cleaning supplies, but if you want to make use of that space, this is the ideal hack to have up your sleeve, and you don’t even need to do much to make it happen.

Photo Credit: The Balance

You will soon find that file folders can be used for more than just organizing papers around your house and office. To evade that clutter under your kitchen or bathroom sink, place all your kitchen cleaning supplies inside. Put the frequently used in the front so it’ll be easier to get. The cool thing about this is that if you need more than once, you can take the whole file folder out, and that’s it!. It’s so easy and satisfying that you might want to use the same hack to organize other things around your room.

Sources

https://www.familyhandyman.com/list/100-home-hacks-that-will-improve-your-life/

https://www.goodhousekeeping.com/home/cleaning/g4917/home-hacks-2017/?slide=3

https://thekrazycouponlady.com/tips/at-home/best-home-hacks

https://www.familyhandyman.com/list/organization-tips-for-your-kitchen/

https://bestlifeonline.com/easy-home-hacks/

https://www.apartmenttherapy.com/genius-idea-put-a-power-strip-inside-your-bedside-drawerreddit-179993

https://www.familyhandyman.com/list/organizing-hacks-for-cheapskates/

https://www.homedit.com/ingenious-ways-hide-things-plain-sight/

https://www.instructables.com/Invisible-Book-Shelf/

Advertisement