The Do’s and Don’ts of Properly Cleaning an Oven, the Heart of the Kitchen

Trista - March 6, 2020
Share

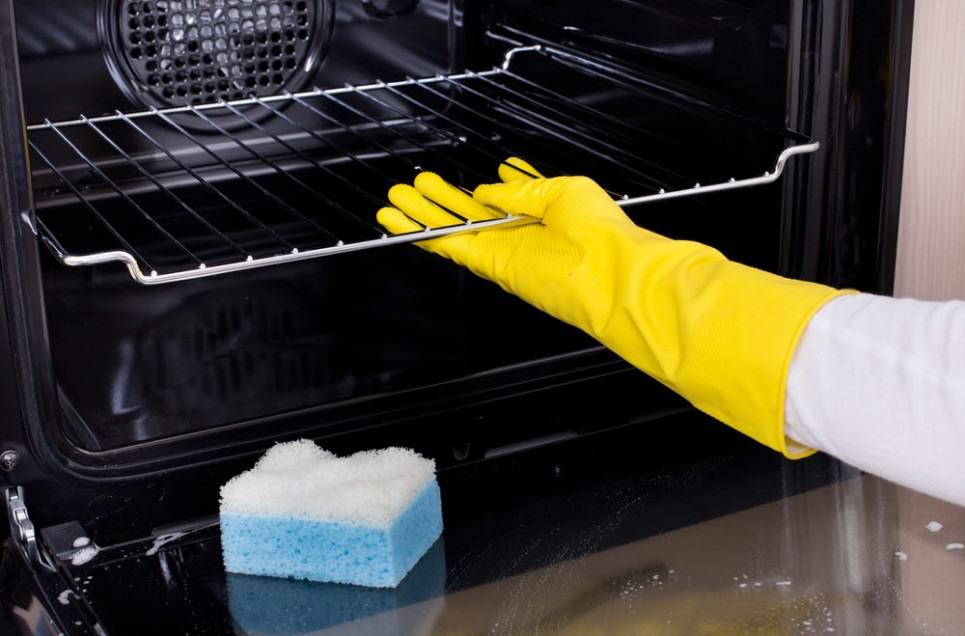
Cleaning an oven is one of the household chores that people tend to put off until there is so much burnt food on the bottom that the cleaning process seems impossible. While there are tricks that people discuss, such as placing a piece of aluminum foil at the bottom of the oven for easy clean-up, this can cause problems down the road. In fact, tin foil can get trap heat or send shocks and cause a fire. Therefore, it’s best to focus on cleaning your oven as often as possible, so you don’t have to deal with the stuck-on food.

Even if you are lucky enough to have a self-cleaning oven, there are still steps you need to take to insure your oven gets thoroughly clean. There is also the problem of cleaning the oven door, creases, and… did you just see splattered food between the glass of your oven door? How did that get there, and just how will you clean it? To find out the best way to clean an oven, because we all know it’s long overdue, continue reading.

In reality, it is time to stop pushing the oven cleaning to the back burner because food brings germs, and they will grow in an unclean oven. Shutterstock.

Cleaning Your Oven Regularly Is Important

It is not something people want to often, mainly because it has the word “cleaning” in it, but making sure you are cleaning your oven on a regular basis is more important than you think – especially for your health. While only a little cheese might have boiled over to the bottom of the oven or a few drops of BBQ sauce splattered on the door, these bits of food residue carries disease if they are not taken care of quickly.

Furthermore, the more you cook food in your oven, the more the food residue cooks and burns. In fact, if you are not careful or a piece of food lands on the heating element, it can catch on fire. It is also possible that grease and food residue makes its way into little cracks in the oven that can cause it to stop working well.

Germs from food residue can make their way into your evening meal. Shutterstock.

Cleaning Your Oven Will Decrease Germs And Hazards

Even though you learn that germs from leftover food residue can make their way into the food you are about to eat; you do not need to clean your oven after each use. While some people will wipe down or clean off any major food spills, and this is a good idea, you do not need to complete a full clean every night.

You want to simply take a warm rag and get all the larger pieces of food residue left from your meal once the oven is completely cooled. Not only will this stop spreading any germs and decrease any threats of a fire hazard, but you will also have an easier time when it comes to the full clean.

If your oven seems like it is on its way out, follow the directions in this article to make sure you give it a full clean. Most ovens will start working better after a thorough clean. Shutterstock.

Your Oven Will Work For A Longer Period Of Time

Is your oven only two years old, and you notice it isn’t working like it used to? You might see that food is taking longer to cook or that you are smelling something odd whenever you use your oven. One reason why your oven might not work is that you don’t clean it properly. You might think that cleaning the oven and door entails a full clean, but there are many corners and other tiny areas of your oven where food can get into.

When these small and somewhat hidden areas are not cleaned, your oven will slowly stop working – and it usually completely stops working right as you are starting the Thanksgiving meal, your family is waiting to eat. Then, there is all the company that you invited over for a holiday. To think that you can often stop this horror story just by making sure you clean your oven thoroughly.

Before you start cleaning, you always want to make sure that you have the right cleaning supplies. Shutterstock.

Your Oven Cleaning Shopping List

Are you even using the right oven cleaners to clean your oven correctly? Are there certain ones or other materials you need to get the job done thoroughly? There are dozens of great oven cleaners that are at the stores, and you can choose out of any of these, but you need to make sure that it will work well with your oven. For instance, if you have a lot of stuck-on food residue and grease, you will want to look more at the harsh cleaners and degreasers.

If you are an Amazon shopper, one of the best and affordable oven cleaners is the “Method Heavy Duty Kitchen Degreaser.” If you prefer stores like Wal-Mart, you can purchase the “Easy-Off Oven Cleaner.” Always remember you do not want to mix cleaners or use one after the other as they can have an adverse chemical reaction. Other cleaning supplies you will need are scrubbing sponges and microfiber cloths. You can also clean your oven with baking soda and vinegar, which is also discussed below.

You will know it is time to clean your oven when you notice how dirty it is at the bottom. However, the sides and oven door are essential too. Shutterstock.

Step 1: Analyze Your Oven To See Just How Dirty It Is

If you are like many other people in this world, you don’t want to think about how dirty your oven is. This is especially true for people who don’t clean their oven regularly. As a general rule of thumb, you should clean your oven every 3 to 6 months. However, if you don’t use your oven often, you can go a bit longer. If you use it every day, you will want to clean it as soon as you notice that it is a bit too dirty for comfort.

When looking to see how dirty your oven is, you want to look carefully. If you see your oven daily, you won’t realize all of the grease stains and splatters. What you often do see is the food residue at the bottom of the oven. Once you see these types of soils, it is time to clean.

Remember to remove all items from the oven. You don’t want to find yourself cleaning around racks or the grid. Shutterstock.

Step 2: Prepare For Your Oven Cleaning Adventure

Yes, you can turn cleaning your oven into an adventure, especially if it makes you a bit more motivated. Turn up the volume on your laptop and listen to your favorite music if necessary. However, what is truly meant by preparing to clean your oven is that you need to remove everything you can in your oven.

You do not need to take out the door, though some people do; you should remove the racks, boiler pan, and grid. Of course, if you store any type of baking supplies in your oven, you want to get rid of them as well. If you don’t use your oven much or you keep it as a storage compartment, as Frankie Heck does from the TV show “The Middle,” then you need to make sure to remove the blanket.

When cleaning your oven, you will start with the door frame and then work your way inside. Shutterstock.

Step 3: Start With The Frame Of The Door

You want to start cleaning by following the easiest path first. Look at it as a way to keep you motivated. When you see your oven just a bit cleaner after this step, you are more likely to continue cleaning, even if you know you will really need to scrub.

First, you don’t want to let cleaner or water enter any open areas on the door frame, such as the slots at the top that you can see when you open your oven door. Therefore, take a warm, damp cloth to start cleaning the door frame. Start with the edge and work your way into the inside of the oven, but stop at the 1 1/2 -inch mark.

Getting the crumbs will help with cleaning your oven because you won’t have to worry about them getting stuck in places they shouldn’t. Shutterstock.

Step 4: Go A Bit Further Into The Oven And Get Those Crumbs

Once you finish cleaning the edge of the oven door, you want to start focusing on the little bits of food that you can easily remove. All you need to do is wipe away any of the loose crumbs. Don’t worry if you get them on the floor because you will want to sweep and maybe wash your floor once you finish the oven. One of the most critical facts about removing the crumbs is they can scratch your oven and increase the presence of smoke.

Chrissy Hogie, the senior product marketing manager at KitchenAid, states that “Foods often react with porcelain at high temperatures, resulting in staining, etching, pitting, or faint white spots.” While this won’t bother with your oven’s performance, it is best to take the precaution and follow this little step. It really only takes about a minute or two.

Understanding your oven’s cleaning features, if they have any, is one of the most critical steps when it comes to cleaning your oven. Shutterstock.

Step 5: Understand That Some Ovens Require Specific Cleaning

Does your oven have a steam cleaning feature? If it does, you don’t want to use any type of additives or cleaners during the process. This doesn’t mean that you don’t need an oven cleaner in your home, but when you give your oven a thorough steam clean, you will want to stay away from the cleaners.

Self-cleaning ovens follow a similar path when it comes to not using cleaners, but the other steps are a bit different. Of course, if you have an oven where you need to do all of the dirty work, then you can use any cleaners that you chose to buy. While you might be wishing you have a self-cleaning oven, as you will see below, people with self-cleaning and steam cleaning ovens still need to do some work as well.

One of the best tips when it comes to cleaning your steam cleaning oven is that you can use lemon juice or vinegar on any callous spots. Shutterstock.

Step 6: Cleaning A Steam Clean Oven

There are two crucial points to remember about steam cleaning ovens. First, you do not want to use any chemicals before the steam cleaning process. Second, you need to remember that steam cleaning won’t take care of the problematic soils in the oven. It is not meant to do this. Sorry, I know you would love a stove that will clean every spotless, but this is simply not the case. Therefore, it is imperative to use the steam clean feature as soon as you notice a spill.

First, you will start the steam cleaning process by pouring 12 ounces of filtered or distilled water onto the bottom of the oven. Never use tap water as this will leave mineral deposits that will stay in your oven. Second, close the door all of the way and then press the “steam clean” button on your stove. It will take about an hour for the process to complete. Third, open the door and wipe out all the remaining water with a sponge. Use a nylon scrubber to get any leftover residue that is stuck in the oven.

If you clean the glass on your oven door before it is thoroughly cooked, it can break and shatter. Take your time when finishing up the cleaning process for a self-cleaning oven, so you know it’s cooled down all the way. Shutterstock.

Step 7: Cleaning A Self-Cleaning Oven

Once you have removed any crumbs and cleaned the edge of the oven door, you will want to make sure to close your oven door. Many self-cleaning ovens also come with a lock, which you need to latch before pushing the “self-cleaning” feature on your stove. Once you press this button, you let the oven do its thing, and this can take up to five hours. It really depends on how dirty your oven is. If there is a lot of stuck-on greases, then it will take longer. However, if it’s pretty clean, the process might only take three hours.

The lock will not unlatch until the oven is completely cooled from the self-cleaning process. Once you can open the door, take a damp cloth and remove any ash from the cleaning process, but you want to leave the glass part on the door alone until you are sure it is cooled completely. If you use a damp cloth on the glass, it will shatter if not sufficiently cooled.

Even though it takes a lot longer, using baking soda and vinegar is a favorite among many people. Shutterstock.

Step 8: Cleaning Your Oven With Baking Soda And Vinegar

If you do not have a self-cleaning or steam cleaning oven and want to skip the rather smelly and potentially dangerous chemicals, your best bet is to clean with baking soda and vinegar. First, you will want to invest in a pair of cleaning gloves, so you don’t get vinegar all over your hands. To make the solution, you will need to mix a ½ cup of baking soda and a few tablespoons of water into a small bowl. Once it looks like a spreadable paste, you can start to coat the inside of your oven. Make sure you do not touch the heating elements.

Let this mixture sit in your oven overnight or for 12 hours. Once the 12 hours are up, take a damp washcloth and wipe out as much of the solution as you can see. If you need to scrape pieces off of your oven, use a spatula. With some vinegar in a spray bottle, spray the oven, especially where there is still residue. Wipe the whole oven again. You can repeat this process until you know all the waste is gone.

The most significant factor to remember about using chemicals is that you don’t want to leave any in the oven and start cooking. The chemicals can seep into your food. Shutterstock.

Step 9: If You Use Chemicals

There are many people who don’t have self-cleaning or steam cleaning ovens nor the time to wait 12 or more hours to clean their ovens. If this sounds like you, the best step is to use the best chemicals that you can find. For instance, if you use the easy-off solution, you want to follow the first steps of wiping out the crumbs and cleaning the edge of the oven door. Then, you will spray the cleaning solution and follow the instructions provided on the bottle. Some cleaning solutions have you wait about 20 minutes until you wipe it out while others are just a few minutes.

When you wipe out the cleaning solution, you don’t want to use another chemical to do so. Start with a dry towel or rag and get as much out of the oven as you can. Then, take a damp washcloth and continue the cleaning process. Don’t use too much water, but make sure you don’t leave any chemicals in your oven. Use a spatula or scrubber to get the hard-on residue.

If you don’t want to clean your oven racks with boiling water, use the baking soda and vinegar mixture. Shutterstock.

Step 10: Clean The Other Pieces Before You Place Them Back Into The Oven

Before you place any metal racks back into your oven, you want to clean them as well as possible. The best way to do this is by soaking them in boiling water with dish soap. You can boil water on your stove and then pour it into your sink. Add a little dish soap and use a spoon or spatula to mix the water and soap.

It is also a good idea to wear a pair of rubber cleaning gloves, so the water doesn’t splash on your hands and fingers. However, you can also use the bathtub as this will give you much room when it comes to wiping down the racks. Because the shelves can be tough to clean, you want to let them soak for a few hours and then scrub them with a stiff brush. Rinse and let them dry before you place them back into the oven.

Cleaning between the glass on your oven door is a little easier than you might think. Shutterstock.

Step 11: Cleaning That Glass Oven Door

Many people feel that one of the toughest parts of cleaning their oven is the glass door. Some ovens only have a little window of glass, while others are all glass. Because the glass is easily scratched, you need to be more gentle than you are with your wire racks and not use any type of scrubber. The best way to clean your oven door is to use the baking soda and vinegar mixture. You will spread the mixture onto the glass generously, but do not pour. Then, you will let it sit for about 20 minutes. Do not shut the door, or the mixture will run down into the oven and cracks. If you have young children or pets, watch them carefully so they don’t get into the mix.

If your glass door has two pieces of glass, rest the door on your leg and unscrew the top of the door. This will give you the access you need to get the crumbs and spots between the glass. To clean this, use a damp rag. You can even use the hose on the vacuum if you have many crumbs you cannot reach. The most crucial part is that you keep the door resting on your leg, so nothing breaks.

Don’t forget about the outside of your oven and the kitchen floor, especially if you used cleaners. Shutterstock.

Step 12: Don’t Forget About The Knobs And Outside Of The Oven

You should never clean the knobs of your oven or stove with any type of cleaner. While this might be easier, especially if you have Lysol wipes, the liquid can get behind the knows and short out the control panel. Instead, take a rag and spray any cleaner onto it. If you use Lysol wipes, drain the cleaning solution out of the rags a bit, so they are not dripping but only damp. You can also use a cloth with warm, soapy water to do the trick.

You also want to remember to wipe down the outside of your oven, which is probably something you do more often. If you notice any crumbs on your kitchen floor, take a moment to sweep. If you used any cleaning solution, it is a good idea to take a wet rag and wipe the floor down by the oven, so no one slips, or the solution doesn’t stay on your kitchen floor.

Put your oven back together, but only the items that absolutely go into your oven. Shutterstock.

Step 13: The Final Step Of Putting Your Oven Back Together

Once you have finished cleaning, it is time to put the racks, broiler pan, and anything else back into your oven. This includes that blanket if you rarely use your oven – just remember to take it out before you or one of your children turns on the oven to make lunch!

But, really, you should follow all oven safety measures and never put anything flammable in your oven. Even pets can push buttons and turn on an oven or stove, and this can end in disaster. The only objects that should stay in your oven are the pieces that belong there, such as the racks.

Sources:

“Why is Cleaning Your Oven Important?” Cookers Solutions. May 2013.

“How To Clean an Oven with Baking Soda and Vinegar.” Gina Eykemans, The Kitchn. September 2019.

“Here’s How Often You Should Clean Your Oven—Plus the Easiest Way to Do It.” Wendy Rose Gould, Real Simple. May 2019.

“Here’s How to Actually Clean an Oven—Because It’s Probably Long Overdue.” Kelly Dawson, House Beautiful. June 2019.

“Simple Guide to Eco-Friendly Oven Cleaning.” Kate Walker, Down Linens.

Advertisement