Try these Reupholstery Projects this Weekend to Transform a Room

Trista - June 11, 2020
Share

Reupholstery is something that can give a piece of furniture a unique look, which can make your room stand out more. Reupholstery is the process of providing seats on furniture or other parts of furniture webbing, paddings, fabric, leather covers, and springs. It is something that many people will pay a lot of money because they believe it takes a lot of time and you need special skills to complete the work.

However, this is far from the truth. In fact, following the steps to reupholster a chair in this article will take about an hour of your time. Another benefit is it won’t break the bank because you can buy everything you need in your budget. By reupholstering your chair, you can make it look like a new piece of furniture and give your room a different look.

You don’t need a professional, and you can use nearly any type of fabric to reupholster your chair. Shutterstock.

The Time And Number Of Tools You Need Are Right Up Your Alley

It is easy to start thinking that you need about a dozen tools and hundreds of dollars when you walk into a reupholstery business and see the employees working. All of the fabric looks expensive, and they have tools all over their work area. Plus, they always talk about how busy they are, and they don’t know precisely how long it will take to get your chair done. Depending on how accessible the business is, you could wait a week or more for them to reupholster your chair.

But, you do not need to wait that long. People who have followed the directions in this article have reupholstered their piece of furniture within an hour. The more you practice reupholstery, the faster you become. Therefore, you could find yourself starting and finishing a chair within half an hour. On top of this, you only need three tools to reupholster your chair by following these steps.

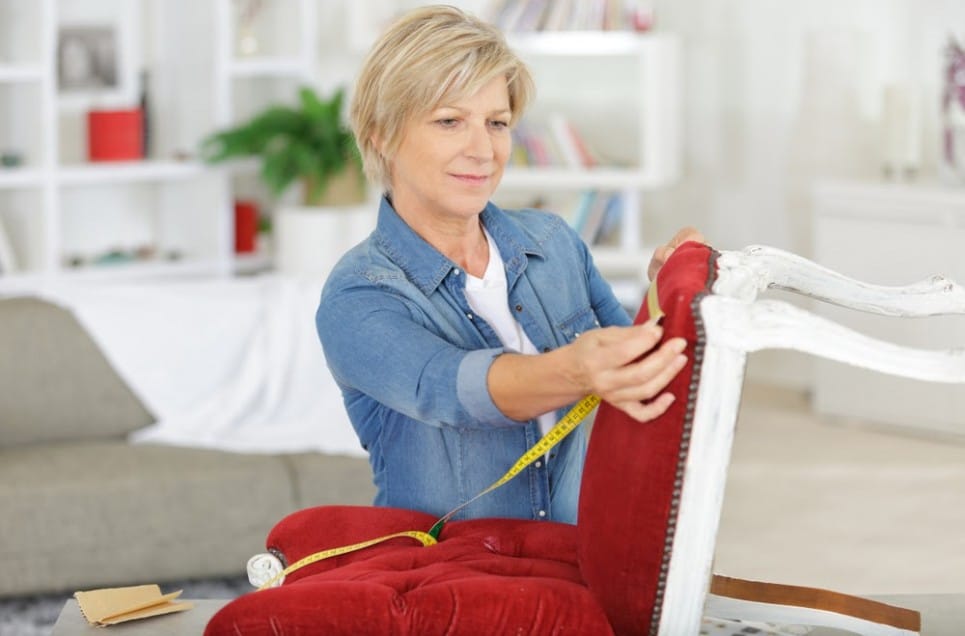
Pick a piece of furniture where the upholstered part can separate from the frame or base of the article. Shutterstock.

Step 1: Pick Your Piece Of Furniture

Like the other steps, the first step is pretty straightforward and one that you might have already completed. If you want to reupholster a piece of furniture, you know what one you want to focus on, such as a chair, a couch, or a bench, but you need to make sure it fits for the steps of this article.

The key to your first piece of furniture is you want to pick something square or rectangle. You also want to find a piece of furniture where the upholstered parts are separate from their bases or frames. If you are struggling to find a piece of furniture, flip it over and look at the staples that secure the fabric or the corners of the material. You might notice that there is a piece of cardboard, which is perfect. If you realize that you can easily take the bit apart, you have the best section of furniture.

The key is to make sure that the fabric will match the purpose of the chair, its location, and that you have enough material to cover the seat entirely. Shutterstock.

Step 2: It’s Time To Pick Out Your Fabric

This step can take you the longest time, especially if you can’t decide between specific patterns. You might want to have a reupholstered chair that gives your room a more antique look, or you might want a plain color, but what color? What patterns will work best for the room? What designs will match your other furniture the best? There are tons of questions that you can ask yourself when you are looking for the perfect piece of fabric.

There are certain features to think about when choosing your fabric. For instance, think of where you will put the furniture. If you use the chair in your dining room, look for material that won’t stain. If you are using it as a regular piece of furniture, think about where it will sit and what other pieces of furniture go with it. No matter what type of fabric you choose, make sure that you add four extra inches on each side.

Before you pick up the fabric, walk around your house and see if you need to purchase any of the tools. Of course, they are widespread, so you might get to borrow them from a friend or neighbor if you don’t have them available. Shutterstock.

Step 3: Get Your Tools Together

Before you go shopping for fabric, you want to take a look around your house and see if you need to pick up any tools for your project. You only need three tools, so making sure that you have them or not is pretty simple – as long as you know where the tools are kept.

The three tools you will need for this project include a scissor, a staple gun, and a flat-head screwdriver. Pretty simple, huh? The key is to make sure that your staple gun has staples in it, and you have enough for your chair. You can get an estimate of this by counting the staples that are already a part of the furniture.

Sometimes the screws can be stubborn to take out; in this case, you can use some tricks to help you loosen the screws. Shutterstock.

Step 4: Take The Screws Out Of The Chair

You might start to have fun at this point, especially if you like to disassemble furniture. It’s pretty easy to take apart a chair, especially if it is an older chair where the seat is held together by screws. All you need to do is turn the chair over and look for the screws. Once you locate them, gently unscrew them so you can start taking apart the chair. This might be difficult because the screws are tight and might seem stuck. Do your best to take it easy and be as careful as possible, so you don’t wreck the wood.

If you have too much trouble removing the screws, try a different screwdriver, or make sure the driver has an excellent grip. If your fingers are slipping, the grip might be the problem. You can also try to add lubricant, such as WD-40. Give the screws a good bath with it and then try again after several minutes. Another tip to release stubborn screws is to get a hammer. As you are trying to get the screw out with the screwdriver, take a hammer and tap the end of the driver as you turn it.

When you take the staples out of the chair, you want to put them into a trash bag right away, so you don’t hurt yourself by stepping on them later. Shutterstock.

Step 5: Take The Staples Out Of The Bottom Of The Seat

When you flip over the chair and look at the bottom of the seat, you will see several staples that are holding the fabric to the chair. You need to remove these staples carefully to take the old material off of the chair seat. If you have a staple remover, this is the best step to take. But you need to realize that the staples are bigger than the ones used to hold paper together and can be hard to remove. If you don’t have a staple remover, you can use the tip of a flat head screwdriver.

The most crucial step is to make sure you throw the staples away immediately. It is easy to place them next to you on the floor and clean them up when you are done. However, this is dangerous because you can step on a staple, get one in your knee, or not collect all of them and step on them later. Once you have removed all the staples, you can remove the old fabric from the chair.

If the padding isn’t good, now is the perfect time to replace it. Shutterstock.

Step 6: Replacing The Chair’s Padding

You don’t have to replace the padding in the chair, but because you are reupholstering the chair, it is a good idea to put on new padding. Of course, if the padding is still good, then you don’t need to worry about it. As long as you don’t see any signs of mold or mildew, replacing the padding isn’t necessary. Another reason to replace the padding is when there are dark spots. They don’t have to be large spots because small spots can quickly grow into larger ones.

To replace the padding, you simply cut a piece of batting that will fit on the seat. Adding a layer of muslin on top will give you extra padding, which is always helpful if you will sit on the chair for an extended period. Plus, an additional layer will make the chair more comfortable for your guests.

Measure your fabric in any way you want, but make sure you have at least an extra 4 inches on each side. Shutterstock.

Step 7: Measure And Set Your Fabric In Place

Don’t worry about this step if you aren’t good at measuring because you can use the seat to help guide you. All you need to do is find a flat surface to lay the upholstering piece down and then place your fabric on top. You also need to ensure that the material is facing the right direction when you measure.

Remember to give yourself about 4 inches extra on each side. Of course, if you want to be precise, you can always take a measuring tape and measure the upholstering piece and then use these numbers to see how much to cut off your new fabric. If you want to double-check your measuring, you can also compare the old material to the new fabric and make sure that they are not too different. Don’t worry if your new material is larger; it is good to have a little extra material on the sides.

While you want to pull the fabric tightly when you staple, you don’t want to lose track of how much material you are pulling up, so the other end becomes too short. Shutterstock.

Step 8: Now, It Is Time To Staple The Fabric To The Piece You Are Upholstering

Once you have your padding in place, you will lay your fabric on top and flip the chair over so you can start stapling the fabric to the chair. You will want to pull tight, but not tight enough to create a problem with your material. Securing the first staple might pose a challenge because you are trying to keep the other edges from getting too short around the chair.

When you secure the first staple, you will want to be about 1/2 inch from the edge of the wood. Each time you staple along the first side, you will lift the fabric tightly. Try to keep the staples as even as possible, as this will help you keep the fabric even on all sides of the chair. Another trick is to lift the opposite side of the material while you are pulling on the side you are stapling.

Take your time when learning how to create a crisp corner, and don’t get frustrated if you need to take out the staple and try again. Shutterstock.

Step 9: Fold Your First Edge To Create A Crisp Corner

One of the biggest problems that people have when they upholster their first piece of furniture is completing the corners. Some people like to dig into their Christmas wrapping skills. However, if you struggle with this, it’s best you find another method when creating crips corners for your upholstered pieces.

The best way to get the crisp corners that people desire is first to fold the edge of your fabric at an angle. You will then secure one side before securing the other side on top of the angle. Take your time when you are trying to create your corners, and remember there is nothing wrong with a little trial and error. More importantly, your staple can always be removed if you find that your angle isn’t done well enough. It doesn’t matter how many times you need to remove your staple; people won’t see the bottom of your chair.

Once you get started stapling, don’t stop! It will go quicker than you imagined, and soon you are well on your way to seeing how the fabric looks on your new chair. Shutterstock.

Step 10: Continue To Staple, Fold, And Crisp Your Corners Until The Fabric Is tightly On

Now it is time to do your best to follow steps 8 and 9 until you have the fabric securely on the chair. Starting with one end, working to one corner, and then securing the crisp for the corner as well as possible sometimes takes the longest part. However, once you complete your first side and corner, you will find that the rest of the chair is easy.

Once you have finished stapling all of the sides and corners, take a good look at the chair. If you notice that you need to redo an angle or you missed stapling a part of the chair, go ahead and fix it.

It is now time to start putting the finishing touches on your upholstery by trimming the extra fabric. Shutterstock.

Step 11: Take Time To Trim Your Fabric Carefully

The main reason that you keep an extra 4 inches on all sides of the fabric is, so you know you have enough. While it is not error-proof, you are less likely to run out of material on the sides while pulling and stapling. Of course, if you notice that one end is a bit too short, it is easy to take out the staples and try again.

When you are finished with step 10, you will notice that there is a lot of extra fabric hanging on the bottom of the chair. There is no need for this fabric, and you can easily trim it off without ruining the upholstery, taking out staples, or ripping the fabric. The key is you don’t want to trim so close to the staple that the material starts to fray around it. Therefore, it is best to keep at least an inch of fabric past the staple.

When you are reattaching your chair, you want to make sure you tighten the screws well, so your chair holds together and isn’t wobbly. Shutterstock.

Step 12: Reattach Your Seat And Put Your Chair Back Together

It is finally time to put your chair back together and see the completed project. I hope you remembered to take a before picture so you can see how much change can happen just by reupholstering your chair! It is incredible what simply changing the fabric can do when it comes to making a chair a unique piece of furniture in your home.

All you need to do to reattach your chair is the opposite steps that you performed when you took it apart. Start by placing the seat back into its frame. Once this is secure, you will put your chair back together by placing the screws back into its slots. Make sure the screws are tight, so the chair stays together.

Step back from your DIY project just for a minute to be proud of all the hard work you put in to reupholster your chair. Shutterstock.

Take A Moment To Be Proud Of All Your Hard Work

Even though it takes less than an hour (in most cases), you still worked hard to reupholster your chair, and you need to be proud of yourself. Take a moment to admire your hard work. If you took a before picture, notice the difference that the fabric makes in the room and how it makes your chair look as good as new.

Don’t be shy when it comes to sharing your new reupholstered chair on social media. Share away! Take pictures and send them to your friends and family. They might ask you to help them with a chair, or you might find yourself a new hobby. To think of all the other furniture you have around your house that you can reupholster. You can even go to the thrift store and buy a set of kitchen chairs when they come in. It doesn’t matter if the fabric doesn’t match because you know how to make it match.

While you can pick any pattern you want, it is essential to realize that some designs can become warped. Stripes can become twisted when you pull, especially if the seat of the chair is round. Shutterstock.

Tip For Picking Your Pattern

According to some of the reupholstering professionals, one of the most common mistakes people make is choosing stripes for chairs that have a round seat. While it is possible to do, especially if you want to, it doesn’t always look the best once it is put together. While there is no harm in taking apart the chair again and switching the fabric, you can start to damage the chair if you take it apart too much, especially if it is an older chair.

The biggest problem with stripes, and sometimes specific patterns, for rounded chairs, is that when you stretch the fabric to staple it, the design can get a little twisted. It might look nice at first, but once you have the finished product, you will notice how the stripes are crooked.

Always strip the old fabric before reupholstering with the new material, or you will need to do the process again within a couple of months. Shutterstock.

To Make Sure Your Job Looks Professional, Always Strip The Old Fabric

When you ask a professional what a lousy job looks like, they will tell you it is when people don’t strip the old fabric. Instead, they put their new material over the old material and try to pass it off as a reupholstered piece of furniture.

While you might not tell right away that a new piece of fabric is over the top, within a few months, it will become pronounced and uncomfortable. The cotton underneath the new material will start to bunch up, and the seat will become bumpy. The moral of the story is that if you want a comfortable chair for an extended period, you will strip the old fabric, replace the padding, and then put on the new material.

Don’t be ashamed to ask for a partner in crime when you are working on your first upholstery project. Shutterstock.

It’s Not A Bad Idea To Have A Partner For Your First Project

While you can do the project by yourself, as the steps show, it’s not a bad idea to ask someone to help you. When it comes to your first upholstery project, pulling and tugging on the fabric and making sure that you don’t short end the other sides can become a frustration for some people.

With another set of hands, you can have one person hold the opposite side, and you will both pull at the same time. As they continue to hold the opposite side, you will staple the side and then repeat the process for the next side. They don’t need to help you throughout the whole project but can come in handy for a couple of minutes or so.

Cheaper fabric is just as good as the more expensive fabric. Shutterstock.

Always Remember That The Most Expensive Fabric Doesn’t Mean It Is The Best

You don’t need to purchase expensive fabric to make your reupholstered chair look okay. You can easily buy a great pattern cheaply and make it look brand new. One reason that you want to stay away from more expensive fabric is that you will spend a lot more on the material than you need to.

Think about it; if you spend about $10 on every yard of fabric you purchase, you will quickly spend more than you would buying a new chair at the store. While this does depend on what piece of furniture you are working on, some furniture takes a lot more fabric than others. Always think about your budget and do the math when you are trying to save a few dollars.

Sources:

“The Absolute Easiest Way to Reupholster Furniture.” Hadley Keller, House Beautiful. September 2019.

“How to Reupholster a Chair.” Better Homes & Gardens.

“4 Guaranteed Tricks To Remove Stubborn Screws.” Scott Sidler, The Craftsman Blog. April 2014.

“14 Reupholstery Tips From a Pro.” Real Simple. August 2014.

“Top 10 Upholstery Tips.” Brooke Ulrich, All Things Thrifty.

Advertisement