Awesome Indoor Photography Ideas To Do from Home

Trista - January 4, 2021
Share

Whether you are cooped up in the house because it is too hot or cold outside, or there’s an international pandemic outside, you have to find ways to entertain yourself. Why not try your hand at photography and see what you come up with? You may be surprised at how different angles and different lighting settings can create entirely different moods! You will need some photography basics: a camera, a tripod, and photo editing software like Photoshop. Get ready to learn some fun photography ideas that you can try at home. Your friends and family will wow at your awesome photos. You don’t have to tell them your editing secrets, unless you want! From capturing mesmerizing light patterns to amazing water droplets, you can make professional-like images. Do you want to take close-up shots of food or jewels? Keep reading to learn 40 ways to re-create amazing indoor photography ideas.

40. Clone yourself, or your pet, or anything you want!

These editing trick works with anything and can be funny if appropriately executed. Shutterstock

To pull this nifty trick, you’ll need to make sure you get a shot of the background you want to clone your subject against, whether it’s a couch, a wall, or a painting. The camera’s angle must not move so you can layer each image on top of each other. If you are taking pictures of yourself, make sure you have a timer too! You can be in the same outfit or change it up between takes. 

Shutterstock

Once you have all the poses you want, start layering them in your photo editing software. That is where shooting from the same angle comes in handy. If the cloned images overlap, start from the back of the photo, spatially speaking, and add them on top of each other until you are satisfied with the result. Don’t forget to add any other effects or filters with the editing software – make your photos as soft and warm or bold and stark as you want them to be. You can tell quite an interesting story with this technique! 

39. Create a beautiful, soft-focus lighting effect with something called “bokeh.”

Make your photos look so much more unforgettable with this blurred light effect and almost no effort! Shutterstock

For photography beginners, bokeh is the soft, out-of-focus effect in a photo or photo background you see when using a fast lens. It is a pleasing, aesthetic quality of a blur instead of a badly taken photo, so don’t mistake the two! It often indicates a whimsical, romantic mood in an image, so capitalize on that when using the bokeh effect in any of your photos. To create this effect, you will need lights, a long, fast lens, and the subject you want to shoot.

Shutterstock

Make sure there is a long distance between your subject and the lights, which creates a blur. Different size lenses will create different shapes and sizes of bokeh, so feel free to experiment with the effects you can make. The camera focuses on the subject you photograph, and the blur then is created in contrast. You can use colored Christmas lights for a colorful background or warm white lights for a more romantic mood. 

38. Trick all your friends into thinking you are magic and can make cameras levitate.

It is hard to refute photographic evidence that magic is indeed real! Shutterstock

This effect’s technique is similar to the cloning effect seen in the first photo idea: it’s a composite of two photos. In the first photo, take a picture of your background. Please take a picture of your camera (or whichever levitating object you choose to suspend magically) on a tripod at the same angle for the second photo. It should also be as close to the same lighting as possible while posing next to it, behind it, or in whichever pose you choose to show off your magical skills.

Shutterstock

Stack both images in your photo editing software and erase the tripod or stand from the second frame, revealing the empty background below. Combine the two photos, and voila! Magic. Another, less tedious way of doing this is to secure your camera with a fishing wire to something above you and photograph it. The wire should not appear on camera, eliminating the need for additional editing, but where’s the fun in that?

37. Create your own smoke and steam patterns by swirling the air around with a fan or even your hands! 

Though we may not think about it often, smoke and steam are very aesthetically pleasing, so why not take advantage of that? Shutterstock

There are many possibilities with creating images using smoke or steam. Cooking provides an endless stream of opportunities, from coffee and other hot beverages to fresh meals out of the oven, to just creating smoke with incense or candles! If the kitchen is too hot, head to the bathroom for a steamy shower – droplets on the shower door with a steamy background may make for a more interesting photo than you realize! Just make sure you are working with a clean surface, no matter what you choose as your realm. 

Shutterstock

To best capture the smoke or steam on camera, you’ll want to use a strong neutral light from the side – top lighting will not work in this case! Think about which colors to use in your photos – do you want a dark, moody photo or a bright, colorful photo? Also, put some thought into which props you want to use in the shot. Don’t forget to use a fan if you need to capture steam or smoke movement! If you have old windows, glass or mirrors laying around, you can make some pretty cool images!

36. Mirror image pictures can be a great way to play around with lighting, angles, and different subjects.

Mirror images are super trendy these days, and you can see them all over social media. Shutterstock

For best results with this kind of shot, use a single color backdrop like black or white. Though you can make it a simple reflected item, you can change the reflection for an added impact. Make your big dog reflect a chihuahua, or make your full plate reflect an empty, ‘happy plate,’ for example. These photos could be as sweet, touching, or as creepy as you wish! No matter which way you choose to go with the subject matter, make sure your area is clean and you aren’t capturing anything you do not want to include in the photo. 

Shutterstock

Play around with where the mirror is, too! If you want to, you can place a large mirror below your item and change how visible it is to create an illusion. Ensure you and your camera are angled enough to the side or from the top to avoid reflection. Lighting is crucial in a reflection photo; it can make a huge difference because of the glare a light source can create. You can find a lot of really cool lighting options and enhancers on Amazon. 

35. Double exposure images are a great – and easy – way to show off your photo editing talents! 

The days of realizing you shot over the same film twice are gone, but you can get the same cool effect with intentional double exposure images. Shutterstock

Some newer DSLR cameras provide a multiple exposure mode, though it can be challenging to master, and not everyone has access to such an advanced camera. Do not let that stop you, though – start with whatever tools you have at your disposal. Many video tutorials are available online, and even beginners can follow most of them, so do not be afraid to attempt this. After all, how are you going to master it if you don’t start?

Shutterstock

To create this kind of image with just your camera and your editing software, make sure your two images are high-contrast (light and dark, for example). Layer them over each other and blend them, playing with their opacity to your desired effect. For additional features, you can add a “mask” effect to specific areas to undo the opacity filter wherever you’d want precise details of one image to come through. There are so many possibilities to play around with when overlaying two images! 

34. Splashing objects into the water can create an aesthetically appealing image, so use colorful things and splash away!

To create a similar image, you don’t even need to use fruit — you can use whichever objects you want! The fun is in the splashing effect! Shutterstock

You’ll need a solid-colored background and a large enough clear tub that you can photograph through for this type of image. This can be a great way to mix up your social media and get creative. Make sure your flash is coming from an angle to avoid glare or reflection – you’ll need to shoot at an angle as well. Try a few test shots before the splashing begins – you do not want to waste your time figuring settings out when you’re ready to start! 

Shutterstock

Professional cameras with quick shutter speed are ideal for something like this, as you’ll have better focus and a sharper image instead of blurry fruits (or whichever objects you choose to capture). This type of shot typically indicates freshness and vitality, so vary the background color and even the color of the water or the fruits to create different kinds of images you take and the emotions you invoke. 

33. Light painting is fun and doesn’t need many supplies. 

The possibilities are endless with light painting. You can think of all the colors, illustrations, and backgrounds you can add together! Shutterstock

The most important thing to have with light painting is, obviously, a light source. You’ll need to set your camera up on a tripod and set up a long exposure in manual mode. You may need to experiment with your settings, timing, and lighting a bit, but it is so worth it! Set your focus on your subject with autofocus, then switch to manual focus and lock it there. Have your light source ready for painting, whether it’s sparklers, an LED light, or your phone. Keep moving to avoid appearing as a definite shape, and dark clothes against a dark background work best to avoid showing up in your image.

Shutterstock

The general way to do this is to set your camera up on a tripod, and in manual mode, set a long exposure. A tripod is pretty essential for long exposure because camera shake can ruin a photo. Even if it’s the slightest movement. It can take a while to get the settings just right, but a few experiments on either side of 10 seconds should be a great starting point. You want to set your focus on your subject and then switch to manual focus. Lock everything down. Then you’re going to want to get your light source at the ready. Set a timer before the image begins to give you some time. Turn off or dim the lights (experiment what works best), then get painting. You can trace around an existing item or draw whatever you want! 

32. There’s no ‘right’ way to do this – art is subjective! 

Don’t be afraid to add artistic effects to plain photos to create more interesting images. Shutterstock

Though this is more labor-intensive than some other types of photography and editing, consider it a labor of love. Turn your photos into sketches, pop art, or even paintings. It’s your world! As we have mentioned before, there are no rules! As long as you come up with something you genuinely love or even have enjoyed the process, then that is enough.

Shutterstock

For the best canvas, take a picture from a distance with a zoomed-in lens. That will flatten the image and make it easier to turn it into a sketch instead of worrying about 3D elements. Once you are working on your photo editing software, add pops of color, change it to black and white, or add effects wherever you see fit! For inspiration, turn to your favorite artists. What Would Picasso Do?

31. High-speed photography can be challenging to master, but it results in a beautiful shot once it is. 

The difference between dull, regular photography and dynamic photos can sometimes just be the shutter speed! Shutterstock

We have all tried to capture some kind of shot in motion with varying degrees of success. The level of our success often does not necessarily. reflect our talent. But the speed of the camera shutter we are using is important. Phone cameras, while relatively high in resolution today, do not always have a high shutter speed. Different lenses carry different speeds, too, so brush up on your lens knowledge if you want to explore this field more. 

Shutterstock

Shutter speed is the length of time the camera shutter stays open, exposing the camera sensor to light. Basically, it means that’s the length of time your camera spends taking a photograph. The point of focusing on that aspect is that it freezes motion in that fraction of a second, so you can capture exactly what liquid or powder looks like, for example. With practice, you can learn which angles and lighting are the best for that kind of shot. The faster the shutter speed, the more movements you can capture. The slower shutter speeds are great for shots like waterfalls – but always use a tripod for slow shutter speeds. 

30. Reflections and refractions are bound only by your imagination. Try using glass, water, and any other surfaces to create exciting illusions.

Playing with reflections and refractions can create endless opportunities – subjects can range from yourself to the most random inanimate objects in your household! Shutterstock

Light bends when it passes through water and will distort the image of whatever else you are looking at. With that effect, you can create impressive photos with less work than you imagine! For this photoshoot, you’ll need several containers or vases, a flashgun, a tripod, or a stable surface for your camera, and a pattern for your background. Vary the water levels in your containers for different refractive effects, and place your subject (or yourself) behind them.

Shutterstock

You can also create this without water – you’ll just need the right kind of prism or glass. An optical prism must be transparent with a flat, polished counter that can refract light. At least one of its surfaces must be angled to refract the light and be considered a prism, but that doesn’t matter for photography purposes! You can even use eyeglasses for a forced perspective! As we said, the possibilities are endless. 

29. Macro photography has countless avenues of photography- including soap film!

Soap film photos are interesting enough to be printed and put on any wall! Shutterstock

Macro photography is just what it sounds like: extreme close-up photography, typically of tiny subjects or organisms. Your photography subjects do not always have to be living beings; however, we see with this project! You do not even need context to create a beautiful or aesthetically pleasing photo – sometimes beautiful colors and strong backgrounds will draw our eyes in no matter what.

Shutterstock

If you are interested in shooting your own soap film photos, you will need to mix liquid soap with glycerin. That will make it last long enough for you to take multiple shots instead of the bubbles fading away quickly. You will also need something to agitate the soap with (like a wire or length of yarn or string), a black fabric background, and a macro lens of a minimum of 100mm. The colors of the soap film will only be visible at certain angles, but that’s part of the magic! Make sure you are north-lit and take photos at approximately 45 degrees.

28. Though similar in concept to the soap film, the process for oil reflection photos are different. 

Based on the color palettes you use and even the types of oil you use, you could create many droplets and photos with this project! Shutterstock

These oil reflection photos are created using a cover above the light instead of a background or printed pattern. Create a cover for your light source from acetate, cardboard, and tape. Colored acetate can create different environments, though it is not required. White or neutral backgrounds can work just as well. Attach your cover with the tape but make sure not to touch the bulb, as they can get hot. Turn it off if you are not using it — safety first.

Shutterstock

Drop oil onto your acetate cover and mix drops of water – the two will not mix, of course, but their presence will create a fascinating mosaic. With practice, you will be able to drop the two in a way that may work to create a signature look! Once you get comfortable with this technique, try dropping in other elements and see how they react, like vinegar, coarse salt, or colored spices! 

27. Though this is a quintessential ‘waterdrop’ image, recreating it is much harder, and therefore more satisfying than you think it is. 

You may have to MacGyver this to create the setup, but accomplishing a shot like this is so worth it! Shutterstock

If this is something you want to tackle, you will need two water containers. One large one will be the ‘pool’ of water, and the smaller one will be the dripping source. You will need to pay attention to when the water is dripping – this is important. You cannot set it up as a constant stream, as that will prevent the crucial ‘splash’ you are looking for. 

Shutterstock

Insider tip: use a mix of water and Xanthan gum, which will make the solution more viscous and allow for a longer splash and ‘tail’ of water. Pay special attention to your light source and shutter speed! Once you are in your photo editing software, consider creating different colors for different droplets or adding hues to your photo. Dabbling in color saturation may result in a better picture than you initially captured because of the amount of control you can exercise. 

26. Feathers can be mesmerizing with their range of colors and patterns. They are the ultimate subject! 

There is something strangely calming about looking at photos of feathers, so why not create them? Shutterstock

Though this entry was initially going to be about macro feather photography, there really should be no limit to how you use feathers in your photography. Stack them on top of each other to create a pattern, or recreate a bird’s wing, drip water droplets on them, photograph them floating through the air – they are beautiful in every shot. Take your feathers on an experimental photoshoot and see which set of photos you like best.

Shutterstock

In a macro feather shoot, you can take a close-up of the feather. The center vein creates a strong contrast to the downy smoothness of the rest of it. Vary the background color to create different shots and increase the feather’s versatility as a subject. You can make the background similar to the feather for a softer aesthetic or contrast them for a bolder look. Don’t forget to saturate the feather colors in your software – you don’t want it to look faded or dull in your final work!

25. You can capture the beauty of everyday life in your home! 

There is something very satisfying about the stillness of glass captured in a photo. Shutterstock

For images like this, glasses can be stacked in different heights, different colors, or perfect uniformity. There are no rules! You can create beautiful lines and reflections – just make sure the glasses are clear from smudges and don’t have scratches or cracks unless intentional. Think about how you want your final photo to look – do you want it to be colorful, or do you want a mysterious black and white photo? 

Shutterstock

Some of the most impressive pictures in this genre have the glasses in a row, which creates lines that visually overlap. You can even place colored liquids in some of the drinks for colorful photos or vary the water level in them! If you angle your light just right, could you create a prism effect? You’d have a two-for-one shot there, and that’s a real winner. Or perhaps you’d prefer some bokeh in the background?

24. Sometimes, seeing scenes of profound beauty makes us want to capture them forever. 

Though you may think you need the weather to cooperate for this shot to work, we have ways to work around that! Shutterstock

If you can see a captivating scene outside your own window, you can create the right setting with nothing more than your camera and a spray bottle, and maybe a bit of patience. Mist the outside of your chosen window with a generous helping of water, then wait for the perfect lighting to capture the right moment. Maybe Mother Nature has already rained on the window enough for you that you don’t need to mist the window – either way, grab your camera and get to work. 

Shutterstock

It does not have to be sunset, of course. You can use the sun peeking through the clouds or Christmas lights as dusk – whatever you want to preserve as a memory and is meaningful to you! Honestly, it does not matter if the photo background is not entirely clear; the glimpses we see in the scene are enough to keep the viewer engaged while adding an exciting filter.

23. Kitchen close-up shots are perfect for decorating your dining area, and you can take pride that they were your own work! 

You do not have to be a chef to pull off these delicious shots! Shutterstock

A kitchen is an excellent place for photography. You have an endless array of shiny surfaces so that reflections can create fun backgrounds. Decorate the kitchen with your beautiful creations on the table and the walls! Whether you’re a fan of chaotic images or love the organized structure of patterns, there’s an image you can create to your liking. Pick out your favorite ingredients and get up close with them! 

Shutterstock

Try taking pictures of steaming hot beverages, dripping honey, or lush green herbs. Even close-ups of spices can be intriguing! Keep the composition of your background in mind, of course, and make sure your photos have a clean, finished look rather than just a hasty, put-together feel. If you want to be in the pictures, set your camera’s timer and get an action shot of you at work in the kitchen, making your favorite dish. Alternatively, perhaps get a before and after of your favorite meal! 

22. Though flowers in ice aren’t exactly something we tend to have in our freezer, the pre-planning for this shot is well worth the extra effort.

Talk about unique ideas! This one is an eye-catching photo. Shutterstock

To create a similar photo, you will need to freeze fresh flowers in ice cube trays (or whichever containers you choose) with distilled or de-ionized water, as that water freezes more clearly than tap water. However, the flowers will float over the water, so you will need to try to secure them to stay at the bottom of the ice. To do so, try to use medium-sized flowers, or place the flower face-down (or stem-side up) and use the bottom side of the cube once they are frozen.

Shutterstock

Once they are frozen and ready for their close-up, you will need to put them on a surface that allows light to come through or behind them and take the pictures from the opposite side to make sure they are fully illuminated. You will need to act quickly, though, as the ice will not last long! Also, consider taking close-up or macro shots of the flowers on the ice. The texture of the frozen water combined with the petals creates a stunning image!

21. Coffee and chocolate and two things that are readily available in most households, so why not use them for a little photoshoot?

If this image doesn’t make your mouth water, you are a stronger person than most of us. Shutterstock

An excellent challenge for indoor photography is taking one object and using it for multiple pictures, like a coffee cup. You could photograph it steaming hot, foaming with a nice milk froth, add some sweets, cinnamon, and chocolate to it, sprinkle some whole coffee beans and add some greenery to it – do whatever you want! Incorporate other elements as you see fit – vintage spoons, colorful mugs, or striped tablecloths can all add new and tasteful touches to your photo.

Shutterstock

Change the backgrounds from light pastels to dark, moody earth tones and see what difference it makes. Add other beverages around the cup of coffee, like milk or cream, for a different set of shots. Sprinkle sugar around for appealing sparkle, as long as you get the right lighting. Be thoughtful about where you place your other elements, as the colors of these elements can change the photo’s composition.

20. Amp up the nostalgia with any retro items you may have lying around the house. 

Any vintage items around the house would be great for still life photos. Shutterstock

Take different shots of your vintage furniture, clothing, watches, or any items you may have in various compositions. Try aligning them differently until you have the right image. Do not forget that your photo editing software will help tremendously adjust the photo to the right color filters and saturation levels you may be looking for. Imperfections aren’t bad – they are part of the item! 

Shutterstock

In classic compositions, photos included precise vertical and horizontal axes, so keep that in mind if you are looking to recreate images that are true to classic form. Otherwise, just play around until the photo feels right to you. You do not need to follow traditional forms if this is just for fun! 

19. We all love taking pictures of flower bouquets. They are beautiful, and we want to keep the image preserved, but most bouquets tend to look the same after a while. 

Pictures of bouquets are beautiful, but what about a deconstructed bouquet? Shutterstock

Deconstructing is all the rage these days: deconstructed cakes, deconstructed sandwiches. Instead of taking a picture of a bouquet, why not take a picture of a deconstructed bouquet? To do this, disassemble a bouquet (or simply pick flowers from your garden) and lay them out on the solid color background. Make sure the color is not similar to the flowers, as you do want a decent contrast here. 

Shutterstock

Throw in a wicker basket or vase and some greenery like eucalyptus or ferns, plus a roll of ribbon for extra whimsy. Then you need scissors or clippers, and you are all set! That would be an excellent time to utilize the Rule of Threes, as you do not want to create a blocked shot. Use your photo editing software to enhance your floral colors if you desire.

18. Out of focus shots are not what we think of when we think about photography, but they add an artistic flair! 

Though this photo is out of focus, there is no doubt about what it is. Shutterstock

There are no rules for this photoshoot option. You have full freedom to use your creativity and make something beautiful. Try taking an out of focus photo of a silhouette, for example. Selective focusing is a basic technique in which the photographer selects a specific subject or object to focus on and uses a shallow depth of field to create a sharp focus on it while blurring everything else. In doing this, the attention of the viewer is drawn to the sharp image.

Shutterstock

You could also intentionally blur the entire photo; again, there are no rules! Keep in mind that the sharper image does not always have to be at the forefront of the picture – it could be anywhere in the photo. This kind of photography is different from bokeh, which is out of focus lights in the background. Look at you, learning all types of photography terms! 

17. Your pet could be your very own model – and you can pay them in treats! 

Many of us treat our pets like babies, so why not have a pet photoshoot? Shutterstock

You can photograph them in pretty much any setting, and they will be perfect: at the window, outside, sitting pretty for a treat – they are the ideal models. Work with different lighting and accessories for different looks. Try the couch for a lazy day feel, or have them pose to figure out what their online dating profile picture would look like. 

Shutterstock

Take a close-up of their eyes using a little bit of flash and a shallow depth of field, and don’t forget to make it a fun process for them! Use treats, squeaky toys, tennis balls, or their favorite stuffed animal to keep their attention on you. Cheese is always a favorite for most dogs – so cube a block up and treat them to a tiny portion every time they give you the “blue steel.”

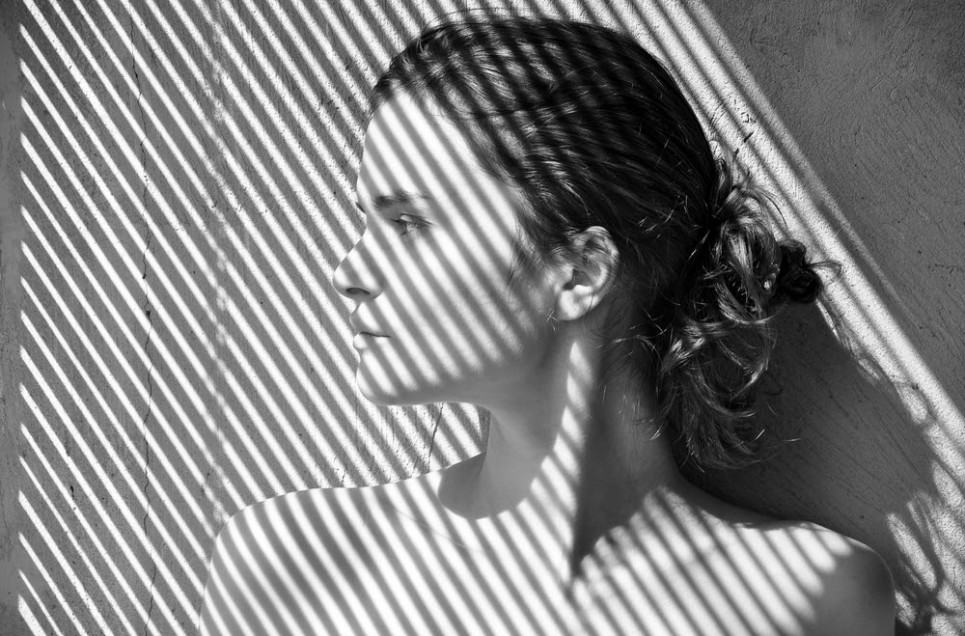
16. Use the light and shadows to make your subject stand out or blend in. 

Shadows are an excellent opportunity for impactful shots. Shutterstock

Shadow portrait photography is another significant variant of indoor portraits, especially with shadows falling on the subject. If you are using a human subject, you can have a very expressive face or use shades to hide your face. You do not need a human subject to play with shadows, though. Just watching shadows play across the walls and create shapes can be quite interesting! 

Shutterstock

Some tips for this kind of photography include shooting during the ‘golden hour,’ which is the timeframe during which the sun is behind the horizon and creates a gold light. The reason for this precious light is that the sunlight rays have to travel a greater distance to reach us, reducing the intensity of the direct light. The light is more diffused, creating a beautiful glow instead of a harsher direct light.

15. Though the picture above is food-related, you can create a sequence photo and create a collage with pretty much any theme or subject you want! 

Watching this loaf of bread progress from bare to fully coated in egg wash is way more aesthetically pleasing than expected! Shutterstock

Think of the possibilities: you can create a sequence collage with a painting you are working on, a pile of laundry you are folding, or a Christmas tree you are decorating. Before and after photos are always fun to look at, and sequence photos add more fun to that! The best part is that you do not have to do anything out of your ordinary life – you’re just pausing for a moment to take a quick photo.

Shutterstock

If you are making a sequence collage, just make sure you create parallel sequences to appease all our obsessive friends. Be mindful of how you frame your subjects – centered or off-centered, for example. Make sure to take the photo from the same angle, too, as you want all the images to be comparable! If you are editing your photos, blend your elements to ensure that they look cohesive.

14. Using small pieces to make the shape of one larger item is useful, impactful, and still minimalistic. 

Consider making shapes or outlines with other items. Shutterstock

You can create anything out of smaller items – think paperclips, kitchen utensils, or whatever else you have at your disposal – the world is your oyster! Vary the colors of the things you use and the background you place them against for a bolder contrast. Ensure that the items you are using are all different since varying the shapes, sizes, and colors can make a difference.

Shutterstock

If it helps, use a stencil or an existing mold or stencil to help your precision. Photographs need exact lines, and any flaws our eyes may not catch will be visible in the final shot. Use your photo editing software to clean up any lines or sharpen edges that you couldn’t notice when you were shooting your photos – it is excellent to take advantage of the tools we have at our disposal! 

13. Play with text in powder, snow, or any other substance for a significant contrast effect in photos.

A picture is worth a thousand words, so this one must be worth a thousand and one. Shutterstock

This 3D effect creates a great visual for photos. Use mediums like chocolate, flowers, or confetti and add extra decorations in the same theme for additional touches. Remember that the text does not need to be inscribed into the medium. Instead, it can be written with the medium too for a different effect. Whether you use more of the medium and sign the word into it or do the opposite depends on how much white (or unfavorable) space you want in your photo. Choose your contrasting background color accordingly! 

Shutterstock

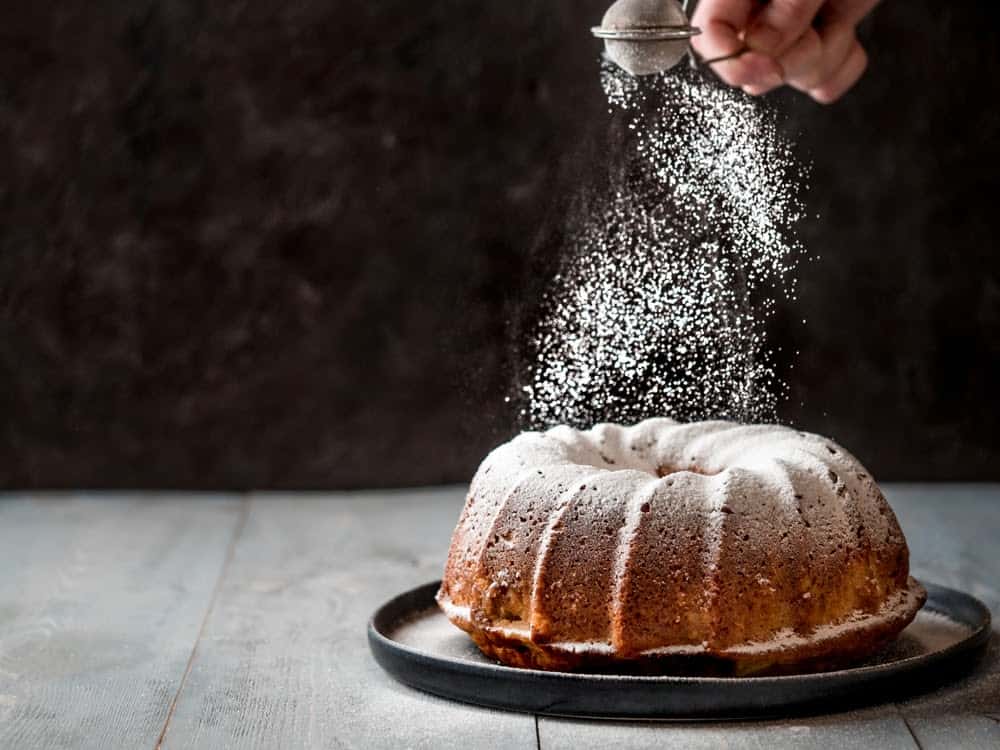
For an extra professional touch, use a stencil and sprinkle the powder through it. That will create sharper edges and mitigate any issues with sloppy handwriting! Make sure your base layer of whichever powder-like substance you choose is thick enough. You don’t want it to be transparent in any spots, as that may have the background peek through and ruin the image. 

12. Recreate your favorite movie scenes with any action figures you may have around the house.

The toys we grew up with feel like real friends sometimes, so why not take pictures with them too? Shutterstock

We promise we won’t tell your kiddos that you used their toys. Are you using Marvel and DC characters in the same universe? So what? That is your photoshoot, and no one can stop you. It doesn’t have to be a battle scene; it could be as simple and cute as Superman and Batman going on a beach picnic. Pack them a mini lunch and send them on their way! 

Shutterstock

Or you can create an entire scene – are they having a turf war in Kitchenville, or is the giant dog-beast uniting both Marvel and DC universes for fear of their heads being chewed off? Add extra effects like fog or work in your editing software after the shoot for some extra magic. You can even add fiery explosions or intergalactic spaceships for more fun. 

11. Food offers many color palettes and textures for photography.

Food is such a vibrant subject; you may need several days to explore all the opportunities it can offer! Shutterstock

If you are interested in making most food photography, make sure you have a surface to photograph your food. Acrylic ice cubes are useful as they look just like real ice cubes without them melting, and glass mason jars are incredibly versatile and aesthetically pleasing. Utilizing solid colors of plates, like black or white, can help focus on the actual food instead of a plate’s pattern. Avoid plastics, as they may look unappealing. 

Shutterstock

Group your photo themes by contrasting foods or grouping similar, monochromatic foods together. Consider your lighting source and background very carefully – you might want to familiarize yourself with the color wheel for this type of photography. It is essentially a practical theory of art and science that determines how colors will coordinate when combined. Familiarizing yourself with the sorts of color combinations (complementary, analogous, or monochromatic) can be of great help when determining what color palette to choose from in food photography.

10. You can create many arrangements of coloring pencils for a great photo. 

Photos of pencils are easy to take and end up very colorful! Shutterstock

Stack them up, lay them flat, or create a geometric pattern. Add other office or stationery items to the picture to create a more dynamic image, and you can use it in your study! You could also draw a rainbow of colored smoke or patterns corresponding to each pencil on a blank sheet of paper, like the photo below. 

Shutterstock

Add a swirl from a sharpened pencil for an artistic touch, or place them next to a white sheet of paper for a vague message to the viewer. Get ready for all of the endless compliments of your awesome indoor photography ideas. These simple tricks are fast and easy, especially after you give them a try. Sure, you might need some trial and error to get the shot you want, but it is still a fun way to pass the time. Besides, you are not only brushing up on your photography skills, but you are learning more about computer editing, too. 

9. Instead of buying the same set of white dishes over and over, try mixing and matching different colors.

Color-coding dishes may be one of the most satisfying visuals. Shutterstock

Photographing different dish sets can create a gorgeous contrast. Having other colored plates for different kinds of foods has a scientific basis – eating from high contrast plates leads to more eating, while eating food that matches the plate tends to lead to eating less. Of course, a scientific basis doesn’t necessarily impact the beauty of the photos, but it is a good excuse to go out and buy more colorful plates to photograph! 

Shutterstock

Play around with the different dishes and serving ware for a striking photo – the varying colors and sizes will appeal to the eye. Place them all on a light background, or even start a gorgeous plate wall – just make sure the screws are in nice and tight before setting the plates on them. 

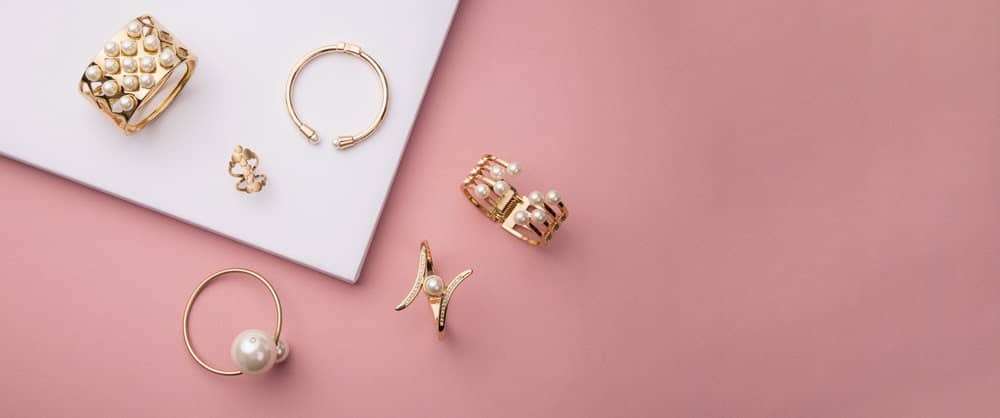
8. There is no limitation on how to photograph your jewelry.

You do not need much for this kind of photo – just the jewelry you want to shoot and a simple background. Shutterstock

Just grab your favorites and start experimenting! Rings, bracelets, necklaces, or any other items should work. If they have anything that may catch the light, make sure they are clean and angle the lighting correctly to see their details. Add in props like makeup brushes or more natural elements like flowers, roses, or even branches and leaves – nature is calming, and we have a subconscious draw to it. 

Shutterstock

If you’d prefer to stay away from props, add elements that will draw the eye with sparkles, like an intriguing backdrop or stage for your jewelry. Placing the lighting above you at an angle is probably best to avoid casting a shadow while still catching a nice reflection. Play around with how to hang your jewelry – you can try to display it creatively for the photo. 

7. Old wooden toolboxes can be an excellent subject for photography.

Play with the lighting to create a dramatic atmosphere. Shutterstock

Photography doesn’t always need soft, pretty things for photos to turn out great. Play with light and dark to convey the hardness of the tools. That can also fit into the vintage or retro stylistic approach; old toolboxes can take a beating, and it’s appealing to see, for some reason.

Shutterstock

You can even vary the toolbox’s contents and add unexpected items in the toolbox to defy expectations and add a twist! Use your photo editing software for additional filters. Black and white filtering on photos like this could be an excellent editing choice. You can also tone down everything else’s colors and brighten the toolbox’s colors to make it stand out even more in your photo. 

6. Vary your key arrangement and even lay them flat without keychains to create patterns for a unique photo.

Though you probably do not have as many keys as the photo indicates above, keys are an interesting photo subject. Shutterstock

To draw in the eye, place the keys in the center of the photo diagonally. Since keys typically do not have many bold patterns, you can go crazy with the background and change it up. In your photo editing software, you can create additional effects too. You could even create a levitating key as you did with the levitating camera! 

Shutterstock

Add a ribbon or a chain around a key for a romantic effect, and drop rose petals around it for maximum romance. Maybe it’s your first house or apartment key, and you want to preserve this memory with a unique photo! Show your friends and they will probably give you rave reviews of your awesome photography skills as well as your cool editing ideas. 

5. There is something very alluring about wine bottles. Labels are explicitly designed to pull you in, so why not take advantage of that?

There’s nothing like a nice glass of wine after a long day. Just don’t finish the bottle until you finish the photos! Shutterstock

Wine bottles and their labels are meant to be pleasing to the eye, so if you have a favorite brand, take pictures of it! If you have a collection of wine bottles, line them up in a row and take shots at angles. Experimenting with their curves and lighting will give you an idea of what your favorite style is.

Shutterstock

If you prefer, take a picture of the wine pouring into a wine glass. Like the water splash shots, you will need a high-speed shutter for that shot. Either way, make sure that your lighting source is not causing you or your camera to reflect in the glass or bottle. 

4. Candle-lit photos are great shots for portraits regardless of the age of the subject. 

Candlelight is among the most flattering lights! Shutterstock

Candlelight is a warm-toned light that creates a sensitive, almost hushed atmosphere. The main thing to watch out for is the shadows they can cast on your photo, but that can be negated with other light sources out of frame or more candles (as long as you are cautious!). 

Shutterstock

You can enhance the brightness and warmth or coolness of the light if needed, post-shoot in your photo editing software. You can also make flames look more robust in the software, though you will want to be careful not to get too overzealous. Fake flames can look a bit, well, fake, if not done correctly, and take away from the overall image. If you are otherwise happy with your photo, avoid retouching it.

3. Even the most common things can provide stunning images, as you can see above. 

Doesn’t this make you want a cold soft drink right now? That’s the power of a good photo. Shutterstock

Pour a glass of your soft drink of choice, though a dark one is preferred for this kind of shot, and knock yourself out! Carbonation tends to fizzle away after a while, though, so you’d better get to work quickly. The longer the drink is exposed to open air, the longer the carbonation has to bubble to the top and escape. Then you will be left with a container of flat, dark liquid – and who wants a photo of that?

Shutterstock

Mineral or sparkling water works just as well here, and there are several variations of soft drinks with different colors,” brown, orange, and “clear,” to mention a few mainstream options. You could even gradually dilute a dark tint and line up different variations of your science experiment. However, you probably will not want to drink those glasses after the photoshoot is over. 

2. Milk baths have been all the rage lately, and you can customize your own however you want to. 

Not a regular relaxing bath, but it’s beautiful nonetheless! Shutterstock

Milk baths are becoming increasingly popular for pregnant women and babies, so why not jump on the bandwagon? Add whichever flowers you like the colors of, fresh or fake. Be cognizant of the color palette, the milk or liquid’s opacity, and the flowers’ placement. Consider incorporating a flower crown if you have a human model or using sliced fruits like oranges, grapefruits, and limes instead of flowers.

Shutterstock

If you choose to use fake flowers, they may sink, so place some kind of bubble wrap or foam under them so they float. When you are taking your shot, make sure you use your camera strap to avoid giving your camera a milk bath as well. It is best if you use a ladder to get the best angles for the shot. 

1. Who doesn’t want an organized pantry with alphabetized spices? 

A photoshoot like this is a win/win – you’ll have an organized pantry and a great picture. Shutterstock

If you are a magical unicorn who already has an alphabetized, color-coded pantry, please go ahead and photograph it now as proof. The mix of satisfaction and envy is a pretty heady one! If not, maybe do a before and after shot and use this idea as motivation! 

Shutterstock

Once you have taken the picture, do not forget that you can play with it in your photo editing software to see what colors you can saturate further – spices have gorgeous colors, and they should be as vibrant as possible while keeping their realism! Enjoy taking your photos and playing around with these editing tricks. You probably learned a lot of tips that you can try out at your own house. 

Advertisement