How to Build a DIY Dog House the Family Pet Won’t Want to Leave

Trista - February 23, 2020
Share

Our dogs are family – they love us unconditionally, and we return the favor. That means we dote on them, even when they chew up our designer shoes or refuse to go outside because it rained three hours ago. After all, they are probably wondering how we can let their paws get wet?

If you are like many pet owners, you might want to build a dog house for your sweet pooch, so we’re going to show you exactly how to do so in just a day or two! The best part is you can build a dog house for as little as $70! Of course, you can spend a few hundred more on your furry companion. It all depends on the size, features, and type of material you choose.

Some dog houses have air conditioning or warming lamps. Shutterstock.

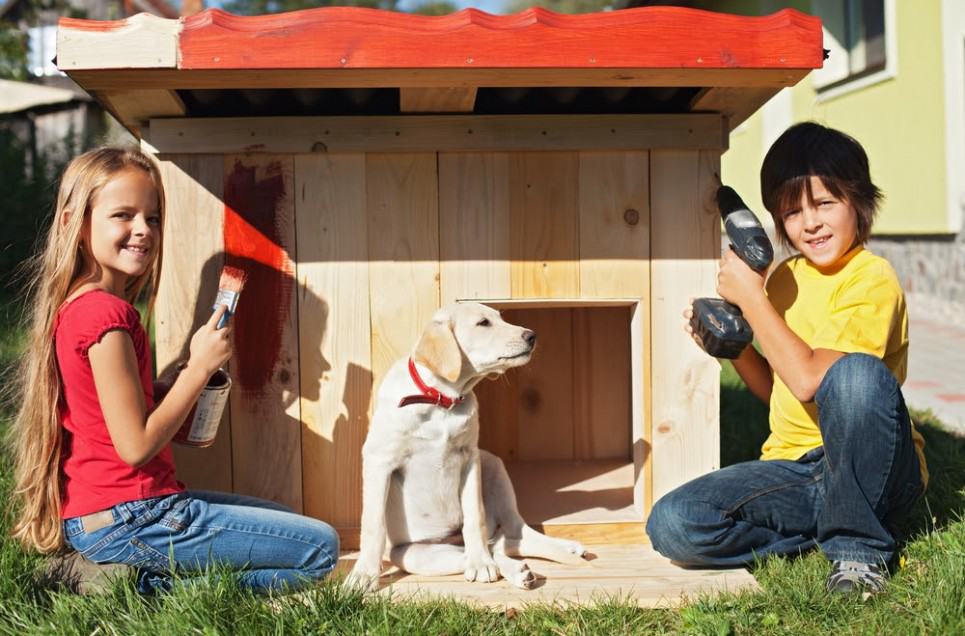
The Process Of Building Your Dog House

Please keep in mind that while DIY dog houses are a fun treat for your puppy, you do need to make sure to take all necessary precautions to protect them from hot or cold weather by providing shelter indoors as well. Dog houses can also be supplied with electricity for fans, air conditioners, and warming lamps for additional comfort.

Think about where to place the dog house as well: for example, raise the doghouse to stay warm and dry, and set the house in the shade, so it doesn’t get too hot in the summer. If the dog house doesn’t have adequate air circulation, consider purchasing and installing a solar exhaust fan to reduce humidity.

Once you have a location and price range for your dog house, think about the supplies you will need. Shutterstock.

Get Your Shopping List Ready

So you don’t have to make a couple of trips to the store, it is best to create your shopping list before you go out to buy your materials. To do this, you will need to know the size of dog house you want to build and have the list of conventional materials.

You’ll need seven 4×4 exterior grade plywood sheets, measuring half an inch and six 2x4s, each eight feet long. You’ll also need a circular saw, a jigsaw, a carpenter’s pencil, a carpenter’s square (also called a speed square), a straight edge, a hammer, 0.5 inch long nails, roofing nails, three-tab composite shingles (rolled roofing works too), exterior latex paint, caulk and a caulking gun, primer, paint brushes, and eye and ear protection.

You want to make sure your dog’s house is big and comfortable for your furry friend. Shutterstock.

Before You Start, You Need To Understand The Size Of Dog house Your Dog Needs

It is evident that small dogs will do fine in a smaller dog house, but bigger dogs need just as much space. But what size dog house is the best for what size dog? This is a question that many dog owners ask themselves. To find out the answer, you need to know your dog’s height and weight. You will want the door to the doghouse to be 75% of your dog’s shoulder height. The height of the door should be a couple of inches or so taller than your dog.

The standard guideline from humane societies, dog trainers, and veterinarians, is that the dog house needs to be big enough so your dog can stand up, lay down comfortably, and turn around while in their home.

You will need to measure your dog as they are standing straight, but have a little measuring fun with your furry friend because their curiosity will get the best of them – especially with the measuring tape! Shutterstock.

Step 1: But… Just How Do You Measure Your Dog?

Make sure you are building a house that works for your dog’s size. You don’t want to create a Chiweenie-sized home for a Great Dane! An appropriately sized house for your dog should be about one and a half times the length of your dog from head to rump.

To get a good sense of your dog’s size, measure their height from the floor to the top of their head while they’re standing. Their length is measured from the tips of their front paws to the back, including their tail. Medium-sized dogs like boxers average about 20 – 30 inches high and 25 – 35 inches long, while bigger dogs like Great Danes or Mastiffs average about 38 inches tall and 40 inches long.

Making the door to your furry companion’s new home is one of the first steps to follow. Shutterstock.

Step 2: Making The Door

If the dog house you’re making is more rectangular (taller than it is wide), cut off a 1-foot strip from the two panels so that a 3-foot by 4-foot section remains from each panel and situate them so that a short side faces you — make sure when you’re cutting the door that the position is high enough to allow the dog room to enter without having to duck its head too low and low enough to allow you room to cut the peak.

The average height for the door is around 24 inches, but make sure that works for your dog and adjust as needed. You’ll need to draw two parallel vertical lines next – this will define the door’s width. Twenty inches is usually a good size, but as usual, adjust as necessary depending on your dog. Use the jigsaw to cut out your door following the measurements and markings you’ve already made. If you don’t own a jigsaw or circular saw, you can rent one from a home improvement store for one day!

Forming the peak will help you create the roof, which gives you a guide to the rest of the dog house. Shutterstock.

Step 3: Cut The Peak

In the front panel (where you’ve just cut a door), mark the triangle where the peak will form a roof. Make a midpoint at the top of the panel – that’s the top of it. Rest the straight-edge on the board with one end on the midpoint mark and the other end 20 inches down the side of the board.

For a flatter roof instead of a more angled peak, you can move that second measurement higher (up to 8 inches), but make sure not to push it downward, as that will interfere with the door opening. Repeat the same steps on the other side to form an upside-down V and cut with the circular saw.

When you cut out the rear panel of your furry friend’s house, think about adding a little window for some extra view. Shutterstock.

Step 4: Cut The Rear Panel

When we first started making the dog house, you might have wondered if we were starting backward. By this point, you should notice that the way this dog house is constructed makes it easy and quick. For the fourth step, you want to focus on making the rear panel.

First, you will lay the front panel on another sheet of plywood and use the front panel as a template. You want to trace all of the shapes but the front door. Remove the template and then cut all the shapes out with the circular saw. This should give you a parallel structure for the front and rear panels. If you want to get really creative and don’t mind spending the money, you can give your dog a little window in the back. For some of us, this idea sounds a little silly, but even your dogs like to look out a window!

You can change the length of your dog house side panel, but you always want to ensure it will fit with the door, peak, and that it is part of your plan.

Step 5: Cut One Side Panel

Your next task is to start cutting the two side panels, which is what you will do with your other two sheets of plywood. Take the first sheet and cut it at 20 x 48 inches. The length of the dog house is the 48-inch side; of course, you will focus on the distance that you want to create. For example, you might have a large yard and want your dog to have a bigger house.

However, you should note that the average dog house has a length of 40-inches. It all depends on the plywood you got, your budget, and how much you want to spoil your furry best friend.

If you start coming up with a few decorating ideas for your dog house, write them down for future reference. Shutterstock.

Step 6: Cut The Second Side Panel

Cutting the second side panel will be easier than the first, but isn’t that always how it goes? Just think of what a professional you are becoming by making your first dog house! Follow the process for the second side panel like you did the first one. Remember, you might want to add a window to one of the sides (if not both of them). Again, it all depends on your budget and your trips to the store.

At this point, you might even be thinking about the type of curtains you could find for your furry friend’s home. Don’t hide if you are, have some fun with the dog house, and give it a little personality!

Because plywood doesn’t have nailing surfaces, you need to create them yourself. Shutterstock.

Step 7: Nailing Surfaces On the Front and Rear Panels

You cannot nail or screw into the side of the plywood, so you need to create nailing surfaces. These need to follow the perimeter of both the rear and front panels. To do this, you will start by cutting four 2x4s at 20 inches long. Then, you will place them flat on the panel sides. From them, you will go to the other side and nail them into place.

Do your best to ensure that your panels are centered. It isn’t that you will create an extremely crooked dog house if you don’t, but you could run into problems later on. Think of centering as a way to decrease the amount of maintenance you will need to do on the dog house shortly after your dog moves in. Yes, there is also maintenance on a dog house!

Don’t forget to create nailing surfaces on your roof peaks! Shutterstock.

Step 8: Nailing Surfaces On The Roof Peak

You didn’t think that the front and rear panels were the only ones that you needed to create nailing surfaces for, did you? Roof peaks also need nailing surfaces created, and this is a bit similar to the front and rear panels, yet there is a bit of difference. First, you will cut four boards to the length of 15 inches per piece.

From there, you will nail them along the roofline following the same side as the other nailing surfaces. Once you are done with this process, you will start to feel how sturdy your furry friend’s house is becoming.

You always need to think about what is below your dog’s head and what is near their little paws. Shutterstock.

Step 9: Nailing Surfaces For The Floor Area

Just as you worry about what is above your dog’s head, you need to think of what is below their feet. Next, you will create nailing surfaces for the floor area. The pieces of the floor area will connect to the front and rear panels and create a more sturdy home for your furry and friendly best friend.

To work on the nailing surface of the floor area, you will start by cutting two 2 x 4s that are 29-inches each. These are then nailed to the bottom of the front and rear panels.

When creating nailing surfaces for the side panels, you want to make sure they will match up with the other pieces to centering is essential. Shutterstock.

Step 10: Nailing Surfaces For the Side Panels

It is true; you will be making your way around the whole dog house when creating the nailing surfaces. To create them on the side panels, you need to focus on the top and bottom, just as you did for the front and rear panels. Start by cutting four 2 x 4s that are about 36-inches long, but this is only for a 40-inch long dog house. Therefore, if your dog house is more extended, you need to focus on a different length.

Nail two per side panel. They will run along horizontally along the bottom and top edges. Centering your panels is extremely important when it comes to your side panels. If you don’t center, they won’t work well with the other nailing surfaces you created with the other dog house pieces.

When you start to nail all the pieces together, they will fit like a big puzzle. Shutterstock.

Step 11: Nailing The Rear, Front, and Side Panels Together

Place the front and rear panels together with the side panels to form a rectangle. There should still be no roof at this point, and you will get to this later. You will need to nail these four pieces together with 1.5-inch nails. You want to do your best to get nails that are this size because they work best with thy plywood. If you get nails that are too long, you can easily create a hazard for your dog and anyone else around the dog house because the nails will stick out.

One of the most important factors at this point is you need to make sure nails are accurately driven, so they don’t stick into your dog’s living space. It is also a good idea not to try to bend nail tips down as this can still harm your dog, another animal, or someone else. Safety is always first!

The floorboard is next, and this will connect to the rest of the pieces of your dog house. Shutterstock.

Step 12: Cut and Join the Floorboard

Lift the dog house onto another plywood sheet and make sure the sides are all even. If they are not, you can take the time to correct this without harming any of your pieces. Then, you need to mark the footprint of the dog house on the plywood sheet. Remove the dog house and start cutting the plywood out with the circular saw just as you did the other pieces.

Now, it is time to nail the floor of the dog house to the rest of the house. You will do this by using the same 1 ½-inch nails. Make sure you don’t place the nails too close to the edge of a wall because they can easily stick out or damage a part of the wood.

When it comes time to focus on the roof, you will start to feel a great sense of accomplishment as you genuinely think your dog’s new home come together. Shutterstock.

Step 13: Measure, Mark, and Cut the Roof

Lay one of the plywood sheets on top of the dog house along the roofline. Find an overhang that seems suitable to you. Don’t worry if you need to try different configurations for a while or even go back and forth to see which is truly the best, but don’t overthink the process! Next, mark the board to that size so you can cut it in the right spot with your circular saw.

Cut the same measurements on another plywood board, so you have two complete sides to form the roof. Your next step is to nail both of the sides to your dog house to create the roof. At this point, take a moment to notice how sturdy the dog house is, you might find yourself surprised!

Look around your windows and notice the caulking around them. This is to help insulate your home and prevent leaks. Shutterstock.

Step 14: It Is Time To Caulk The Dog House

Just like many areas in your home has a layer of caulking, you will need to caulk your dog house. This is easier than it seems as you can easily squeeze the caulking out with a caulking gun. The main reason for caulking is to protect your dog from various outside elements, such as rain, that could leak through the dog house if it isn’t caulked.

Start at the door of your dog house and go all the way through. You might notice some gaps are a bit wider than other gaps, but this is nothing to worry about. Use your caulking to fill all of the holes and double-check to make sure you didn’t miss anything!

Adding shingles to the dog house is easier than you think and will give your dog’s home a complete look. Shutterstock.

Step 15: Add Shingles To Your Furry Friend’s Home

Another way to help insulate the dog house is to add shingles to the roof. A second benefit is it will make your dog’s home look homier and give it a little upgrade. All you need to do is add three-tab composite shingles to the roof panels of the dog house. If you are worried about your budget, use rolled roofing instead of composite shingles.

When installing shingles, remember to set, mark, and cut the drip edge to length and nail into place along the roof perimeter, starting at one wall and working your way up. It’s always best to work up from the lowest roof edge. One great tip when installing shingles is to use a utility knife to trim shingles, so they fit.

Furnishing the inside of the dog house might become a little more fun than you thought, but remember to think on the practical side. Shutterstock.

Step 16: Furnish The Inside

Keep your dog happy by adding a blanket, dog bed, and anything else you feel suitable. Of course, you probably won’t add a table or decorations that your dog can knock down or get into, but you can think of a few toys. While there is no need for a toy box or a particular spot as the toys will quickly get thrown around, they can help keep your dog happy and entertained.

You can also add a piece of carpeting to the floor of your dog’s house. To add carpet, cut a piece of carpet to dimensions one inch smaller than the floor panel and secure it to the floor with wood glue for permanent results or duct tape for a replaceable carpet.

Painting your dog’s house will turn into a lot of creative fun. You know your dog’s personality, so the color and any type of drawings will easily come to your mind. Shutterstock.

Step 17: Paint And Decorate The Dog House

You can paint the dog house any color and even decorate it if you feel a little creativity in you. For example, you can paint with any color and then draw lines to make it look like the siding instead of painting. You can also decorate it by painting flowers or little dogs.

One crucial fact to note is that exterior-grade plywood is very porous, so you will need to prime it before painting, but the great thing is you’re painting a tiny area. There is no need to use rollers or sprayers, though you can if you wish. All you really need is a couple of paint brushes or different sized paint brushes if you are looking to paint a few designs.

There are a lot of different paints that you can use, but you need to ensure your paint is non-toxic. Shutterstock.

One Of The Important Points To Note When It Comes To Painting Is Using Non-Toxic Paint

Whatever you choose, make sure the paints are non-toxic! If you decide not to paint the roof instead of using shingles, you can treat it with linseed oil, since that is a non-toxic preservative.

One of the biggest reasons you want non-toxic paint is because, as you probably know well, dogs chew on pretty much anything, and yours might start chewing on parts of their house. Therefore, you also want to make sure you let everything dry thoroughly before allowing your furry friends to play in their new abode. You can also add a nameplate on the outside, so everyone knows – that’s definitely Fido’s house.

Remember to make the moment you introduce your dog’s new home to them a special one because it is a special day for your furry friend. Shutterstock.

The Final Step for a DIY Dog House

The final step of this process is to sit back and admire all of your hard work and watch your dog have the best time with their new home. Your four-legged friend will adore you for all of your love — congrats on getting it done.

Don’t be ashamed if you decide to record the event; it is genuinely an essential day in your furry friend’s life because this is their own little space that you created especially for them, and your dog understands this. Make this an extraordinary moment between you and your furry best friend!

Sources:

“The Complete Guide To Dog House Sizes.” Jar Ladr, Paw Castle.

“How to Build a Dog House.” Lee Wallender, The Spruce. October 2019.

“How Much Does a Dog House Cost?” Cost Helper.

“How to Build a Dog House.” The Home Depot.

“How to Build a Dog House.” WikiHow. January 2020.

Advertisement