Weekend Project: How To Antique Wood and Give a Room Some Character

Trista - July 14, 2020
Share

It is a look that is in style – the look that your furniture is decades-old even though it is a new piece. While it might not be a completely new piece of furniture, it is new in your home and no more than ten years old. You might also have that new piece of wood furniture that you or someone built for you. It’s a dresser that you want to put into your room, but you want to make it like an accent piece – you want this dresser to look like it has character.

Unfortunately, you can’t buy or build character when it comes to your furniture, but you can fake it. You can go to the store and purchase antique paint finish to give the dresser or any piece of wood furniture, the character that you are craving for your home. All you need to do is follow the steps and tips laid out for you in this article. One of the benefits is that it’s easier than you think.

When using this technique to give your piece of furniture a distressed look, you want to follow it carefully, so you don’t overdo it. Shutterstock.

The Most Important Tip You Need To Know Before You Start

Before you go any farther on this adventure, you need to know one crucial factor when it comes to painting your wood furniture with antique paint finish, and this is not to overdo it. It’s easy for people to put on too much paint because this is a typical thought pattern. Think about when you paint your living room walls and how you usually know you need two or maybe even three coats to make it look great.

Your piece of furniture that you want to make look distressed is not like your living room, bathroom, or any walls in your home. Don’t go for the look that will make your furniture over distressed. You want to go for a more natural look, and that means that you will follow the steps closely, especially when it comes to painting.

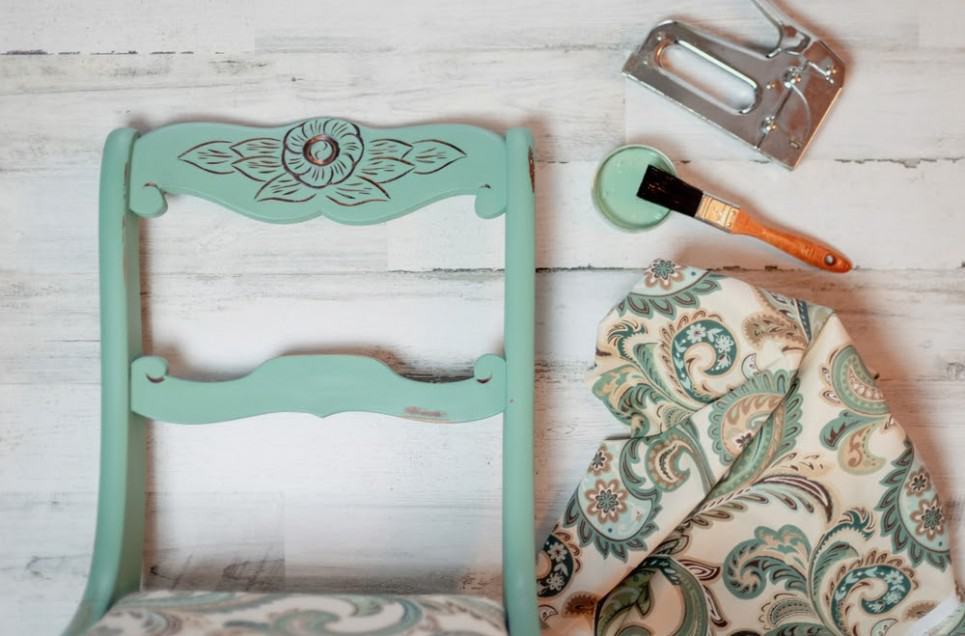
You can go a bit beyond regular, unfinished wood when it comes to antique finishes. Shutterstock.

What Furniture To Try This Technique On

Most people want to use the antique finish on their wood furniture because this makes it look more realistic. Other people feel that this is the only type of furniture you can use when it comes to giving it character, but this is not true. While some techniques focus on wood and some people will say that you shouldn’t try any painting technique on something other than wood, you can pick nearly any piece of wood furniture for this project.

Do you have furniture that you want to give an antique look that’s been laminated? No problem! You can use this method on furniture that is laminated, which most new dressers and tables are today. You can even use this method on furniture that already has a paint finish. However, you might not want to look at plastic or metal furniture for this process. While it’s not impossible to give these pieces an antique finish, these steps focus more on wood furniture than other parts.

Sometimes selecting the perfect piece of furniture is a process, especially if this is your first antique wood project. Shutterstock.

Step 1: Select A Piece Of Furniture

Now that you have an essential tip for this project and understand what furniture you need to look for, it is time to select a piece of furniture for your project. You might already know what part you want, you might be waiting to purchase it at the store, or you might have several pieces of furniture.

No matter what it is, as long as you follow the guidelines above and the steps below, you will find yourself enjoying this project. You might even think of other furniture you can give an antique look after you are done with your first round! Maybe you will also find a new hobby?

When gathering your supplies, start with the items you have at home and then head to the store. Shutterstock.

Step 2: Get Your Supplies Together

Once you have your piece of furniture, you will need to get your supplies together. To do this, you will need to know just how much paint, oil, stain, and paint you will need. Obviously, larger pieces will need more of these items than smaller pieces. It’s not easy to understand how much of each you need but to make sure you don’t need to make another trip to the store, and it’s best to make sure you have enough.

Before you head to the store with your shopping list, take a look around your home and see what items you have. The supplies you need to gather to complete this project include sanding blocks that are 150-grit and 220-grit, a paintbrush, and a clean rag. You also need to pick chalk paint, matte paint, or milk paint and walnut, oil, a gel stain, or brown paint. Make sure you write down all of the items you don’t have at home, so you only make one trip to the store.

By removing all the pieces you don’t want to paint over, you will find yourself feeling a little less stressed when you do start to paint – it can actually become relaxing. Shutterstock.

Step 3: Remove All Hardware And Tape Off All Areas

Before you start any type of painting, you need to remove all the hardware from your piece of furniture. Basically, this is anything that should not, or you don’t want to get oil, paint, or finish on. Depending on your piece of furniture will depend on what you remove. For example, if you have metal or glass knobs on your dresser, you will probably move these.

However, you might not move any brackets or hinges that hold doors on your furniture. In this case, you might tape them or leave them on and just carefully paint and finish around these pieces. It is vital to remove the hardware carefully, especially if you have a bit of furniture that is a little older. You can damage the wood if you are not careful, which can put a pause on your project.

Take your time when it comes to cleaning, so you don’t end up scratching your furniture or putting on too much water. Shutterstock.

Step 4: Make Sure You Take Time To Clean Your Furniture Carefully

You might notice that your piece of furniture is a little dirtier than you thought, especially once you start removing the hardware. It is essential that you don’t use cleaners that you shouldn’t on your product. While certain wood cleaners are great, if you are working with an older piece of furniture, the wood isn’t made for regular cleaners, so it is always best just to use a dry rag or a microfiber cloth.

If you need to clean the grime off of your piece, you can use dish soap, especially if your wood already has a type of finish on it. However, you simply want to dampen cotton both or cloth to try to clean the grime. For tiny places, a cotton q-tip works well. Once you are finished cleaning, allow the furniture to dry before you start the next step.

It is your choice whether you will strip the furniture of its current color or allow that color to show through. Shutterstock.

Step 5: Sand Down The Existing Finish

When applying this wood technique, you will start sanding by using the 150-grit sanding block instead of the 220-grit. You want to lightly sand the entire area you are painting, especially if you don’t mind the color that is showing coming through the finish. In this case, the point is to remove any sheen so that the new paint will stick.

If there is paint that you don’t want as a part of your piece, then you need to strip the color from your furniture. This will mean you will spend more time sanding and sand a little heavier on the areas where you want to remove the paint, especially if there are layers. The best step to take then is to strip your piece of furniture to its wood base completely.

Areas that are prone to heavy use should be stripped as it will help protect your furniture and give it a more even look in the end. Shutterstock.

Step 6: Completely Remove The Existing Painted Stain Or Finish In Heavily Worn Areas

Now that you know where you sit when it comes to what you want to show through the antique finish and what you don’t, you will start to completely remove all of the existing paint finish or stain in the areas where there is a lot of wear and tear. For example, you will look at high points, edges, and areas that are heavily touched or used.

It is crucial that you get to the wood’s raw surface as the darker stain you will use will help protect this area. You don’t need to use the higher-level power block for this step. You can continue to use the 150-grit as this will help the process go a little faster being you are already set up and working with this sander.

Don’t worry about any white paint that you have on the furniture. Even though your furniture will look dirty after you stain it, the next step will get rid of this, and it will look as good as new with the white paint. Shutterstock.

Step 7: Use A Dark Finish To Fill In Crevices

The key to this step is that you need to find a dark finish. It doesn’t matter if you use dark paint, wood stain, or even walnut oil. You will get the same results as long as it is on the darker side, such as a brown or black color. You will start this step once you have completed the sanding process and begin by filling in the edges.

It is important to note that if you decide to use paint, you will need to water it down a little as the paint will be a little thicker than regular stain or oil. You don’t need to use a paintbrush for this step. In fact, it is best that you use a clean rag (one that you won’t care gets a bit stained). When it comes to the word down and low spots, you want to take the rag and soak these spots as this will help darken the areas. Always remember to wipe away an extra paint, stain, or oil.

Before you start painting, you need to know if you want to use a primer, which you will if you chose chalk or milk paint. Shutterstock.

Step 8: Painting On The Main Color

Next, you will start to paint your piece of furniture. You will need to paint the entire piece with a thick layer of the primary color you picked. The thinner your layer is, the easier the rest of the process will be. Therefore, don’t worry about making it too thin, but you do want to see the color you chose. Be light with your hand as this will help your antiquing turn out well.

If you decided to use a milk-based paint or chalk paint, you would need to use a wax finish as well to seal your paint. If you decided to use a matte-finish color, you wouldn’t need to worry about a wax finish. It all depends on if you wanted to use a primer or not, as well as matte paint doesn’t need a primer as other colors do. After you paint your furniture, you need to let it rest for 24 hours so it can completely dry.

When you add the second coat, you want to make sure that your first coat is completely dry and make sure you have the color you want. It is possible to paint your project a different color from the first coat. Shutterstock.

Step 9: Add The Second Coat Of Your Main Paint

Once you have allowed the first coat to completely dry, you should wait about 24 hours, and you can start to paint the second coat. If you still notice some brown color from your staining after the first coat, you will see them easily vanish with the second coat. In fact, one of the purposes of this second coat is to make sure that any staining is completely covered and give your piece of furniture a more natural look.

On top of this, adding a second coat will give you a chance to add another layer to your distressing. You don’t need to use the same color when it comes to the second coat. You might choose a darker or lighter shade that is similar or one that is entirely different. This can give your furniture a unique look while still giving it an antique characteristic. Again, you need to allow the second coat to dry thoroughly before you start the next step. I understand this is a complicated process because you are so excited to see your finished product, but allowing the coat to dry is essential, so you don’t ruin the look of your furniture.

Sanding a second time, after you have painted your project, is crucial because it will give your piece of furniture a finished and fine look to show off to your guests. Shutterstock.

Step 10: Sand Down The Edges Of Your Project

Now, the magic will start to happen. If you are wondering why you see lines in the paint or worried that you did something wrong while painting, you will find everything vanishing with the next couple of steps. But, before you start, you want to make sure that you didn’t miss a part of your furniture that needs distressing. If you did, go back and paint it and then allow it to dry. This will put you back a second day, but it is essential to make sure that you have a completely painted project before moving on.

Using your 150-grit sanding block, you want to buff the edges down so that the dark, raw wood shows through, which is the dark stain that you put on earlier. From there, you will switch to the 220-grit sanding block, and with very gentle hands, start standing a bit deeper so you can remove the top layer of your primary paint color that is surrounding the edges.

You will notice your original finish start to peek through by now, providing you didn’t completely strip your piece of furniture. Shutterstock.

Step 11: Buff The Edges With More Dark Stain

To buff the edges, you will want to use the same dark stain you did earlier. This will help give your product a more finished antique look and make you realize that you definitely made the right choice following this process. Like before, you will get a dry rag and pour on some of the stains or dip the cloth into a container. You will buff it on the edge and then wipe it away immediately after.

If you want a piece of furniture that has a more rustic and aged look, you will use some of your dark stains and buff it into your paint. Don’t be afraid and go throughout the whole piece of furniture with the stain and buff. You don’t need to buff hard, but you want to go around the entire part. Remember to wipe away all the excess stain right away.

Depending on how you feel about adding scratches or nicks will depend on how you handle this step. However, you might find yourself having more fun than expected, but don’t have too much fun! Shutterstock.

Step 12: Add A Few Scratches And Nicks To Further The Aging Process

The point of making your piece of furniture antique is that it looks aged. You don’t want people to know that you did it yourself, so you need to do a thorough job of making sure that your project looks antique. This means that you need to add a few scratches and nicks throughout your piece, or it will look a bit too perfect. Take a moment to think about it – how often do you see aged furniture that doesn’t have any type of wear and tear on it?

To do this, you will want to bang on the piece of furniture. Just kidding! What you will want to do is take your 220-grit sanding block and then go through lightly sanding the whole piece. Of course, you can use a butter knife or anything else that has a bit of a sharp metal end to add a couple of scratches and nicks. You can choose to put a couple of nicks in the door (a common place for wear and tear) or on the top. Finding common spots will give it a more realistic look. You don’t need to add a lot of nicks and scratches; a couple is just fine.

One of the fun steps is when you get to put your finished project in its correct location. Shutterstock.

Step 13: Time To Place Your Piece Of Antique Finished Furniture

If you don’t already have a location for your piece of furniture, this might take some trial and error to make sure that you find the perfect spot. Of course, even if you took the part from your bedroom, you might find that it now belongs in your living room because it is too good to hide away in such a private room.

When placing your piece, you want to think about what is around it. For example, do you have antique-looking frames in the background, or will you use it as a way to decorate your family heirlooms that are handed down from generation to generation? You might also use it as an everyday piece of furniture, such as an end table, and decide to put the same antique touch on your other furniture pieces.

Take a step back and be proud of your project. You worked hard on it, and you deserve to pat yourself on the back. Shutterstock.

Step 14: Take A Step Back And Admire Your Work

While it is a lot of fun, it is also a lot of work to give your piece of furniture an aged look – which is something you just found out! It does take a few days, no matter how small your piece is, because you need to let it dry in between coats of paint.

Don’t be shy; this piece of work is a great way to brag about your talent (and not the ability to follow a step-by-step guide). It takes patience and interest to complete this type of work, and that is where your skill comes in. Send a picture to your friends or post it on your social media pages. It will even give you more bragging rights if you took a before picture so people can tell the difference!

You might want to start on another piece of furniture right away, but it is essential to take a step back and relax before you get set on a new project. Shutterstock.

Now, It Is Time To Relax And Think About Your Next Steps

You might never want to do something like this again, but most people enjoyed giving their piece of furniture an aged look that they want to do it again. Before you start on your next section, it is important to take a bit of a break. People often get overly excited when a project went well, and then they immediately want to get started on a new piece.

However, this can burn you out. Unless you love the process so much you are thinking of starting up a little side hustle, you can find yourself burned out of your new hobby quickly without a little break. Even if it is a couple of days, it is essential to get away from your workspace. Of course, if you are really itching to get back to it, then go for it. While you want to be careful, so you don’t overdo it, you just starting and it is exciting giving your furniture an aged look!

Sources:

“How to Antique Wood.” Lauren Thomann, The Spruce. January 2019.

“How to Antique and Age Wood Instantly for a Weathered Look.” Ashley Hacksaw, Lil Blue Boo. April 2014.

“How to Paint Wood Furniture With an Aged Look.” Christopher Ekstrom and Dan Oldejans, DIY Network.

Advertisement